INTRODUCTION
TECHNOLOGY IS NOT PERFECT
Welcome to the complete guide on camera metering. Ever wonder how modern cameras automatically “know” how to take photos that are not too bright or too dark? The answer will be, through a series of built-in (light) metering sensors. But even with today’s technology, it is not perfect, and you will sometimes get photos that are too bright or dark.
So what exactly happened when the photos are too dark/bright? What can you do to remedy it? This guide will help you understand metering, and give you a few tips on how to tweak it a little to get better photos.
NAVIGATION
TABLE OF CONTENTS

Part 1 |

Part 2 |

Part 3 |
|
Closing |

PART 1
WHAT IS METERING, HOW IT WORKS.
Camera metering, exposure metering, metering mode… or just metering, they all refer to the same thing. So what is this metering thing? The “mythical technology” that automatically sense the surroundings and give the camera the correct settings? This section will explain everything.
WHAT IS EXPOSURE?
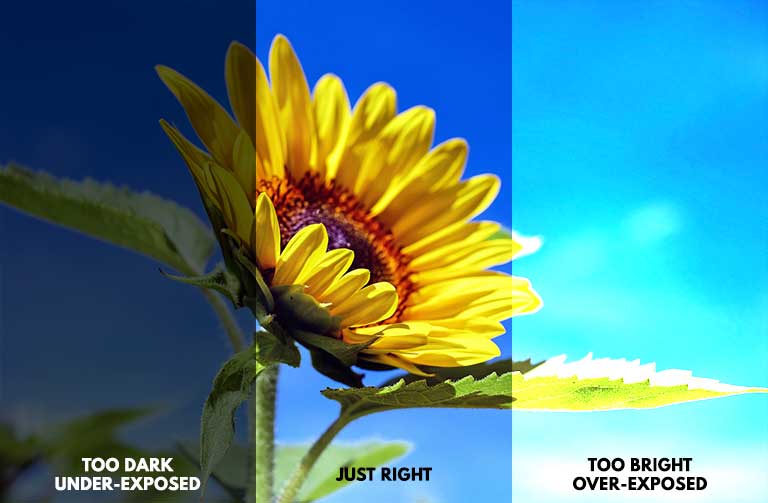
Before we start, this is one word that you have to know in the world of photography – Exposure. You might have heard of this many times already, but what the heck is this exposure that photographers are talking about? Well, in the simple terms, it means exposing the camera’s electronic light sensor to light when we take a photo. That easy. The next thing you need to know about exposure is:
- If the camera does not get enough light, the photo will end up too dark. We call this under-exposed.
- The other way round, if the camera gets too much light, the photo will end up too bright. We call this over-exposed.
- We usually aim for “just right”, but know that there are times where photographers will deliberately over or underexpose to create dramatic shots.
THE MAGIC OF METERING
Here comes the part where metering comes in. In the days long past, there is no such thing as “automatic”. Photographers have to use a bunch of scientific equipment to calculate the amount of light/brightness level, then do estimations on the camera settings in order to get the correct exposures.
Today, we thankfully have better technology. No longer do we have to walk around like Einstein, nor do we have to do crazy calculations. Because there are sensors built into the camera that will adapt the environmental lights, and do all the calculations automatically – This process of measuring the environmental lights and calculating the settings is called “metering”.
METERING IN AUTO CAN BE WRONG
But of course, machines are not perfect and there are times when the automatic calculations will be off. 2 common examples :
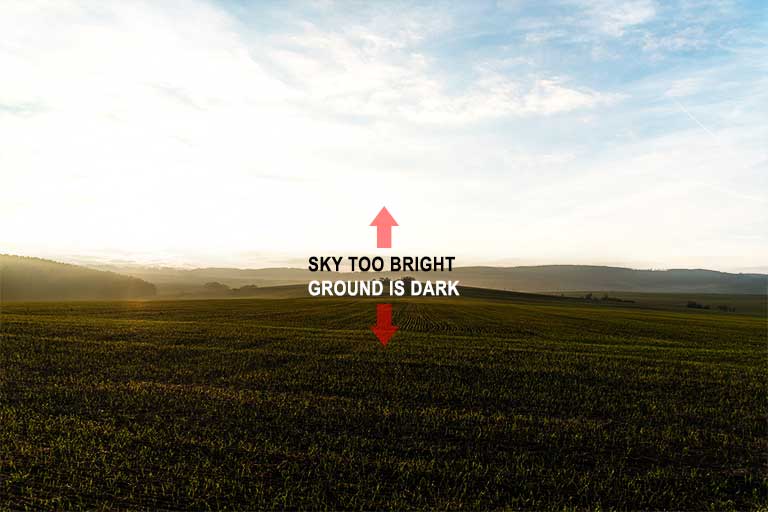
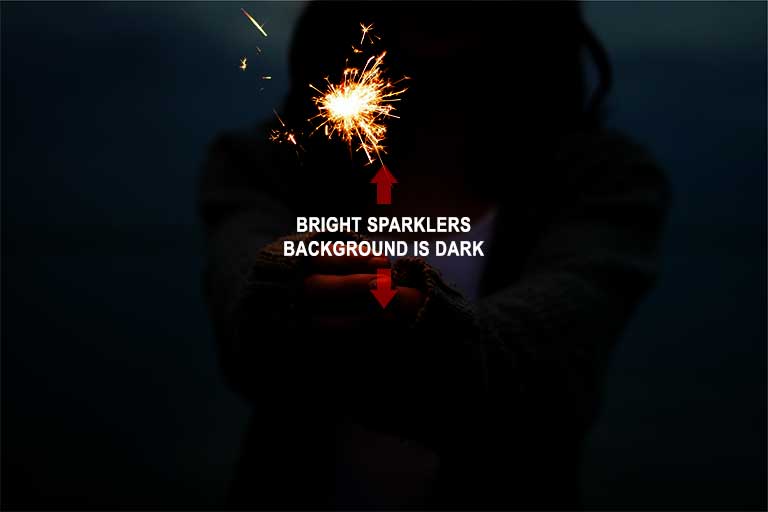
How did those happen? In a nutshell, the difference between the brightest and darkest spot is too much.
- The sky is too bright while the ground is dark. Modern cameras are probably smart enough to know that it is a landscape photo, and try to “average” the exposure. While this does help a little, the sky will still be over-exposed (blown out white). Simply because the sky is just too bright, and because of technical limitations of the camera.
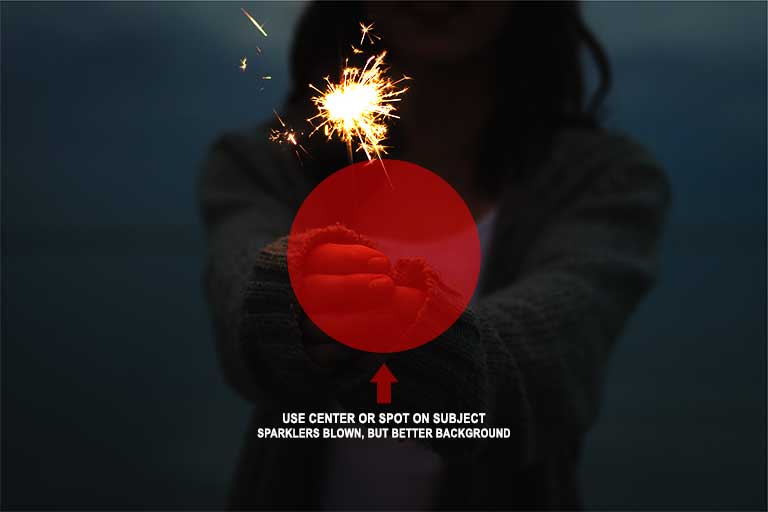
- In the case of the sparkler, some modern cameras will probably try to adjust towards the brightness of the bright sparkler, thus resulting in a dark background.
PART 2
METERING MODES
Now that you know what metering does and a few of the shortcomings, let us move on to the various metering modes. Yes, to solve some of the exposure woes, you will have to first understand how to control the “automatic” metering.
MATRIX/EVALUATIVE METERING

This is probably the “default” metering mode of most modern camera, and it uses the entire frame as consideration for the camera settings. The level of “intelligence” for this particular mode will differ from manufacturer to manufacturer though. Some cameras will try to determine the kind of scene that you are shooting and give you the best-recommended settings… While some others will just average out the entire frame and try to give you a “good enough” overall exposure.
With today’s technology, you can safely shoot with the evaluative mode as it works decently well most of the time for any situation. But when you have a scene with very bright and very dark patches, it may still mess up and give you oddly exposed pictures.
SPOT METERING

The spot metering mode uses a single spot that you choose as consideration for camera exposure settings; The camera will only use that particular spot you have chosen for considerations and ignore the rest of the entire scene. This mode is particularly good if you have a single subject or spot in the photo that you want to be well-exposed – That could be portrait, sports, product, or even food photography.
PARTIAL METERING

The partial metering mode is similar to spot metering, but it uses a larger area as consideration. Use this mode when you have a single subject, and it occupies a slightly larger frame space. Do take note that this mode is mostly available on Canon cameras only.
CENTER-WEIGHTED METERING

As the name implies, the center-weighted metering mode uses the center of the frame as consideration. Use this mode when you have a subject that centered in the middle of the frame, and make sure that the subject occupies sufficient framing space in the middle.
PART 3
METERING TIPS
Now that we have gone through all the basics and modes of metering, just how do we use those to “fix” the exposure problems as discussed in section A?
SHIFT THE METERING POINT
Quick recap, we have a photo that has over-exposed sky and dark ground. How do we use the different metering modes to get a better-exposed photo? How do we fix it? Very simple, we tweak around with a metering mode that works. For example, instead of using the evaluative mode, we use the spot metering mode and target the ground instead.

As for the over-exposed sparkler, you can try to use the center-weighted mode, or evaluative mode to give it a more balanced overall exposure.
EXTRA – METERING WILL NOT FIX ALL EXPOSURES
The sky is still blown out, and the girl is still in the dark! How do we “totally recover” the exposures? Here’s the thing, there are technical limitations to every camera. Metering and in-camera settings can only do so much, so we have to seek various different solutions to exposure woes.
- To recover the overly bright sky, we will have to use a GND filter.
- As for the sparkler girl, we can try to use some LED lights to brighten her up slightly.
Just keep in mind that the camera cannot “fix” every picture. As photographers, we have to do things within our limits to make good photographs instead.
METERING IN MANUAL CAMERA SETTINGS
This is something extra for you slightly advanced photo ninjas who are already trying out manual settings. Metering is not just for the purpose of shooting in automatic. If you look through the viewfinder, you will see those bars thing.
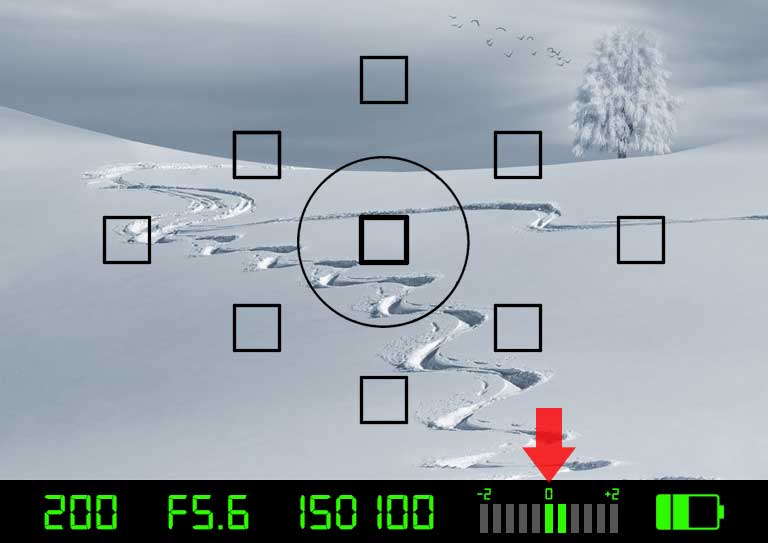
That is metering in action, and these bars will tell you if your current settings are over-exposed (bars on the plus side), or under-exposed (bars on the minus side). And yes, you can still apply the metering modes to tell the camera to evaluate a single spot or the entire frame.
CLOSING
WHICH IS THE BEST METERING MODE?
Here comes the end of the tutorial, but one last question remains – Which is the best metering mode to use? Personally, I am mostly stuck on evaluative because I do a lot of landscape photography. But at times when I do portrait or product, I switch to the spot mode or even full manual.
There really isn’t one single best metering mode to cover “all kinds of photography”. You have to learn how to use all of them and choose the best for what you are currently shooting. Hope this has been a step forward for you, and keep shooting!
If you have questions, please feel free to comment below. Happy shooting!