INTRODUCTION
LIGHT TRAIL PHOTOGRAPHY IS FASCINATING
Welcome to a beginner’s guide on how to do light trail photography. Back when I started photography, light trail is one of the first subjects that fascinated me. Personally, traditional photography has always been capturing “a single frame of time” in a photograph… Then came along a photo with long silky light streaks.
I had my moment of “how is this possible”, “that is an amazing photo”, and “never knew that photography could do something so interesting”. With some digging around, I learned how these light streaks are captured on the camera using long exposures… But what happened next is a lot of trial and error with the timing plus manual settings.
Light trail photography sure isn’t “newbie friendly”, thus the purpose of this guide to share some tips. Hopefully, help some people to get those epic light trails with lesser pain. Read on!
NAVIGATION
TABLE OF CONTENTS

What We Need |

Prelude |

Step 1 |
|

Step 2 |

Step 3 |

Extra |
|

Extra |

Closing |
WHAT WE NEED
THE EQUIPMENT
When it comes to light trail photography, smartphones are sadly still rather limited when it comes to long exposures. So to get started, we need to have some decent gear. But not to worry, these are not among the likes of “special” nor expensive exclusive explosive equipment.

REQUIRED EQUIPMENT
- A decent camera
Shooting with a mirrorless or DSLR is preferred. But it is good so long as the camera is capable of doing manual settings and taking long exposures of at least 20 seconds – Yep, if the camera doesn’t burst into flames after a few seconds of exposure, it will do just fine. - A sturdy tripod
One that does not break, tip over with a touch, or get blown away by the wind. Does not matter if it is a ball head or pan head, but I personally prefer ball heads for their convenience.
RECOMMENDED OPTIONAL EQUIPMENT
- Remote shutter release
This will help to keep the hands off the camera, to reduce camera shake, get sharper photos. Does not matter if it is wired or wireless. - 2-way or 3-way bubble spirit level
This will help to get the horizons straight, prevents people from thinking that a drunk took the photo.
ARE SMARTPHONES REALLY THAT BAD!?
Well no. If you have a smartphone that is capable of doing slow shutter speeds, then it should technically be able to capture light streaks as well. But just don’t expect too much image quality out of the tiny sensor…
PHOTOSHOP OR ALTERNATIVE EDITING APP
Don't have a copy of Photoshop yet? Click on the banner below to check out an offer.Alternatively, you can check out the GIMP, a free image editing app.
PRELUDE
THE BASICS
In a nutshell, all we need to capture light streaks is to set the camera to slow shutter speed and move lights across the frame. That could cars zooming across or manually “drawn” using a torch – Here are a couple more basic things to take note of.
LIGHT TRAILS VS LIGHT PAINTING
Just to set the record straight:
- When we capture a vehicle (with lights on) travels across the frame, we get a light trail.
- But when we manually “draw” with a torch, it is called light painting instead.
We will be talking about light trails and not light painting in this guide.
HELLO DARKNESS MY OLD FRIEND
Captain Obvious number one note – We need darkness for the light to shine through, and for an environment suitable for slow shutter speeds. So wait for the sun to go down, wait for people to switch on their car lights.
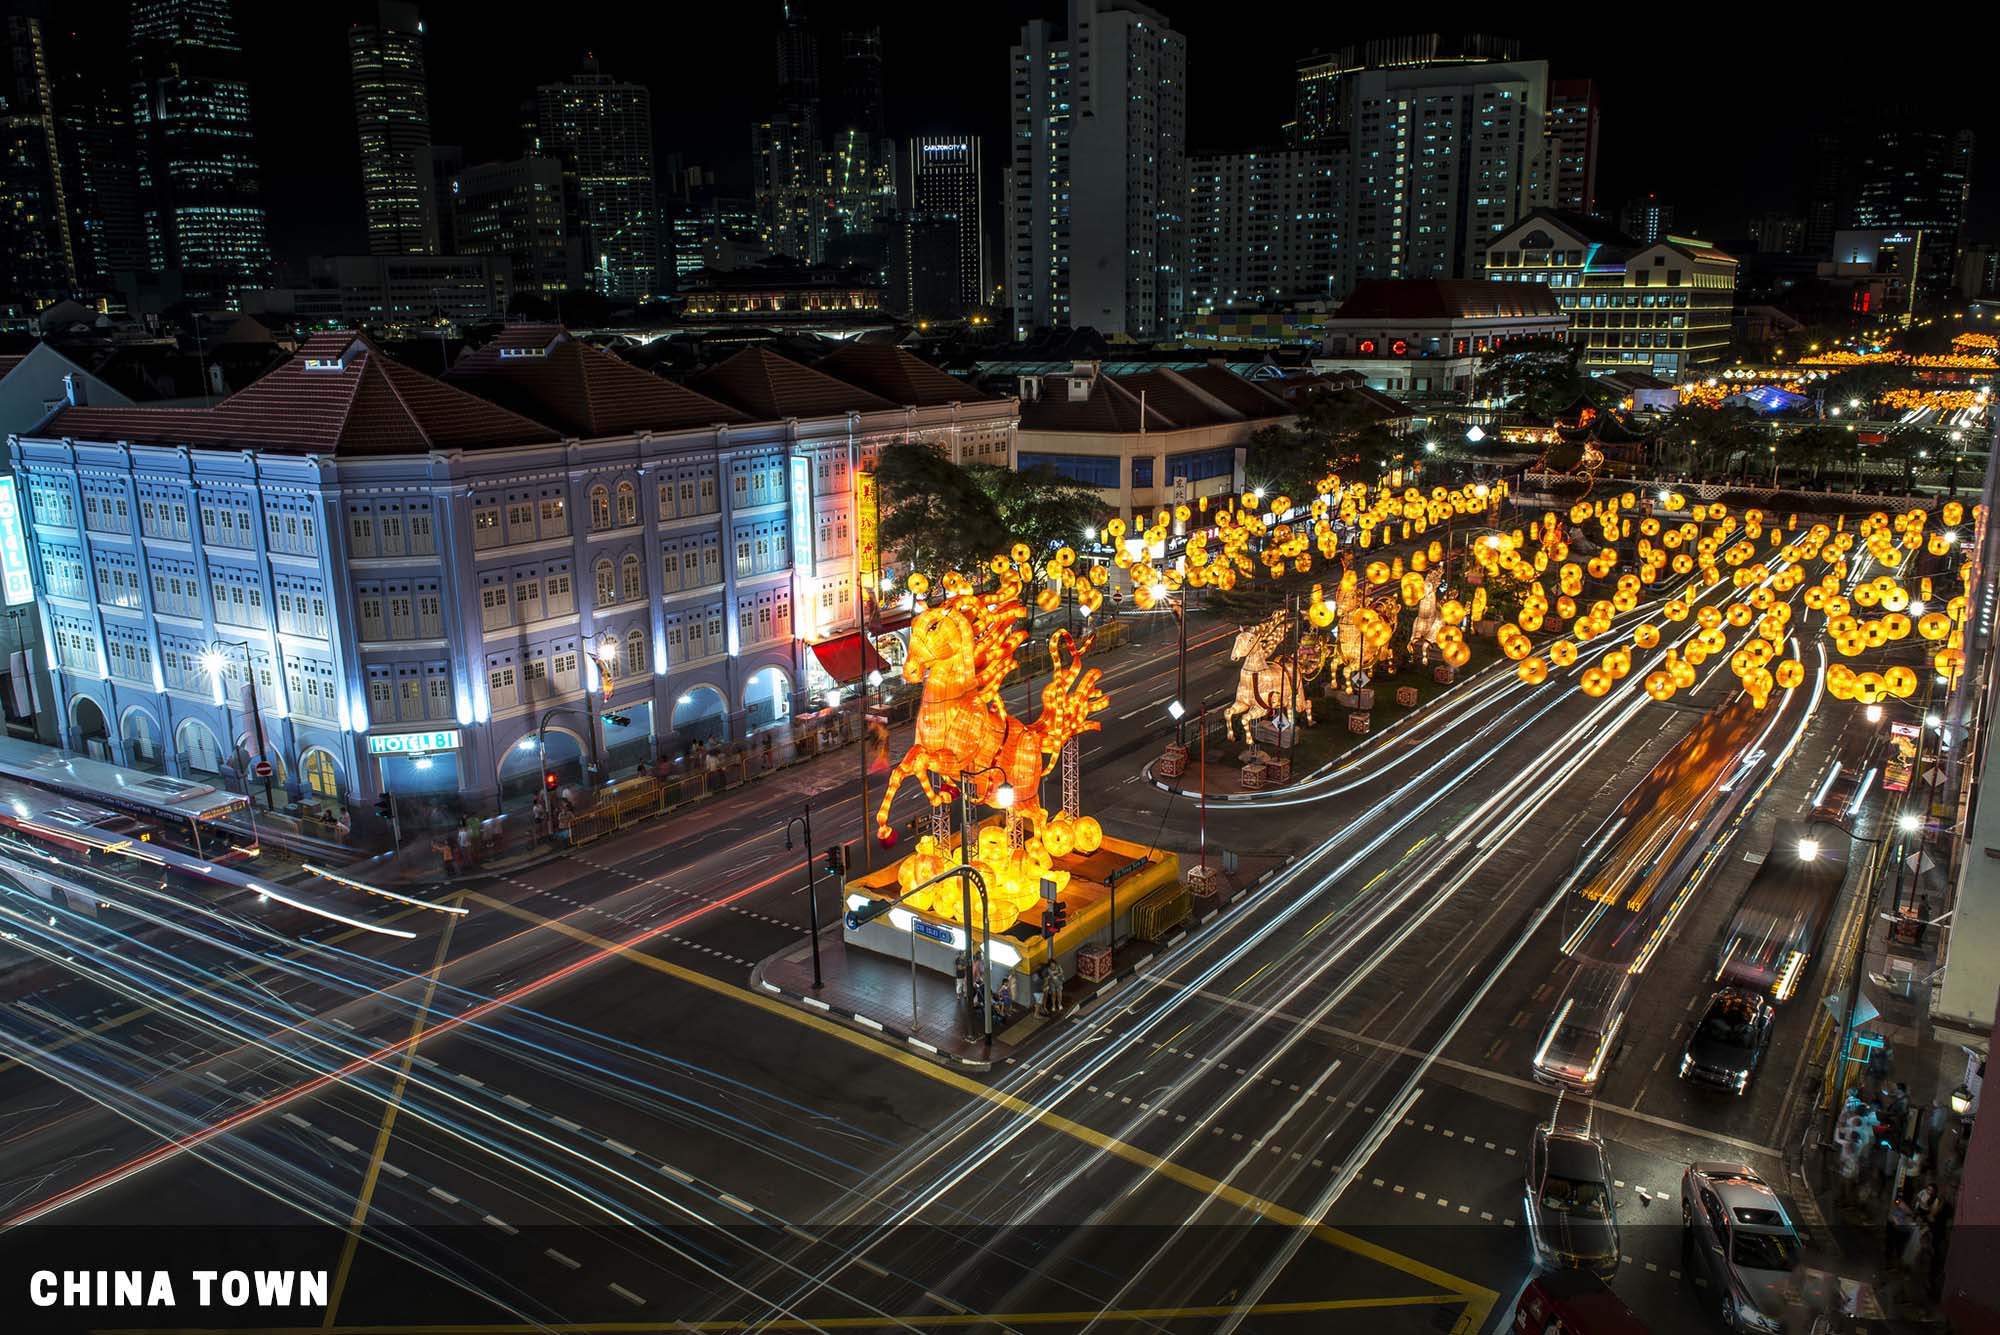
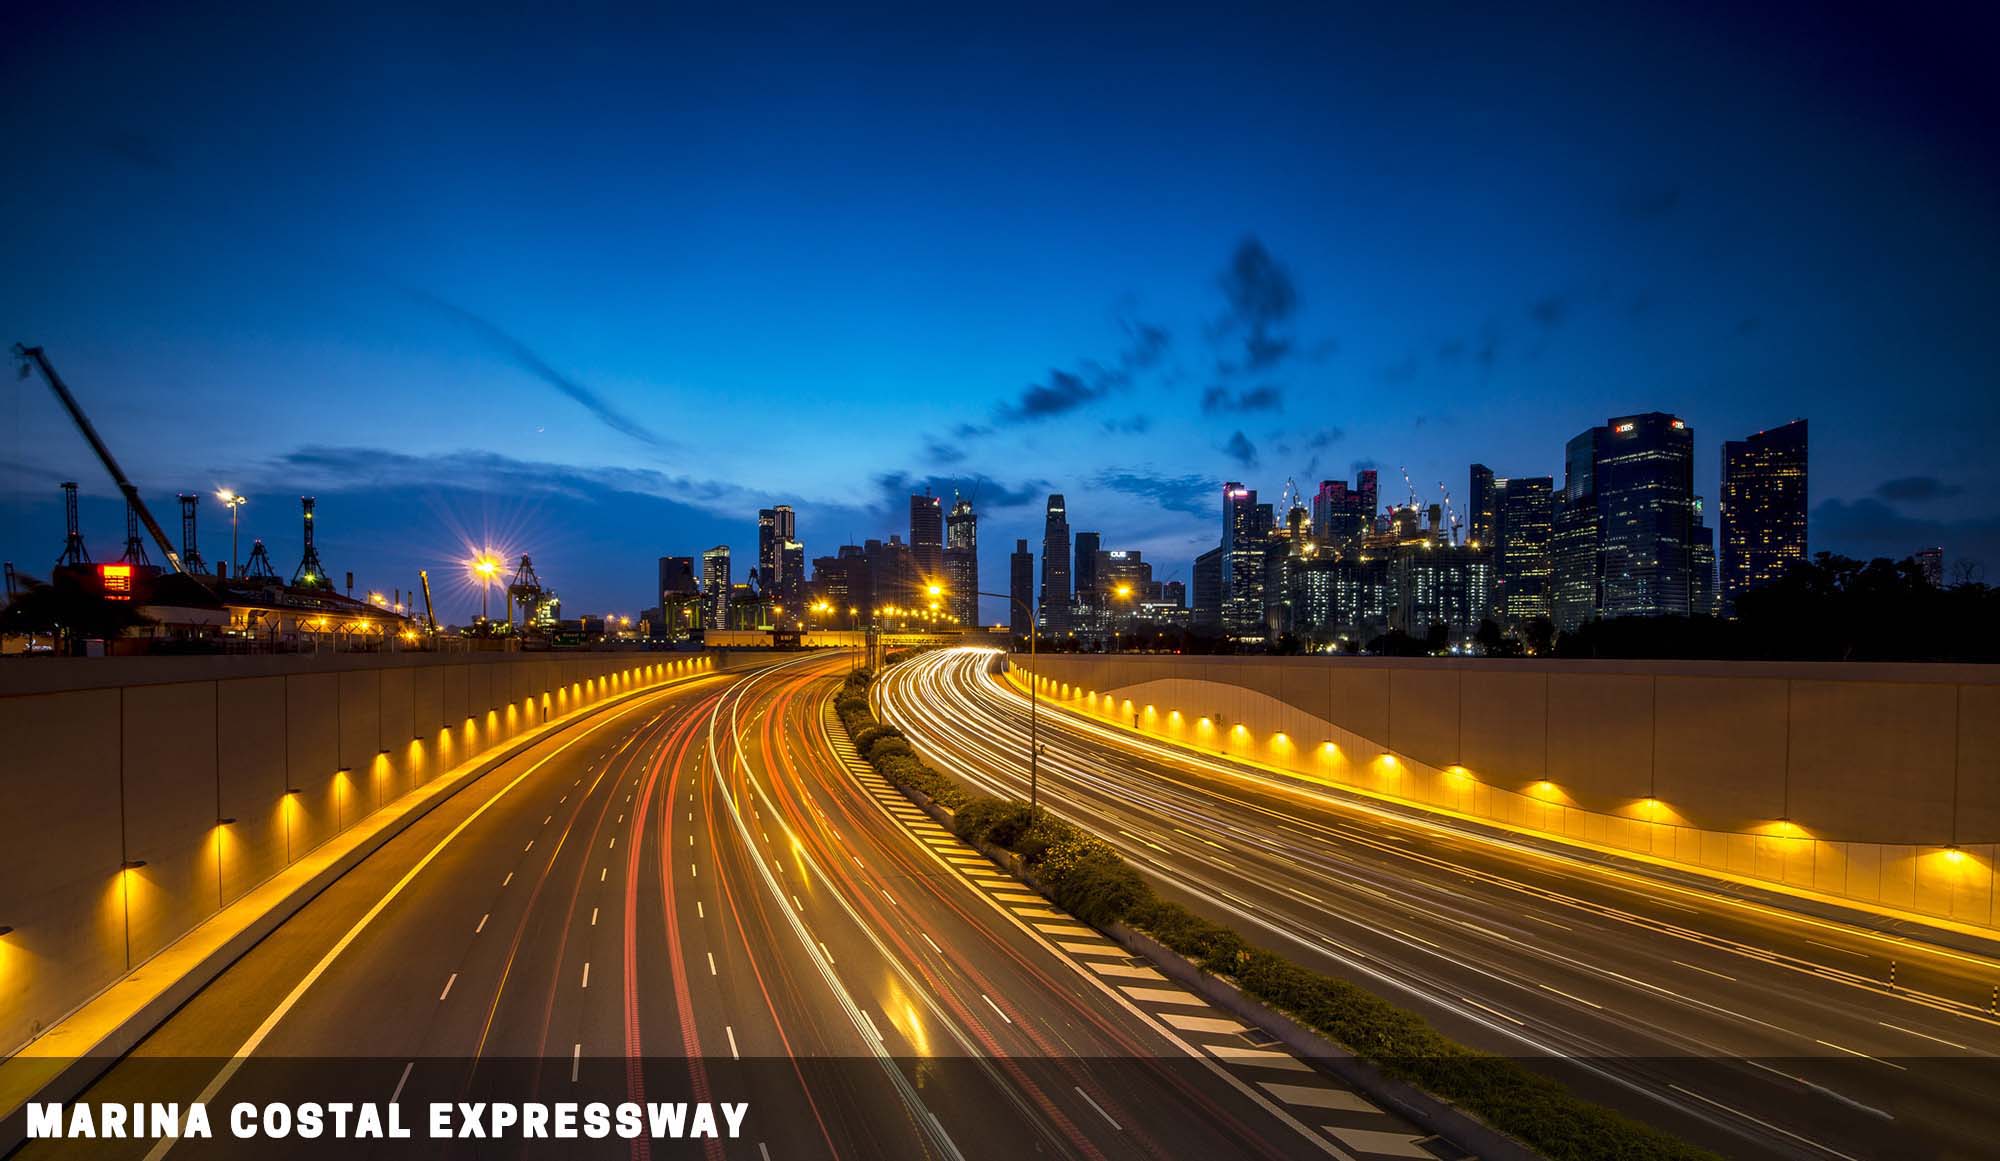
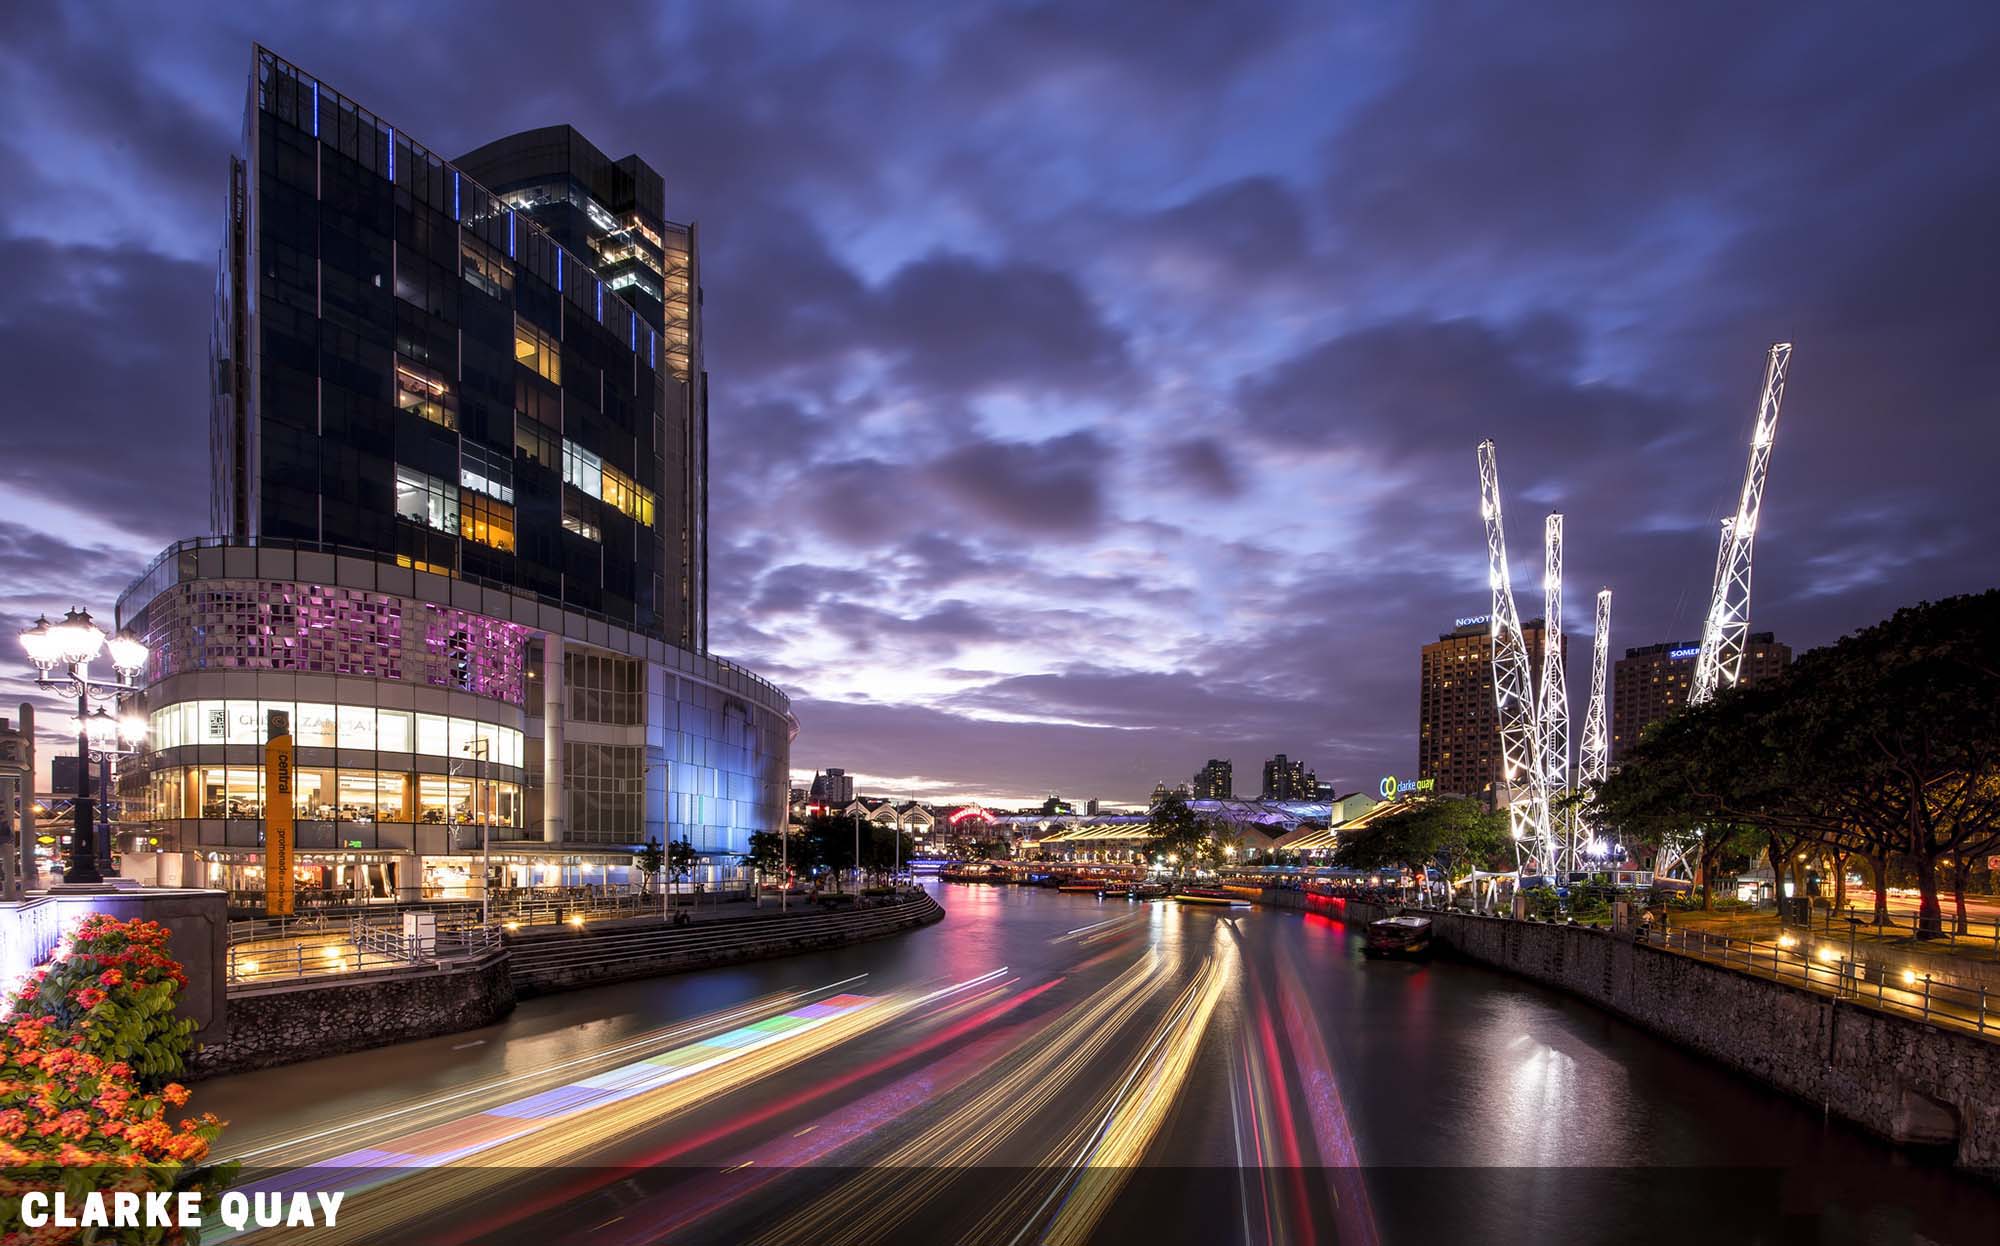
While some people may think of it as a nighttime city shoot, I will recommend shooting during the blue hour (sometime after sunset) instead. This is because only during the blue hour, that we can still get some light to catch the clouds plus nice details of the surroundings.
CHOOSE A GOOD LOCATION
Captain Obvious note again – We need a good vantage point, but safety first. It will be dumb to stand in the middle of a road. I personally love to haunt overhead bridges and tall buildings. Particularly those that are facing busy roads and junctions.
Also, try to avoid shooting beside busy streets, as a camera and tripod tend to draw quite a lot of unwanted attention. Usual problems while shooting on the street may include:
- Occasion passerby bumps, destroying your entire shot.
- Overly-friendly strangers who can’t leave you alone to take one shot.
- Overly-paranoid strangers who suspect that you are a spy or terrorist.
- Accidental “expert art directors” who tells you how to shoot and frame your shot.
- Annoying children who run into your tripod and grabs it for no reason.
- Vehicles suddenly stopping, profanities screaming driver.
- Zealots who suddenly praise your photography and spreading the love of God?
So… just get to somewhere with less human traffic, and somewhere that you can shoot in peace.
MOVING VEHICLES
Yep, Captain Obvious note number 3 – Cars that don’t move don’t produce any light trails. Make sure that there is some moving traffic on where you are trying to shoot.
STEP 1
COMPOSITION & SETUP
Step number one of literally taking almost every photo – Keep an eye open for a good composition then dish out the camera.
COMPOSITION
A light trail photo is still a photo, the usual basic composition rules still apply – Colors, lines, and shapes. Find your foreground and background interest, then offer an interesting perspective. But please do take care that the light streaks tend to become very strong lead lines. Try to use those streaks to your advantage. Lastly, take note of the direction of the vehicles.
- If they are headed towards the frame, you will catch a white headlight trail.
- If they are traveling away from the frame, you will catch a red tail light trail.
USE A TRIPOD!
In order to capture light trails, we need to use a slow shutter speed of a few seconds. We need to hold the camera absolutely still for this duration, or the shot will be ruined with just a little bit of camera shake. If you don’t have the mad ninja skills to hold still for 30 seconds, then deploy a tripod. Tripods are your best friends and are a must.
If you don’t have a tripod or the location does not allow to deploy one, a simple trick is to use the railing or rubbish bin as substitute support… Or just find anything stable that you can rest on.
USE A SPIRIT LEVEL
A spirit level is one of those “bubble inside water” gadgets. I know, there is something called “virtual horizon” in the camera to help get straight horizons. But nothing is more convenient than an actual spirit level, no need to fumble around with the camera controls.
STEP 2
TAKING THE SHOT
One does not simply put the camera on the auto mode and shoot blindly. Light trail photography does not work this way. It requires some timing, patience, testing, and a little bit of the “precision touch”.
SHOOT IN RAW
Always shoot in the RAW picture format if your camera supports it. RAW files simply contain more data than the JPEG file format and are extremely useful in editing.
FORGET SHOOTING IN THE AUTO MODE
The auto mode will never work for light trail photography. For you guys who are new to the exposure triangle, prepare to go full manual and get ready for a wild ride. 🙂 Well, if you are still uncomfortable with fully manual settings, then switch the camera into shutter priority mode and set a really slow shutter speed of a few seconds.
HANDS OFF THE CAMERA
Connect and use a remote shutter release. In long exposures, it is important to keep the hands off the camera and tripod as much as possible. Any minor shakes will result in a blurry photo. If you don’t have a remote release, turn your camera to timer mode with a one-second delay.
SEMI-MANUAL FOCUS
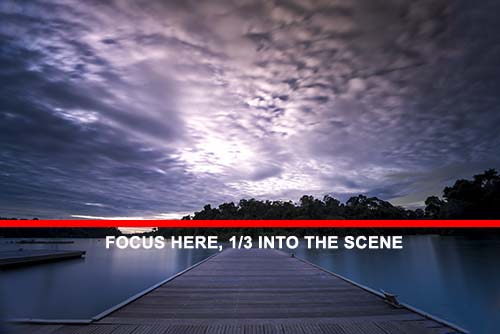
Use the auto-focus and focus 1/3 into the scene. Once your frame is in focus, turn the auto-focus off (change into manual focus mode). The reason for doing this is very simple. Since your camera is mounted on a tripod, the frame and focus are not going to change.
Also, we do not want to activate the auto-focus on every shot, which will start to hunt on the moving vehicles. We want the camera to be ready to take shots immediately, not wait for the auto-focus to hunt.
MIRROR LOCK-UP
If you are on a DSLR and remote shutter release, turn on the mirror up mode. This will further reduce camera shake, and give you an even sharper photo. But take note, the first press will lock the mirror up, the second press takes the photo – We need to press the shutter release twice instead.
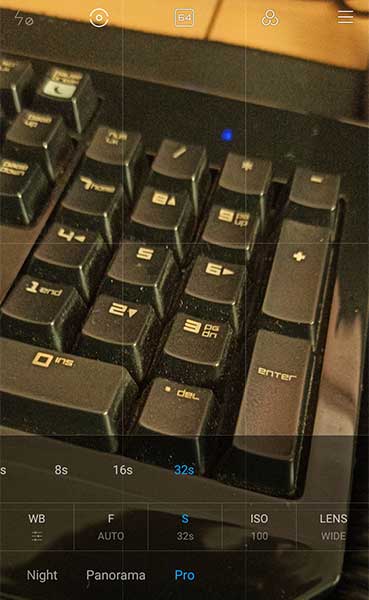
THE SETTINGS
Sadly, there are no magical setting that fits every scene. But here are my usual settings:
- Shutter Speed: At least a good 10 seconds or more. This should be enough time to catch light trails, but it really depends on how fast the subject is moving across the frame.
- Aperture: I tend to use f/8 and smaller – This is to make sure that there is sufficient depth-of-field for the surrounding buildings and landscape. Although shooting with wide-open and bokeh light trails can be pretty interesting as well.
- ISO: ISO 100. As usual, keep the ISO as low as possible unless you are forced to raise it.
TIME THE MOVEMENT

It is best to time how long it takes for vehicles to enter and exit your frame. If a vehicle takes about 10 seconds to move across your frame, a shutter speed of 10 seconds or more will result in a full streak across the photo.
Faster shutter speed will show the vehicle in motion blur within the frame – This is not wrong and all up to your personal preference. Just review the photo on the spot, and see if the light streaks are to your liking.
BULB MODE
If you want more control over the shutter speed, then turn the camera to shoot in bulb mode. With this, you will have precise control over when to start and stop.
STEP 3
EDITING
Just the above 2 steps are enough to capture light trails. Editing is optional, but as the old saying goes – Photoshop makes everything better. So yep, this final step is a sharing of how I usually edit my photos.
PART A) ADD CONTRAST
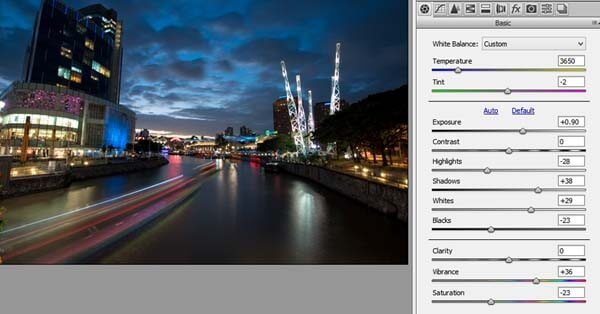
I shoot in RAW, so the first thing that opens in Photoshop is Camera Raw. My usual “magic”, is to start by correcting the exposure and adding contrast to make the trails more striking:
- Boost the shadows and reduce the highlights – that will recover some of the lost details.
- Reduce the darks and boost the whites – recover some of the contrast.
- Optionally, boost the exposure or contrast.
- Play with the vibrance and saturation, see which one fits your taste buds.
PART B) COLOR GRADING
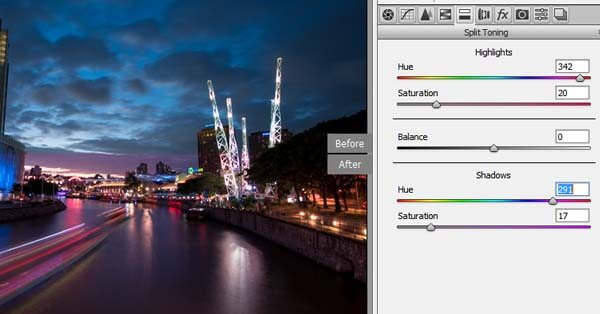 There are many ways to do color grading. For me, I sometimes do it in the laziest way – Using the “Split Toning” tab. There is really no fixed rule in here – Do as you see fit. Just don’t go too crazy with the colors.
PART C) SHARPEN
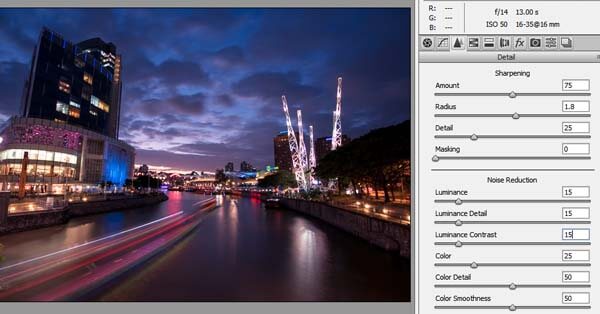
There is no rocket science in this one, just sharpen the photo. But remember to not overdo it again, especially if you are shooting at a high ISO – That will make the noise more visible.
PART D) CLEANING UP
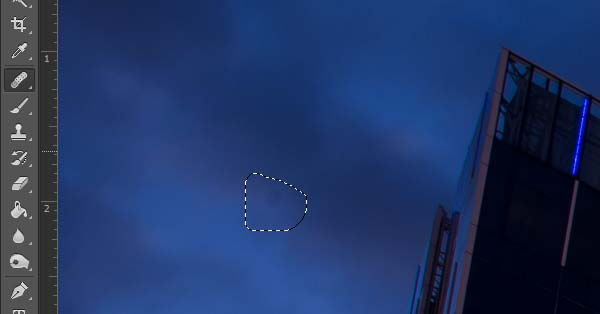
Finally, clean away dust spots and pieces of rubbish with the healing brush tool (or content-aware). Slap in your watermark, and we are done!
EXTRA
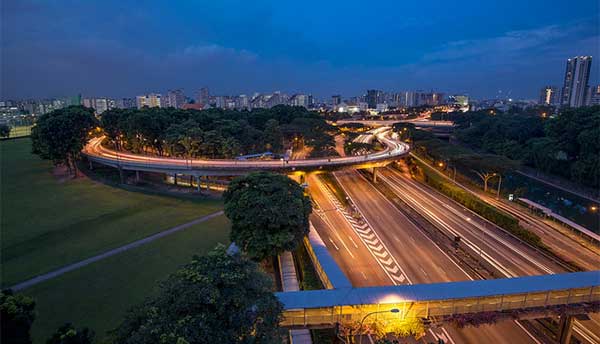
WHAT TO NOT DO IN LIGHT TRAILS PHOTOGRAPHY
This is one of my failed shots and a section on what to not do. Just in case you are wondering what went wrong, try to find light trails in the below photo. You might spot it if you squint hard enough.
TOO EARLY
The time when I took this photo is 7.15 pm, shortly after the sun has gone down. It was a stormy and cloudy day, so I thought, this should be dark enough. When I got back home and looked at the photo on the big screen, it all turns out that I was wrong. It sure is all gloom and blue, but it is still not dark enough. The contrast is not enough to bring out the light trails.
TOO LITTLE TRAFFIC
Usually, at this hour, people will be rushing back home. But for some reason, this stretch of the highway is pretty silent. Maybe an accident happened down the road and slowed the traffic. But if you want some spectacular streaks, wait for more traffic.
WRONG SHUTTLE SPEED
Light trails are not all about pushing that shutter speed to 30 seconds or more. It’s about following up with how fast the subject is moving. This photo is a highway, meaning, vehicles are traveling fast. I should have used a much slower shutter speed of 10 to 15 seconds.
STREET LIGHTS = LIGHT POLLUTION
Not really a mistake, but something that you should take note of the roads. Notice the overwhelming orange? Yep, the streetlamps cast those. So take extra care if you are shooting oncoming traffic – it will be white headlamps vs orange street lamps. Not a pretty sight if you get your settings wrong.
EXTRA
LINKS & MORE
That’s all for this guide, and here is a small section on some extras and links that may be useful to you.
LINKS & REFERENCES
- How to Shoot Fantastic Light Trails – Expert Photography
- How to do Long Exposure Photography and Light Trails at Night – Digital Photography School
- 7 Tips For Better Light Trail Photography – Nomad Within
YOUTUBE TUTORIAL
Too many words? Here’s a good YouTube tutorial:
CLOSING
WHAT’S NEXT?
Thank you for reading and we have come to the end of this guide. My usual advice will go – don’t stop here. Reading can only give you this much, and you need to go out and actually practice. If you have anything to add to this guide, please feel free to comment below. Go shoot, and have fun!