INTRODUCTION
FAST AND FURIOUS
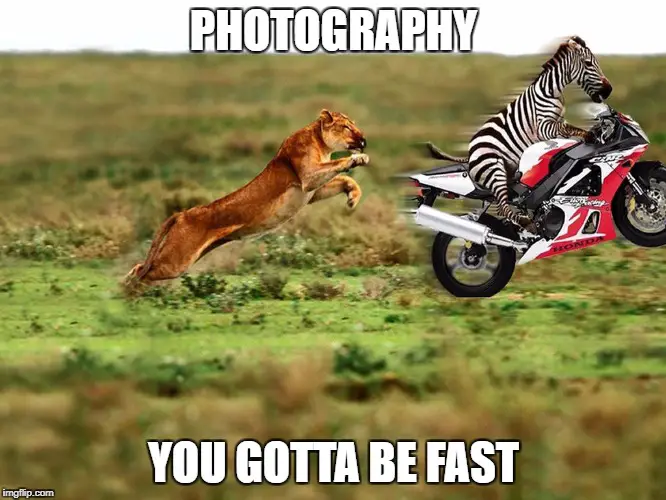
Welcome to a beginner’s guide on the camera burst mode, and this will be a fast and furious one. The camera burst mode is sometimes also known as continuous shots, and it is pretty commonly known to be used for capturing fast-moving subjects. But just how do we use burst mode, and what are the things to look out for? Read on to find out!
NAVIGATION
TABLE OF CONTENTS

Part 1 |

Part 2 |

Part 3 |

Extra |

Closing |
PART 1
THE BASICS
To many beginner photographers, the way to take photographs is probably “one shot at a time”. But unknown to some, there is something called “burst mode.
WHAT IS BURST MODE?
In burst mode, several photographs are captured in quick succession by either pressing the shutter button or holding it down.
Yep, this one should be pretty self-explanatory. As the name implies, burst mode is taking multiple shots at one time, much like a machine gun. Also take note that burst mode is sometimes called “continuous shots”, “sports mode”, or “high-speed burst shots”.
PART 2
SETUP & LIMITATIONS OF BURST MODE
Now that we have gone through the basics, let us look at how to properly set up the burst mode on cameras.
SETTING UP BURST MODE ON YOUR CAMERA
As there are a ton of different cameras and different menu designs, we will not be going into the specific steps to switch to the burst mode. But setting a camera into burst (or continuous) mode should be a breeze, in general:
- Nikon users, there should be a “continuous low” or “continuous high” shoot mode dial on your camera.
- Canon users, it is “continuous burst mode” under the “drive” menu.
- Sony users, it is also “continuous shooting” under the “drive” menu.
- On an iPhone – Just press and hold the shutter button, the phone will keep taking photos.
- On Android phones – The same, just press and hold the shutter button to take continuous shots.
THE LIMITATION – FRAMES PER SECOND
Before getting too excited over firing the camera like a machine gun, you need to know that there are limitations to the speed and number of continuous shots. Every camera is built differently and definitely does not have infinite capacity.
The first thing you need to know is frames per second (FPS), and it simply means the total number of photos the camera can take per second. This is a limitation resulting from how fast the mechanics and memory (electronic components) can process at once.
MORE LIMITATIONS – BUFFER
This part may be a little confusing, but most cameras don’t directly save photos into the memory card.
- The photo will be first held in a buffer zone, in a fast random access memory (RAM).
- It will then be transferred from the buffer to the memory card (SD card, CF card, or whatever you are using).
Why is this buffer zone required? Isn’t it stupid to have this 2-layer architecture? Well, it is necessary because memory cards are actually slow compared to RAM. What this means is that if we don’t have a fast buffer, the camera burst rate will be slowed down to as much as the memory card handle… As at the date of writing, even the fastest memory cards in the industry are not capable of crunching monster megapixels in a split second.
So here comes the limitation – Once the buffer is full, the camera will stop taking photos to catch up with moving data from the buffer into the memory card. Please don’t freak out when your camera “hangs” in the middle of a string of long continuous burst shots. It just needs time to move the photos to the memory card.
EVEN MORE LIMITATIONS – FOCUSING
Hold your horses before you spam the burst mode. Because of the speed at which burst shots work, the camera may not be able to autofocus on every single shot. Meaning, if the first shot is out-of-focus, all the following string of shots will probably be blurred. So take extra care in the focusing and expecting where the subject will move.
PART 3
USES OF BURST MODE
Back in the film photography days, burst shots are very expensive to do so. Just imagine taking hundreds of photos in those days, and having to develop all of those rolls of films… That will probably burn a hole in the wallet along with the maintenance of expensive equipment.
But with the modern-day memory card, we can all afford to burst shot hundreds of photos without blinking an eye. But spamming is not the point of this guide, so let’s get on with how to do continuous shots properly.
WHAT BURST MODE IS NOT USED FOR
Before moving into the actual uses, I have to raise a point on what burst mode is not to be used for. Let me introduce a term called “spray-and-pray”. Now, some smart beginners probably have an idea plucked from thin air that goes – “If I take 999 random photos, a few of them will end up as good shots”.
While this idea is not totally wrong, however, it is also not how photography works. If the composition is wrong in the first place, the photo will not look good. If the focusing is off, all the photos will be blurred. Random spray and pray is just not the way to go. We should properly plan and have an idea of what we want first, then spray-and-pray for that one shot to hit the desired result.
HIGH-SPEED PHOTOGRAPHY
Burst mode is commonly used in high-speed photography, or what I personally call “calculated spray and pray”. A classic example will be taking a photo of a balloon bursting at the right moment. As it will take superhuman accuracy to catch the exact timing with a single shot, thus the smarter way is to just use burst shots and hope that one hits the golden moment.
CATCHING FAST MOVING OBJECTS
Ever tried to shoot a fast-moving vehicle or action with the single-shot mode? It is not entirely impossible, but the better (and smarter) way will be using the burst mode to catch a whole series of photos – You will have a better chance of getting good photos instead of just one single shot.
SPORTS PHOTOGRAPHY
Anything can happen on the battlefield… and instead of taking single shots, burst shots make more sense – You can never accurately capture a 100% good action shot with only one try.
TIME LAPSE
This is one of the more interesting uses of (slow) burst shots – Take multiple photos, then string them into a motion video. You can even reverse the sequence and make things look like they are moving backward in time.
BRACKETING
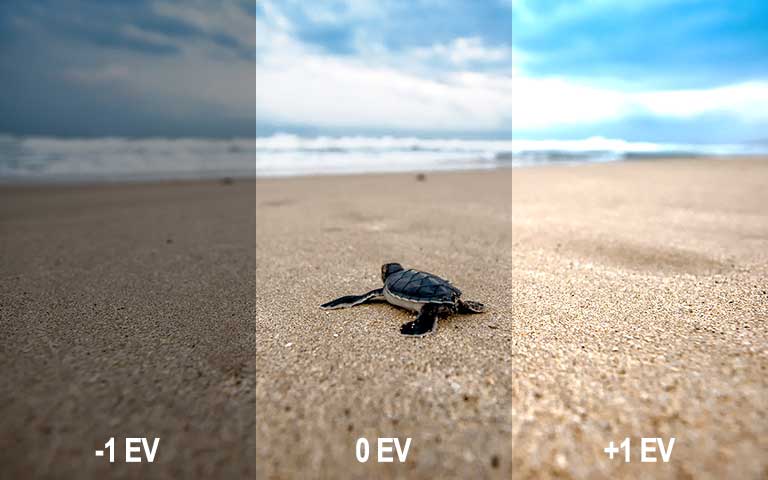
Bracketing is another photography technique that takes photos at different exposure levels. As this guide is not about bracketing, I will not cover it in-depth within this guide… But for now, just know that burst shot is commonly used in conjunction with bracketing to take HDR photos.
TIPS ON USING BURST MODE
There really isn’t a secret to using the burst mode. Just switch to continuous and fire away. But here are a couple of quick tips for capturing better burst photos:
- Use fast shutter speed to “freeze motion”.
- Use the back focus button if you are attempting to shoot a moving subject.
- If not, use a focus trap.
- In the case of the bursting balloon or planned splashes, pre-focus on the spot and switch to manual focus.
EXTRA
USEFUL BITS
That’s all for this guide, and here is a small section on some extras and links that may be useful to you.
LINKS & REFERENCES
- How To Use Burst Mode for Perfectly-Timed Shots – Expert Photography
- How to Take Better Photos in Burst Mode – How-To Geek
- Burst Mode: What It Is and How to Use It – Lifewire
CLOSING
SHOOT ON!
Thank you for reading, and we have come to the end of the guide. I hope that it has helped you to better understand the camera burst mode a little better. But having read all of these is no use if you don’t put them to good use. Knowledge needs to be completed with experience. So go out, and enjoy shooting in the burst mode!
If you have anything to add to this guide, please feel free to comment below.