INTRODUCTION
THE MAGIC OF LEVITATION PHOTOGRAPHY
Welcome to a guide on how to do levitation photography, where we will walk through the different ways to make people float… or at least make it look like so. While levitation photography may seem to be an “advanced technique” to some beginners, there are actually very simple ways to do it, without the need for crazy equipment nor ninja Photoshop skills.
So you purists and beginners don’t have to worry too much. Levitation photography is actually not really that difficult, and it is fun to do. Let us now get into how to create hauntingly beautiful levitation photos. Magical wands not included, each sold separately – Read on!
NAVIGATION
TABLE OF CONTENTS

Stuff We Need |
Method 1 |
Method 2 |

Method 3 |
Method 4 |

Method 5 |

Method 6 |

Method 7 |

Extra |

Closing |
STUFF WE NEED
RECOMMENDED EQUIPMENT
For a start, we actually only need a decently good camera – Even smartphone cameras can do the job. But here are a couple more things that will come in handy.
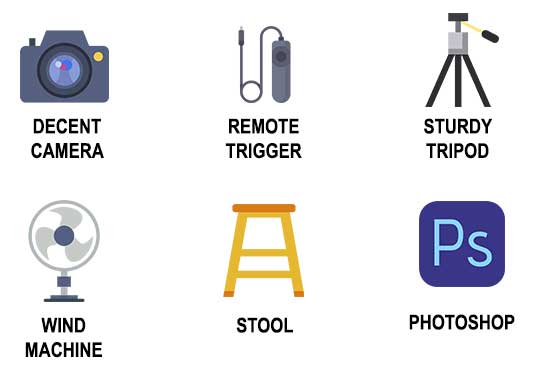
GADGETS
- A decent camera
A smartphone camera is sufficient, but mirrorless and DSLR cameras are better. - A sturdy tripod
This will come in handy for some of the techniques below. - A remote shutter release
To reduce camera shake, and ease your action directing. Does not matter if it is wired or wireless. - Wind machine
If you are crazy enough. A crazy strong fan will add some of those flying hair and flowing-fabric effects, making the scene look more convincing. - Folding stool
For use with the chair method below.
EDITING APP
Don't have a copy of Photoshop yet? Click on the banner below to check out an offer.If not, check out GIMP if you do not wish to spend any money on an editing app.
METHOD 1
WET FLOOR TRICK
Who says levitation photography is difficult? This is probably the easiest and laziest way to do levitation photography – No editing needed, no expensive gear needed. Just dry ground and a bottle of water.
LEVITATION ILLUSION
How this method work is simple. Just pour some water on dry ground, ask your friend to stand a few steps away from it, and snap away. Yep, that’s all to this trick. A wet spot on the ground will look like a spot of shadow, giving an illusion that a person is floating mid-air.
But please do watch the direction of the sun and where shadows cast… It will be weird when the direction of the shadows don’t match with the wet spot. Also, having a dry ground is a must – Roads, concrete, and stone are your best bets.
METHOD 2
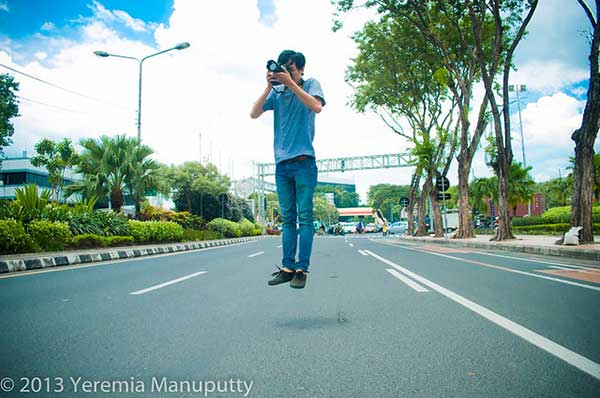
JUMP AND FREEZE FRAME
What if it just rained and the ground is wet? What if we don’t have a bottle of water? This second method is actually a pretty common technique, but it will require some patience, timing, and stamina.
ALL ABOUT TIMING

The basics of this method are very simple – Ask a person to jump and attempt to catch a shot of the action during mid-air. This may sound like an easy task, but getting the right pose and capturing the exact moment in mid-air is a pain. To maximize the chances of getting the right timing, here are a couple of things to look out for:
- Make sure to set the camera to decently fast shutter speed. We need that to “freeze-frame” and to prevent motion blur.
- Set a decent enough aperture. As the subject will be moving and jumping around quite a lot, it is going to be difficult to work with a razor-thin depth of field.
- Use the continuous burst shoot mode. It just makes life a lot easier with getting the correct shot.
- Frame the composition before the shot – Ask your friend to test jump, see how much space is required.
- Set a focus-trap to better help you get a sharp photo – See the video below.
- Remember to not wear people out with jumping. If you fail to catch the shot after a few tries, take a short break before you continue.
METHOD 3
COMPOSITION WITH PHOTOSHOP
This is the usual method that I personally use and it is the bane of purists. If you are not into Photoshop, you might want to skip this method and continue to the next one.
THE BASIC IDEA
- Take one base photo of your subject.
- Then capture many shots of levitating objects.
- Finally, combine them together in Photoshop.
As such, it is essential in this method to use a tripod and fix the camera on the spot. If there is too much camera movement, we are going to have a hard time combining the shots in Photoshop. We may be able to pull this one off with hand-held… but that will need some very steady hands.
STEP 1) VISUALIZE
Start by having the concept and complete picture in your mind. That will help you plan your “base photo”, the poses, and all the props that you need.
STEP 2) THE BASE PHOTO
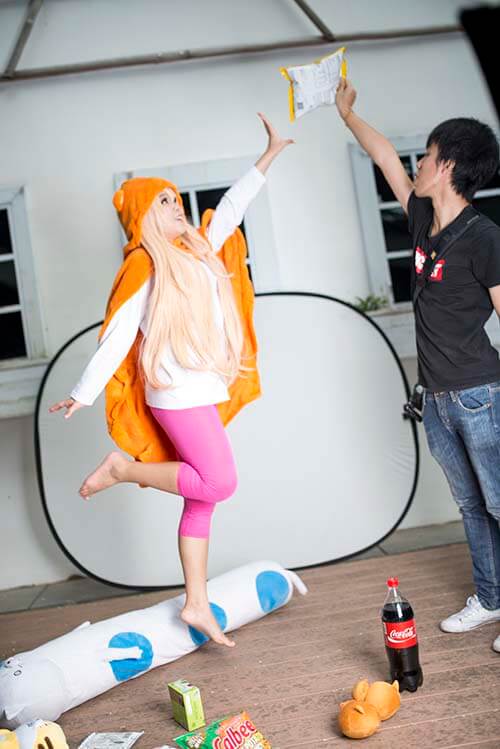
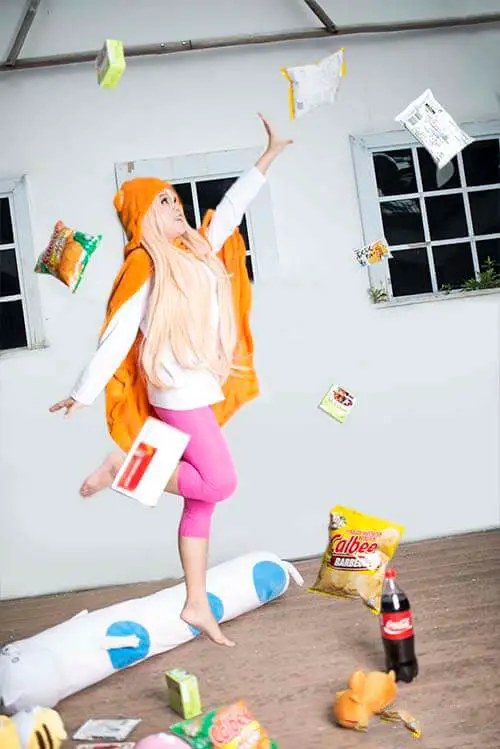
The base photo is an important one with the talent striking a pose, and this is one that we cannot afford to screw up… We can take multiple shots of the “levitating” props later, discard any of those that are bad. But if we have a bad base shot, nothing can fix it. So make sure to get this one correct, take multiple base shots if you have to.
P.S. I know this example base photo is kind of messy with a diffuser in the background, and my friend is totally in the frame. But that’s the whole idea of the composite. We only need to get the important elements right – which in this case, is the talent in a mid-air hop.
STEP 3) THE FLYING BITS
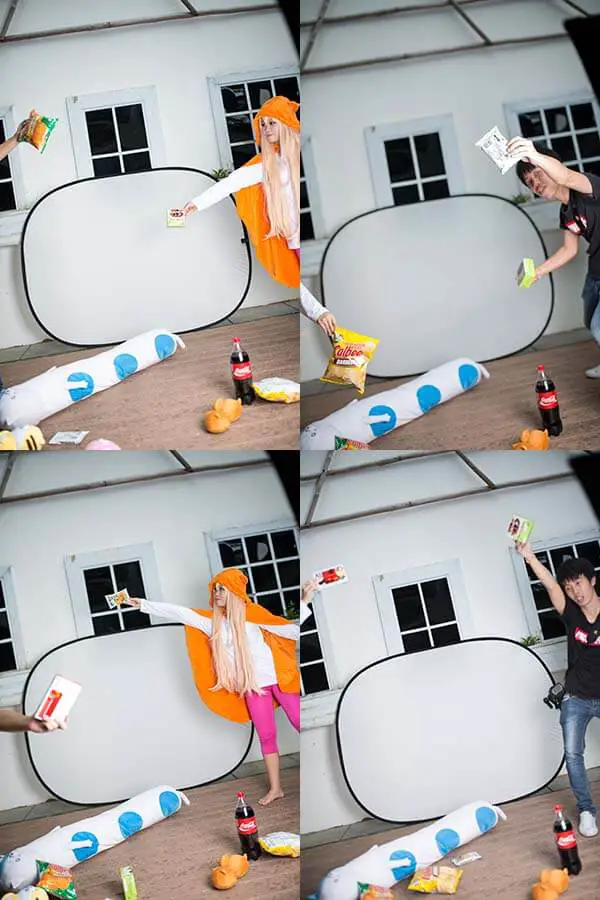
The next step is the fun part. Grab a whole bunch of objects that you wish to levitate, and take a lot of photos at different positions.
STEP 4) BY OUR POWERS COMBINED
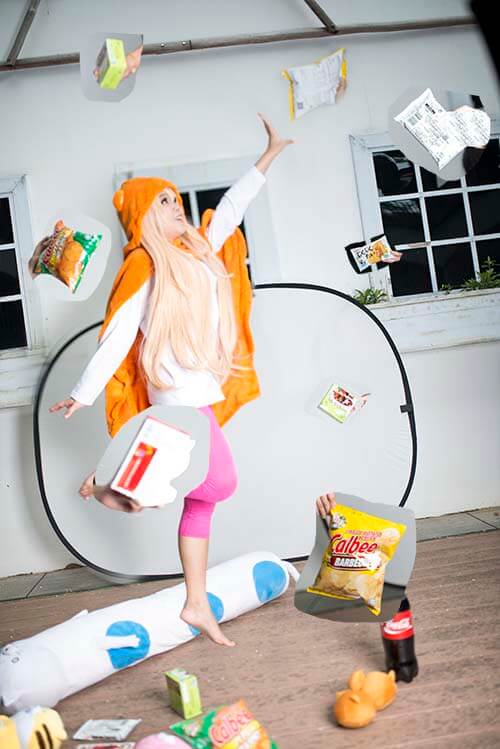
The final part of the process is a mind-bending Photoshop blending. As you guys may have noticed, I simply used the lasso tool to copy and paste in the snacks… and it looks ugly. No, it’s not complete yet. It is only after a lot of patient cleaning, moping, and polishing that we get the final levitation image.
That’s it for the Photoshop method. But remember – Use a tripod, the camera has to stay at the same spot, shoot using similar exposure settings. It is not really that difficult, just a tedious process to shoot multiple photos and blend them together in Photoshop.
METHOD 4
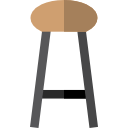
DISAPPEARING CHAIR
This method is pretty much the same idea as a Photoshop composition, except for a small difference – We will be using an ancient device called “a chair” to support the talent.
STEP 1) SIT OR LIE DOWN ON A STOOL
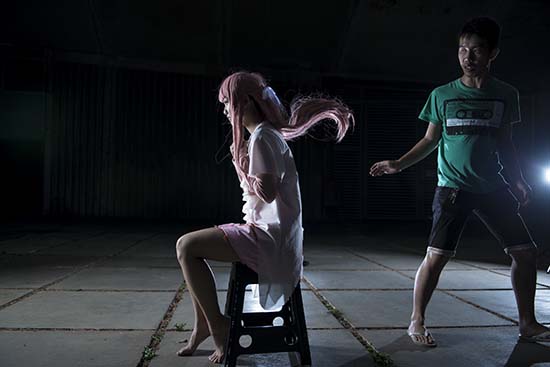
Just how do we use a step or stool to make things levitate? Very simple – Take a photo of your talent sitting on a stool, then manually flip the hair or fabrics to create a floating effect. Yep. that’s all to the “magic” behind the scene.
STEP 2) PHOTOSHOP MAGIC
The next step, Photoshop the heck out of it. I totally removed the background of this shot and replaced it with another. The “less painful” way of doing this is to take 2 shots and combine them in Photoshop – One with the model sitting down, and another “empty scene” shot with only the backdrop.
METHOD 5
FLASE PERSPECTIVE
The false perspective method may seem difficult at first, but it just requires some thinking and a little bit of editing to rotate the photo.
SHOOT STRAIGHT, ROTATE LATER.
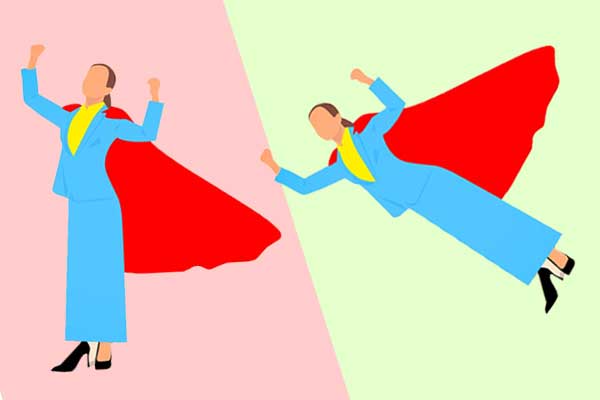
- Have your talent standing upright and strike the “flying superman” pose.
- It is best if to shoot against a clean background, like the sky.
- Flip the cape, hair, and blow some wind to make the scene look more realistic.
- Then just rotate the picture 90 degrees – Magic happens and you just faked a flying human. 😆
METHOD 6
UNDERWATER
I hear you people. I know some of you guys will say “underwater is not levitation”. But think again, underwater is the best place for levitation. Things float naturally when underwater. No need to blow stupid fans, no hair flipping, no cape flipping, and no jumping action. Just pure buoyancy magic.
FISH TANK SHOT
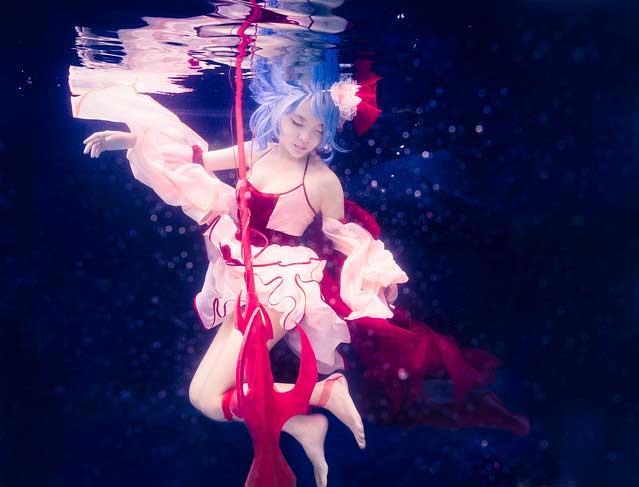
The huge challenge is how to shoot underwater though. We will need some “serious waterproofing” for all the camera gear and go underwater… Or alternatively, build a huge aquarium. Underwater lighting will be another issue as well. All right, maybe this method is not for everyone. But there is just something very charming about underwater. To do or not to do – you decide.
METHOD 7
FLIGHT PRODUCTION
Disclaimer – I have personally not tried this method, and this is still a concept in my mind. Please don’t burn me. While I have personally not gone this far, I shall share the idea nonetheless.
NOT FOR EVERYONE
What is this “top-secret” method? Nothing special. Ever watch those superhero movies and see how the actors are all tethered to steel lines for the “flight and fight” action scenes? Yep… This requires a lot of effort and equipment, definitely not for everyone.
But if you are interested, you are going to need a studio or a controlled environment. Remember to throw in some dry leaves, feathers, add some fog, dramatic lights, and maybe even burn some steel wool. Also, there will be plenty of lights, fans, and crew members to do all the hair and cape flipping action.
EXTRA
USEFUL BITS
That’s all for this guide, and here is a small section on some extras and links that may be useful to you.
LINKS & REFERENCES
- How to Do Levitation Photography: A Tutorial – Peta Pixel
- Levitation Photography – 7 Tips for Getting a Great Image – Digital Photography School
- 100 Magical Levitation Photography Examples to Inspire You – Photodoto
VIDEO TUTORIALS
Too much text to read through, here are a few good YouTube tutorials that I have found.
CLOSING
NOW GO FLY
Thank you for reading, and have come to the end of this guide. We may have walked through the various ways to take levitation photos, but practicing is still the key to success. Don’t be afraid to copy the ideas, try to “reverse engineer” and recreate shots that other people have already done.
It’s all a part of the learning process. With this, I shall end the guide with one last small tip – Levitation photography is all about using some creativity. Don’t give up if you don’t get it right in the first few tries. Just keep on trying, and it is awfully fun to play with even when you fail.
Now go awaken your awesome inner magician. Enjoy, and happy shooting!