CLEAN IS GOOD
Welcome to a beginner’s guide on how to physically clean your computer. Yes, computers are pretty robust these days, and some may think that they are “maintenance free”. Well, that is not entirely true. As long as we are living on the planet called Earth, things are sure to get dirty over time.
Computers, in particular, are magnets for grime and dust. If you have the bad habit of eating at the computer desk, there are probably nasty food bits stuck in the keyboard. If your place is dusty, the computer fans are probably choked with dust.
What is so bad about that? Choked fans don’t move as much air, overheats the computer, and rotten food bits just attract all kinds of creepy crawlies. Too much dirt is no good for both electronics and humans. So let’s get cleaning and remove those nasty bits. Read on!
TABLE OF CONTENTS
 Part 1 Part 1Keyboard & Mouse |
 Part 2 Part 2The Monitor |
 Part 3 Part 3Speakers & Earphones |
 Part 4 Part 4The Internals |
 Extra ExtraUseful Bits |
 Closing ClosingWhat’s Next? |
KEYBOARD & MOUSE
Let us begin by cleaning up the easiest to reach the keyboard and mouse. But before that, remember to shut down your computer first.
KEYBOARD CLEANING
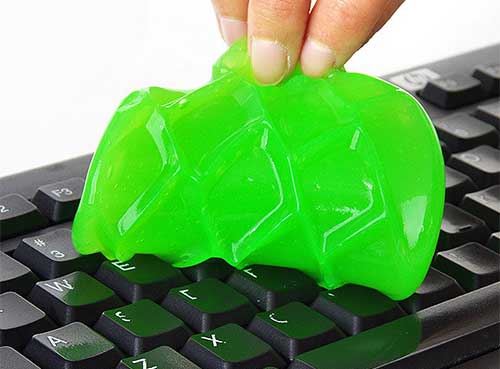
To clean the keyboard, simply turn it upside down and give it a few good (but not violent) shakes. That should dislodge some of the small expired food bits stuck inside, then slap the jelly to reach within the nooks and crannies. Don’t have a cleaning jelly? You can try using Play-Doh, or an old toothbrush to slowly scrub the dirt off.
With that, the keyboard should be “mostly clean”. But if you still have a greasy keyboard, you can wipe it down using a moist (not wet) cloth plus a little bit of soap.
MOUSE CLEANING
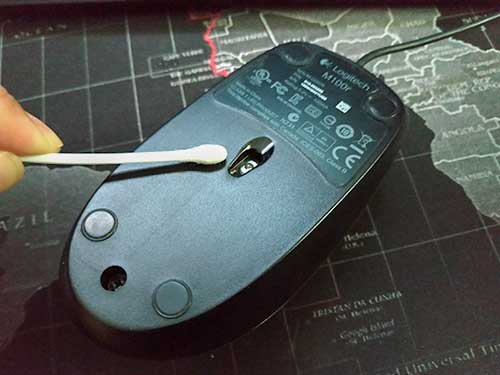
Similar to cleaning the keyboard, use a moist cloth and a little bit of soap to wipe off the dirt and grease first. Then, use the jelly to reach within those tiny nooks – Especially around the mouse wheel, and those “tiny cracks” in between the mouse buttons.
Don’t forget the belly side of the mouse too, the rubber feet seem to attract quite a lot of dirt over time. If the optical sensor is blocked by dirt, use a slightly damp cotton bud to clean it.
THE MONITOR
Moving on, we will clean another one of the easiest – The monitor. Reminder again, switch the monitor off before cleaning it.
DUST OFF
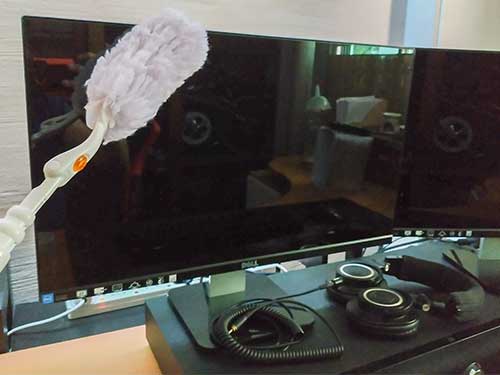
If you have a super dusty monitor, use a duster to clean off most of it first. Then, further wipe it down with a piece of slightly moist cloth (but leave the screen alone). The whole idea here is to catch as much dust on the cloth as possible, and not to inhale a mushroom cloud of dust into your own body.
SCREEN CLEANING
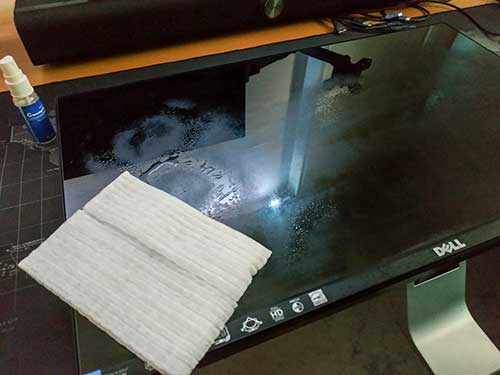
After getting rid of the dust, spray some screen cleaning solution on the screen, then wipe the gunk off with a piece of microfiber cloth. A few important points to note here:
- Do not wipe in circular motions. You will “polish” your screen using dust, leaving a lot of micro scratches.
- Wipe across the screen horizontally or vertically instead, that will move the dust particles out of the screen.
- Do not apply too much downward pressure, as pressing down too hard can damage the screen.
If you don’t have a screen cleaning solution, any generic glass cleaner (used for cleaning windows) should do the job as well – Does not matter even if you have a matte plastic screen.
REMOVING SCRATCHES
The painful situation when you spot scratches on the screen… But there is still hope, and here are a few “old techie cures” for removing micro scratches:
- Rub the scratch with soft rubber.
- Rub Vaseline on the scratch, the key here is that you need to use a petroleum-based product.
- Use plastic or glass polish, you can probably find these under the auto-care section in hardware stores.
SPEAKERS & HEADPHONES
If your speakers are puffing out dust clouds and headphones not smelling too great, here is how we clean it.
SPEAKERS CLEANING
Just clear the dust off the surface of the speaker with a duster and/or wiping cloth. If you have wooden speakers, you can use some wood polish to further protect the wood.
HEADPHONES CLEANING
The cleaning method is different depending on the build and material of your headphones. But the earpads of headphones can usually be removed for replacement and washing. My Audio-Technica has leather earpads, so I usually remove it and use a little bit of leather care on it. If yours are those fabric types, you can take it off and wash it with soap.
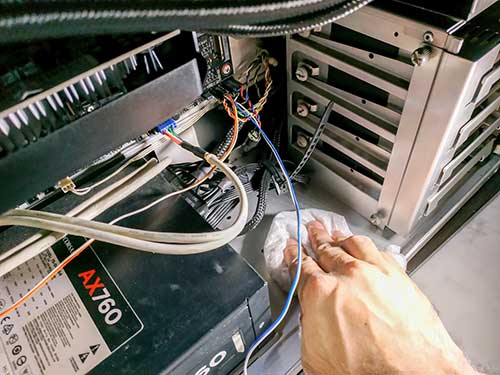
THE INTERNAL HARDWARE
Warning – Before cleaning the internal hardware of a computer, please shut down it completely. Unplug everything, move the casing to somewhere with good lighting and ventilation. If you are uncomfortable with this, or not sure what to do, it is best to leave it to the professionals instead.
Even more warning – Opening up the casing may void the warranty. So please do proceed with utmost care.
OPENING PANDORA’S BOX
Depending on the design of your computer casing, you may need a screwdriver to open up the casing. But most modern cases these days are designed to not require tools and can be opened easily by just turning some thumb screws.
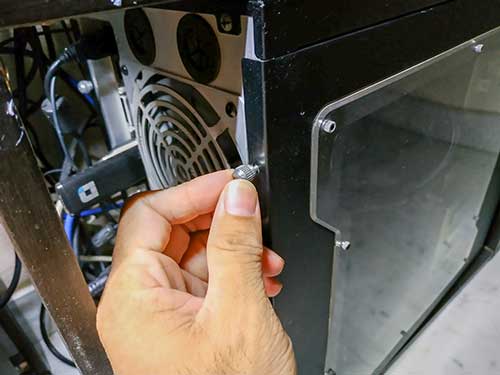
UNCHOKING FANS
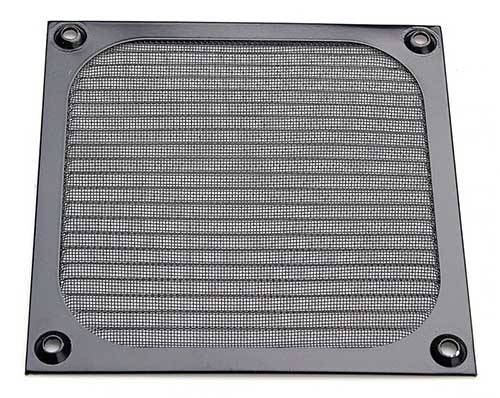
Once you have opened up the casing, the very first things that you will want to clean are the fans… Because these pick up the most dust. Good for those of you have dust filters attached. Because all you need to do is probably to pull those out and wash with soap. If the fan itself is super dirty and choked with dust, you can wipe it off using electronic wipes and cotton buds.
DUST OFF HEATSINKS & CIRCUIT BOARDS
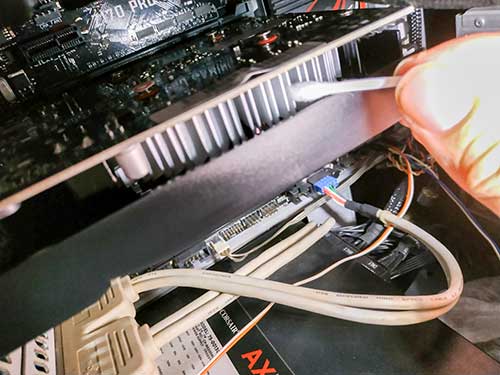
Moving on with the heatsinks, the motherboard, and graphics card – Don’t even think of using a vacuum cleaner. No moisture, no wet wipes either. While some people may recommend using air cans and air compressors, but I personally think it is a really bad idea to conjure up a dust storm. If you want to do that, bring your computer to somewhere open, where you don’t have to smell the dust.
So if the computer is not coated with dust, I will usually clean off most of the junk using electronic wipes, a small brush, and cotton buds instead. Remember that sticky jelly thing? That will kill off the rest of the dust, without blowing up a dust storm and frying your computer.
CIRCUIT CLEANING
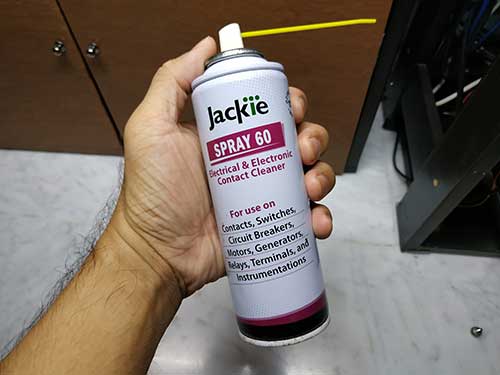
Next is a step that I will usually skip if the motherboard, graphics card, and memory are not too dirty. But if they are coated in dust, you can use the duster to lightly clean them off. To remove stubborn pieces of dirt stuck on the circuit board, you can use a cotton bud and electronic contact cleaner.
WIPING DOWN THE INTERIOR
Finally, use the electronic wipes to clean off the remaining of the general interior – The surface of hard disks, power supply, and the floor of the casing.
PACKING UP
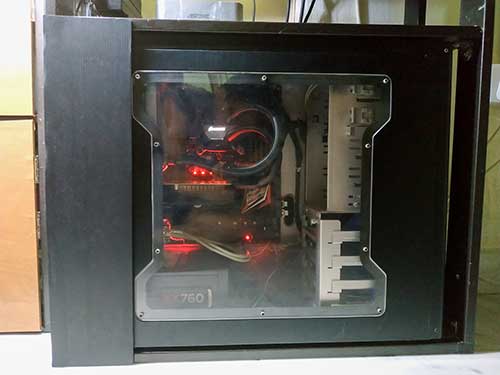
Plug everything back and put the computer back into place. You are done and now have a squeaky clean PC now.
USEFUL BITS
That’s all for this guide, and here is a small section on some extras and links that may be useful to you.
LINKS & REFERENCES
- How to clean the inside of your computer – Cnet
- How to clean your computer – PC Gamer
- Thoroughly Clean Your Dirty Desktop Computer – How-To Geek
TOOLS OF MASS CLEANING
Here are all the tools that you might need… Which you probably already have lying somewhere around at home.
- Cleaning cloth
Just a piece of disposable rag, to soak up all the dirt. - Microfiber cloth
A soft textured cloth used to wipe the screens and not leave scratches. - Electronic wipes
Dry disposable wipes. For those of you who prefer “use once, throw away”. - Duster
Good to have, for removing dust on the monitor and casing. - Cotton Bud
For taking out dirt from the small nooks. - Small Brush
Or an old toothbrush, to reach into those small corners. - Keyboard Jelly
Not the edible kind of jelly, but the sticky kind of jelly that will pick up dirt. Play-Doh might work as well. - Hand Soap, Dishwasher, or General Purpose Cleaner
Just a little bit of this to remove stubborn grease. - Screen/Glass Cleaner
For shiny clean screens. - Screwdriver
You may need this to open the computer case. - Electronic Contact Cleaner
For cleaning those electrical contacts.
Well, get them online if these are somehow not available – Useful cleaning computer products.
WHAT’S NEXT?
Thank you for reading, and we have come to the end of this guide. I hope this has helped you to get a squeaky clean computer, and if you have anything to share with this guide, please feel free to comment below. Good luck and happy computing. May the digital force be with you.