Welcome to a guide on how to remove scratches on computer screens. Oh no! There is an ugly scratch mark on the screen, and it is very annoying every time you use the computer. Fear not. If the scratch is not too deep, there might still be hope with some “home and Internet remedies”.
A short disclaimer though. While I have personally tried and tested some of these methods, they are not proven to be 100% effective. But in any case, there’s no harm in trying out some of the “low risk” possible fixes – Read on!
1) USE AN ERASER
Risk: Low. What can go wrong?
Erasers are one of the most common and easy “remedies” that we techies use. Just use a soft rubbery pencil eraser (not those rough abrasive types) to gently rub on the scratch mark – It seems to work pretty well in removing light scratches, and it cleans off stubborn pieces of stuck dirt as well.
2) ISOPROPYL ALCOHOL
Risk: Medium-low. Just don’t let the alcohol seep into the edges of the screen.
Have a very dirty screen with a lot of small scratches everywhere? Then you will need to get a cleaning cloth, some cotton buds, a soft brush, and cleaning alcohol (90% isopropyl alcohol from pharmacies will also do the trick).
First, apply the alcohol evenly over the screen. Be careful of the edges around the screen, and not get the alcohol inside – It will damage the electronics. Wipe it down with the cleaning cloth, and use cotton buds to target stubborn spots. This should pretty much restore any old screens back into their “shiny state”.
Note – I know the above is not a “scratch repair” video, but that is a very good demonstration of how to restore an old computer screen using cleaning alcohol.
3) USE TOOTHPASTE
Risk: Medium. Can potentially scratch the screen even more.
There are actually quite a lot of these “Mythbusters” videos on the Internet that toothpaste does not remove scratches. Personally, I have tried it and it works – But only on micro scratches.
- First, clean the screen with a soft brush and cleaning cloth. You do not want to add more scratches by rubbing dirt on it.
- Secondly, you need to get an “abrasive” toothpaste for this to work. The ones that have “polishing properties” and feel like very fine sandpaper.
- Lastly, apply the toothpaste to the screen, use a cleaning cloth and rub it in a circular manner – The whole idea is to use the toothpaste as a screen polish.
4) USE VASELINE
Risk: Low.
This is another trick that we techies use to hide the scratches, and yep, just about any petroleum jelly-based product will work. All we need is to gently rub the cream into the “scar”, it should start to “blend in” and fade the scratch mark. Take note though, that it seems to only work on matte plastic screens and not the glossy glass ones.
5) WINDSCREEN OR PLASTIC POLISH
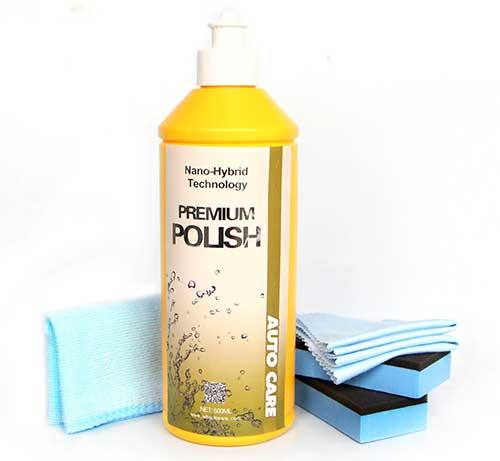
Risk: Low. Don’t let the liquids get into the edges and destroy the electronics.
Have some deep scratches? Try your luck with automobile windscreen polish or plastic polish. They may cost quite a bit though.
6) VERY FINE SANDPAPER
Risk: High. Can potentially ruin the entire screen.
This is kind of an “enhanced method” of the above windscreen polish. If there are a lot of micro-scratches on the screen, you can try applying a wet piece of very fine sandpaper (2000 grit) in circular motions to get rid of them first.
Then, complete the treatment with windscreen polish and car wax. The whole process requires quite a lot of elbow grease and patience, but it does restore the screen back to its “default factory shiny state”… Maybe even better.
7) BANANA AND BAKING SODA!?
Risk: Low. Makes the screen smell like a banana at worst.
Once upon a time in the bronze age of the Internet, people would use mashed bananas and baking soda to repair the scratched CDs… A very eco-friendly way of repairing stuff, non-toxic too. If it works on the plastic of a CD, then it should also technically work on plastic computer screens.
P.S. Not tried nor tested. Not sure if this really works, or is another urban myth.
WHICH IS THE BEST METHOD?
Personally, a combination of cleaning alcohol and Vaseline seems to work the best; Cleaning alcohol to remove the gunk, and Vaseline to cover the micro scratches. But take note, this worked on plastic screens, not glass.
WHEN TO GIVE UP…
If you run your fingers across the scratch mark, and it catches your fingernail. That is probably too deep to be fixed with the above home remedies, and it’s better to replace the entire screen.
LINKS & REFERENCES
- How to Fix Deep Scratch – azcentral
- How to Fix Scratch on LCD Screen – WikiHow
- Recommended Cleaning Products (get the scratch removal products online) – Red Dot Geek
THE END

Thank you for reading, and we have come to the end of this guide. I hope this has helped you to better understand, and if you have anything to share with this guide, please feel free to comment below. Good luck and may the cyber force be with you.