Welcome to a guide on how to stop video and audio autoplay in Google Chrome. Videos and audio add interest to websites, but they are plain annoying and alarming with sudden autoplay. Even though restrictions are imposed on autoplay, there are still some cracks. Just how can we tighten the autoplay rules? Read on to find out!
TABLE OF CONTENTS
 Block Autoplay Extensions Block Autoplay Extensions |
 Change Site Permissions Change Site Permissions |
 Change Autoplay Policy Change Autoplay Policy |
 Useful Bits & Links Useful Bits & Links |
 The End The End |
1) EXTENSIONS TO BLOCK AUTOPLAY
First, let us start with the easiest method. Installing a Chrome Extension that can stop video/audio autoplay.
WHAT ARE EXTENSIONS?
For you guys who have not heard of Chrome Extensions, they are simply “plugins” to add functionality to the web browser. Not to worry about “extensions are illegal”, all the extensions recommended in this guide are hosted on the Chrome Web Store, run by Google themselves.
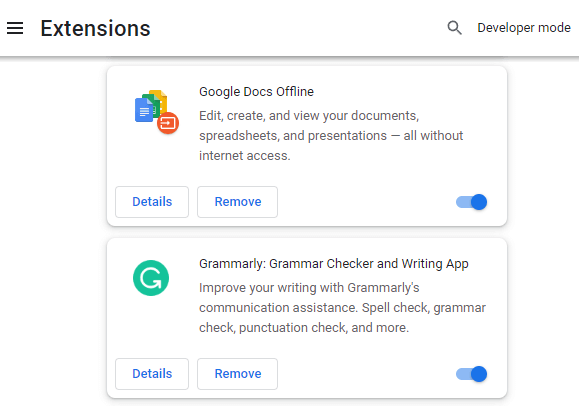
P.S. You can remove or manage your browser extensions at any time. Hit the ⁝ button at the top-right corner > More tools > Extensions.
DISABLE AUTOPLAY EXTENSIONS
Well, just do a search for “block autoplay” on the Chrome Web Store and there are a ton of them. There is nothing much to do here, just pick one that you like, install, and activate it. That’s all, the extension will start blocking video and audio from autoplay.
EXTENSIONS MAY NOT ALWAYS WORK
Please do take note that the extensions work to a varying degree of success… It is pretty much a manner of finding the one that works the best.
2) CHANGE SITE PERMISSIONS
For this next method, we will be changing the permissions of websites to disallow playing sounds.
DISABLING AUDIO
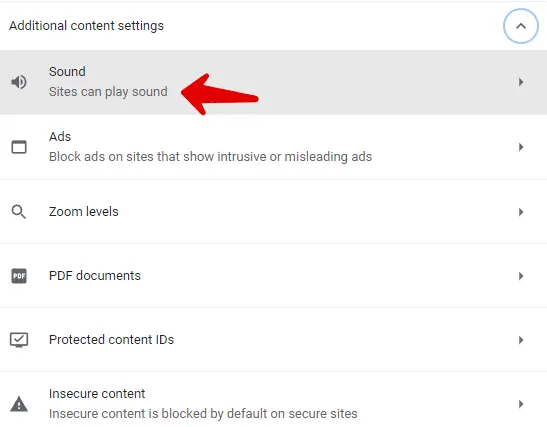
Open a new tab and enter the URL chrome://settings/content. Scroll down, expand “additional content settings”, and click on “sound”. Here, you can choose to disable audio globally, or manually enable/disable the audio for specific sites.
ENABLE/DISABLE AUDIO FOR INDIVIDUAL WEBSITES
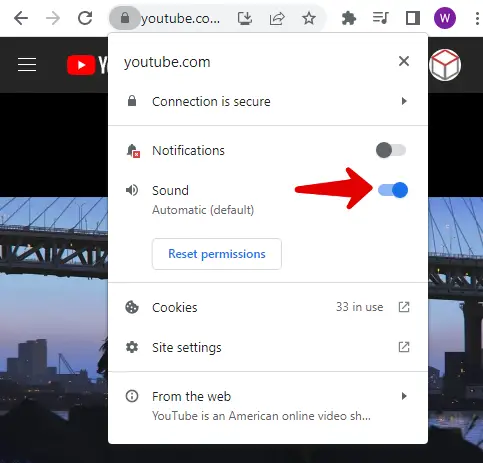
Just click on the icon beside the URL, and that will open the list of permissions for that particular site. Simply disable the sound if you want to mute it.
HOW ABOUT VIDEOS?
Well, it’s a frustrating situation. In 2018, Google changed the way Chrome handles video autoplay… You will not find a single “autoplay video” option in the site permissions, nor in the browser settings. More of that is in the final section below.
3) CHANGE THE AUTOPLAY POLICY
For this final method, we will override the autoplay policy in Google Chrome.
MEDIA ENGAGEMENT INDEX
 Before we go further down into the rabbit hole, here’s a quick crash course on how Chrome handles video autoplay.
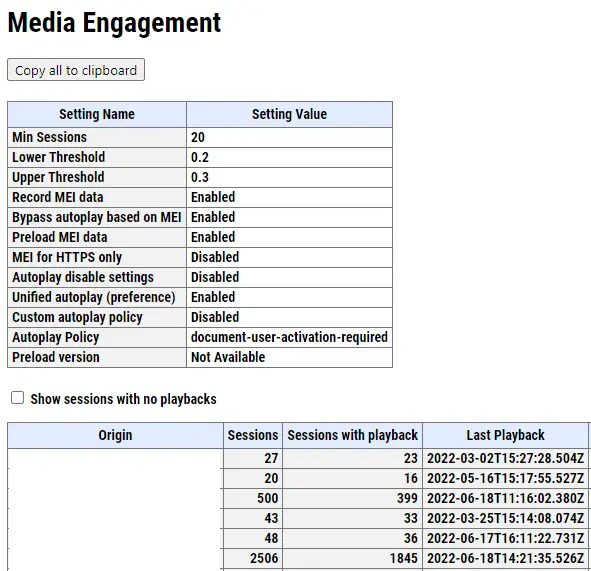
- Open a new tab, and enter
chrome://media-engagementinto the URL. Yes, Google invented something called the “Media Engagement Index” (MEI) to annoy us even more. - Basically, every site will have a “MEI score”. The more you play videos and audio on the site, the higher the score will be.
- By default, all websites are only allowed to autoplay muted videos, only when the user has interacted with the page at least once.
- But this behavior is overridden for websites with a “high MEI score”, they will be granted a “special pass” to autoplay videos.
Guess what? There are no straightforward ways to override this MEI thing at the time of writing, and people are upset over it – “An AI can allow autoplay, but the human cannot turn it off”.
COMMAND-LINE DISABLE MEI

To disable the MEI features, it can only be done through the command line. For you guys who are on Windows, hit START + R and run chrome.exe --disable-features=PreloadMediaEngagementData,MediaEngagementBypassAutoplayPolicies,RecordMediaEngagementScores,RecordWebAudioEngagement.
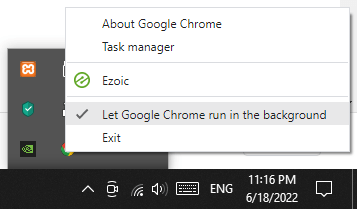
But please take note that Chrome must be fully closed before you run this command. It took me a while to force quit Chrome, and disallow it from running in the background.
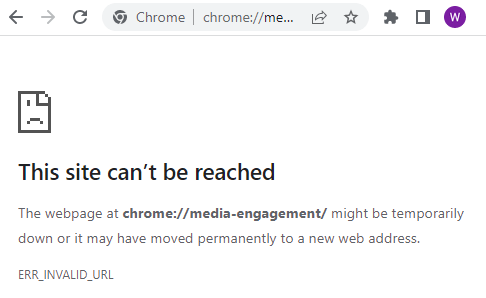
Once you have relaunched Chrome, you can verify by accessing chrome://media-engagement. It should show a “this is can’t be reached” error, MEI has been turned off.
CREATE A SHORTCUT
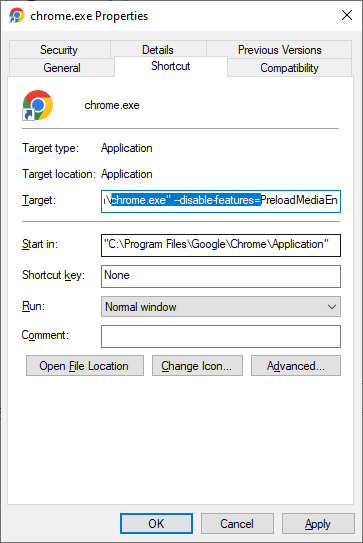
Sadly, the above setting will not “stick”. The moment Chrome is closed and reopened, it will revert back to the “selective autoplay”. So as an alternative for Windows users, you can always create a shortcut and add the flag behind it.
USEFUL BITS & LINKS
That’s all for this guide, and here is a small section on some extras and links that may be useful to you.
WHICH IS THE BEST METHOD?
Just find a good “stop autoplay” extension, that is the least painful way to deal with autoplay. But if you really want to go for it, then permanently disable sound and that “MEI thing”… It’s kind of counterproductive though, you will have to manually enable the sound every single time.
EXTRA) MANUALLY MUTE WEBSITE
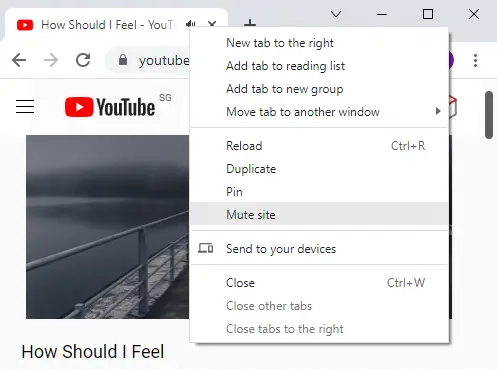
As a small extra, we can actually quickly mute a tab (temporarily) by right-clicking on it, mute site. Good for silencing the noisy sites quickly.
LINKS & REFERENCES
- Autoplay Policies In Chrome – Chrome Developer
- How to Run Chromium with flags – Chromium Project
- Chromium Command Line Switches – Peter Beverloo
- How to Disable Autoplay Videos on Sites in Google Chrome – GroovyPost
THE END
Thank you for reading, and we have come to the end of this guide. I hope this has helped you to better understand, and if you have anything to share with this guide, please feel free to comment below. Good luck and may the cyber force be with you.