INTRODUCTION
LIGHTS, A PHOTOGRAPHY ESSENTIAL.
Welcome to a beginner’s guide on the different types of photography lighting styles. If you have been dabbling in the ninja arts of photography for a while, you will realize that light is another essential element alongside the composition and subject.
But sadly, light is yet another one that is not easy to grasp. Apart from the many different types of lights, there are seemingly endless techniques and ways to place them. Which is the purpose of this guide – To compile all of the common lighting styles into one single post for your easy reference – Read on to find out!
NAVIGATION
TABLE OF CONTENTS

Section A |

Section B |

Extra |

Closing |
SECTION A
THE VARIOUS TYPES OF LIGHTING STYLES
Understanding light is one more step towards better photos. But don’t worry, photographers are not crazy scientists or mathematicians. We do not need the precise calculation and engineering, but we do need to know how to shape and control light.
There are countless ways to do your lighting setup, and here are some of the common ones to take note of. But please don’t let these restrict you into “I need to comply with the standards”… There are no fixed ways for your own lighting style. Adapt and see what works best for you.
1) HARD & SOFT LIGHT
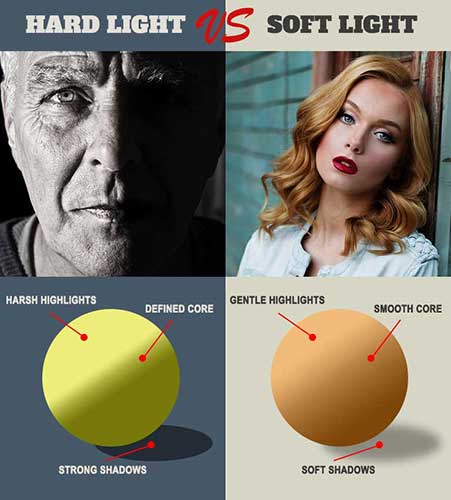
Hard and soft light is not really a lighting setup per se, but these are 2 of the most basic “styles of light” that you should know.
- Soft light refers to gentle lighting that is mellow and casts smooth shadows. It tends to create beauty shots.
- Hard light refers to an intense light that is harsh and casts very defined shadows. It tends to create dramatic shots.
Well, each has its own character and hard light is not all that bad. Hard light is usually used in creating dramatic shots, while soft light adds that delicate touch. I will let the picture examples do the explanation.
2) HIGH KEY
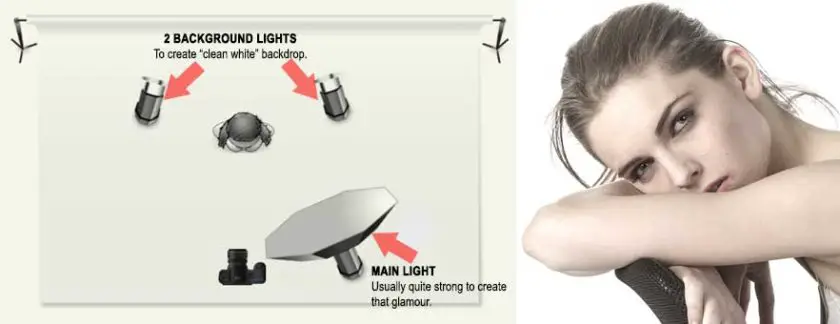
High key photography is a style where your background and subject are all well-lit. This style is commonly used in beauty, fashion, and it produces that “glamour look” for the magazine covers.
3) LOW KEY

Low key photography is the complete opposite of high key, and the overall picture is kept dark. It produces photos that project dark, gloomy, dramatic and/or a mysterious feel.
4) LOOP LIGHTING
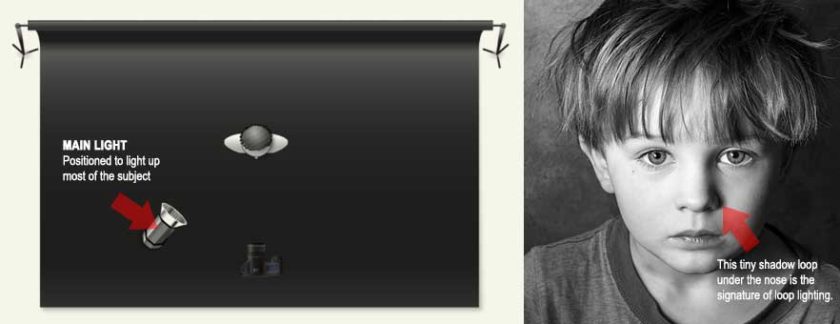
This is one of the basics in studio lighting, and very easy to set up. All you need is one light positioned at the side of your subject. Its signature is a small shadow loop cast under the nose of the subject… and thus “loop lighting”.
5) SPLIT LIGHTING
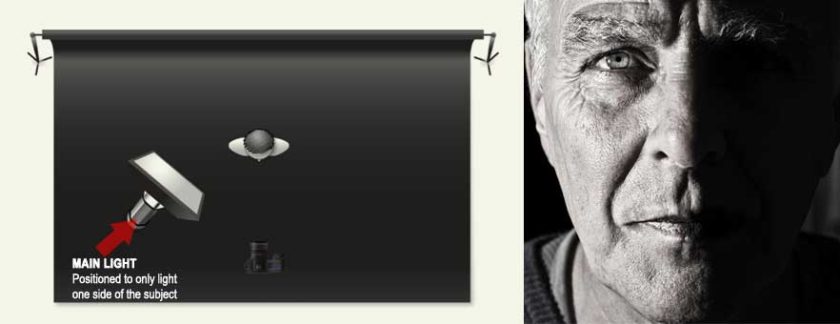
Split lighting is portrayed by that sharp split of bright and dark on the subject. Often done with one single light skewed to the side of the subject, this style is used to create some very dramatic shots.
6) BUTTERFLY LIGHTING
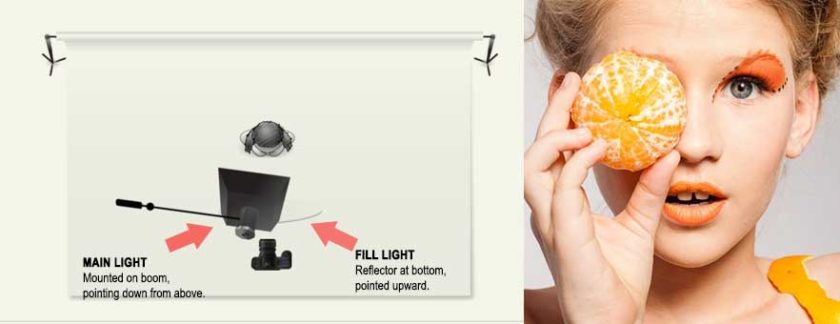
Another of the classics in lighting styles, and you are going to need 2 lights for this (or one light plus reflector). The main light will be top-down directly in front of the subject, while the fill light will be at the bottom of the main light. As with how this is being set up, it is also often called “clamshell lighting”.
7) REMBRANDT LIGHTING
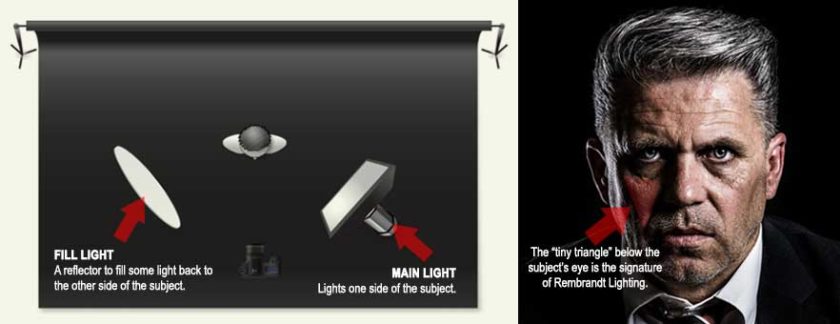
One of my personal favorites, and it is named the artist Rembrandt Harmenszoon van Rijn who always paints in this kind of style. You are going to need the main light on one side of the subject, and a reflector on the other.
The beauty of Rembrandt lighting is that it produces photos that have depth but still maintains a natural look without being too harsh. A signature of Rembrandt lighting is the small light triangle cast below the subject’s eye.
8) NATURAL LIGHT
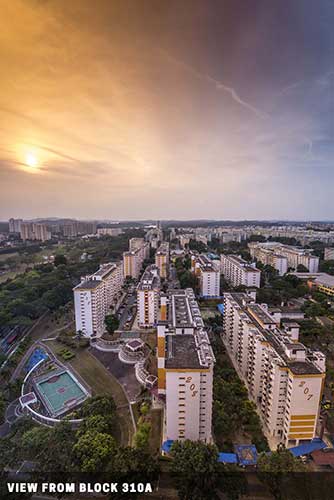
Natural light is pretty much as-it-is, using light from the sun and everything that glows naturally. But people who strictly shoot with natural light only will always struggle with it being the best friend and worst enemy. Since we can’t turn off the sun at will, the only option is to work the best with it – Shoot during sunrise and sunset to get the amazing golden shots, or hide in the shade to minimize a harsh afternoon sun.
9) BOKEH BALLS
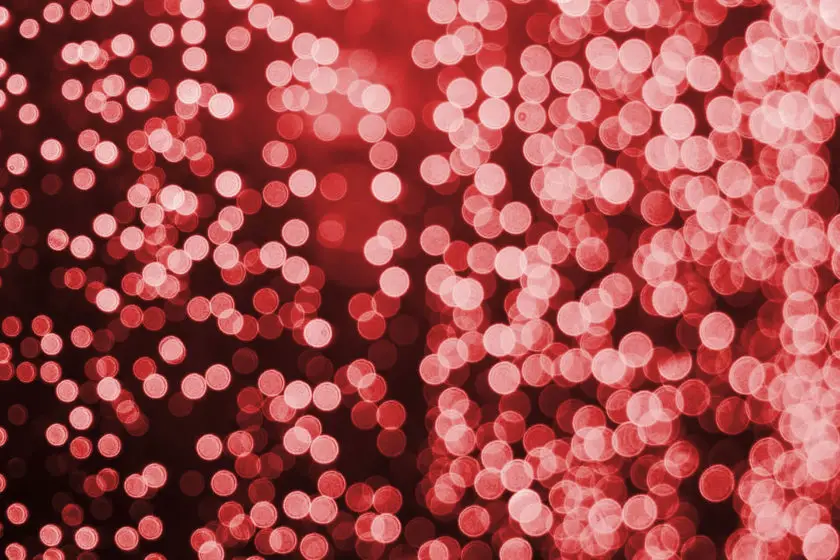
For those who do not know, bokeh means blur, and bokeh balls are simply those out-of-focus balls of light. This is kind of an acquired taste, and some people are going to argue that it is not an “orthodox” style of lighting. Well, creativity has no boundaries. So just go bokeh if you like it and create something awesome.
SECTION B
STUDIO LIGHTS – A QUICK INTRODUCTION
When it comes to the available kinds of lighting for photography, an unknowing beginner will probably only think of “light bulb” and “flash”. Sadly and thankfully, we have many kinds of “light bulbs” to choose from with today’s technology. This section will run through a few of the common ones that you need to know.
THE DIFFERENT KINDS OF ARTIFICIAL LIGHTS

Incandescent: The old school filament bulb, very warm in color. |

Fluorescent: Usually has a bluish tint, and a regular Joe that you find everywhere – clinics, supermarkets, offices, etc… |

Halogen: Commonly used as headlights for vehicles. Closer to neutral white, but generates quite a lot of heat. |

Flash: Portable lights that are commonly used in photography to give that extra boost of light. |

LED: The newer technology that has been taking the world by storm. Low power consumption, low heat generation, and perfect for almost anything. |

Strobe: The big gun used in studios, and there are some portable ones too. Whips out a lot of light. |
WHAT’S THE BIG DEAL?
Just as natural light, each one of the artificial light has a certain trait to it – Color temperature and intensity. As a photographer, you should really know and experiment with each kind of lighting.
| Type | Light Intensity | Color Temperature |
| Incandescent | Soft | Warm |
| Fluorescent | Harsh | Warm / Cold |
| Halogen | Very Harsh | Almost neutral |
| Flash | Very Harsh | Almost neutral |
| LED | Soft | Warm / Cold |
| Strobe | Very Harsh | Almost neutral |
GUIDE NUMBER
How do we measure how “powerful” a flash, strobe or LED is? One of the most common ways is the guide number (GN), and this formula goes GN = distance X f-number. For example, a flash with GN 40 at ISO 100, will mean that it can properly illuminate a subject at 5 meters, with f/8 and ISO 100 (f/8 X 5 meters = GN 40). In simpler terms, the higher the guide number, the more powerful the lighting device is.
LUMEN & LUX
Apart from the guide number, the other measuring unit that you will find on LED and light bulbs is Lumen and Lux. There is some pretty complex formula behind it, but generally again, the higher the number, the brighter the light bulb is.
EXTRA
USEFUL BITS
That’s all for this guide, and here is a small section on some extras and links that may be useful to you.
LINKS & REFERENCES
- 6 Portrait Lighting Patterns Every Photographer Should Know – DPS
- 3 Essential Lighting Styles for Better Portraiture – Adorama
- 7 Easy Portrait Lighting Setups – PetaPixel
CLOSING
MASTERING THE LIGHT
Thank you for reading, and here comes the end of the guide. It will sure take some time to open your inner chakra and see the light in terms of photography. This is not going to be easy for some of you guys, but keep on experimenting with the different lighting styles. You will eventually become better, and develop something that is called “your unique photo trait”.
Also, learning to embrace the dark side is also a huge part. While lighting styles may be all about lights, shadows are also a part of photography. Without shadows, the photos are just going to look unnatural. With that, I shall now sign off, and good luck with your photography journey!