INTRODUCTION
NOT SHARP?
Welcome to a quick guide on how to do lens calibration. Having trouble with the autofocus on your camera lens? Is the focus always off? No worries, let us walk through the steps on how to do lens calibration and get things back into sharpness – Some of you guys may think calibration is a difficult process, but it is actually a pretty simple one. Read on to find out!
NAVIGATION
TABLE OF CONTENTS

Section A |

Section B |

Section C |

Closing |
SECTION A
THE BASICS & EQUIPMENT
Before we start, here are a few bits of good-to-know information, and the equipment we need to do lens calibration.
WHY IS THE AUTOFOCUS OFF?
So why is the autofocus inaccurate? Will it happen again after the calibration? Well, there are actually several possible reasons:
- Using a third-party lens that may not be fully compatible with the camera.
- Using a lens adaptor, which may not be fully compatible again.
- A firmware update that is not friendly towards third-party or older lenses.
- Physical damage to certain parts of the lens.
- A corrupted electronic circuit on the lens.
- Or just a plain stupid autofocus system that is always inaccurate…
WILL CALIBRATION FIX IT?
Most of the time, a simple lens calibration can fix those annoying autofocus skew. But if it is a compatibility issue or actual hardware damage, no amount of calibration can fix it…
EQUIPMENT WE NEED
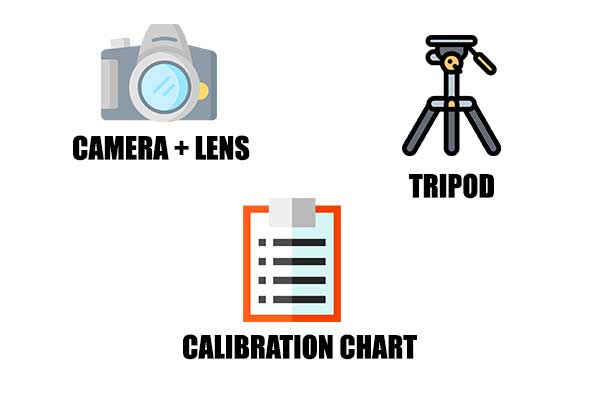
Thankfully, we don’t need any of those “crazy equipment”.
- The lens and camera to be calibrated. Captain Obvious to the rescue.
- Using a tripod is optional, but highly recommended.
- Download a Lens Calibration Chart, print it, and put it onto a clipboard. There are actually a lot of different variations online if you search for “lens calibration chart”. Alternatively, a simple ruler will also work.
SECTION B
HOW TO CALIBRATE
So far so good, let us now get into the steps of how to actually calibrate a lens.
STEP 1) DEPLOY TEST SETUP
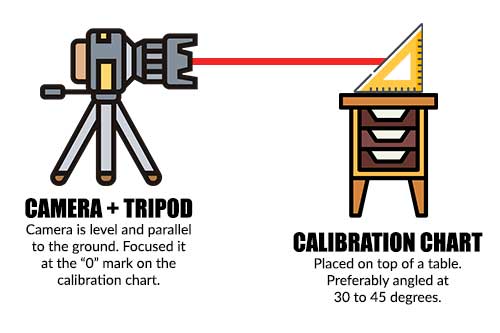
- It is highly recommended to do the calibration in a well-lit place, where the autofocus system doesn’t have to struggle in low light.
- Place the calibration chart on top of a table, preferable slopped at an angle of around 30-45 degrees.
- Set the tripod and camera up, the camera needs to be level and parallel to the ground. Use the virtual horizon or a spirit level to help you.
- Then adjust the height of the tripod to “center” the frame on the “0” mark of the chart. If you are using a ruler, then use the center as the “zero point”. For example, use the 15cm mark on a 30 cm ruler as the center.
- Don’t need to be perfect, but just try to get it as level as possible… Or the calibration may go off later.
STEP 2) TAKE SAMPLES OF THE AUTOFOCUS
What’s next is very easy.
- Set the autofocus back to the center point – Which should be directly on the “0” mark of the calibration chart.
- Don’t have to worry about the settings – Just use full automatic.
Finally, take a few test shots. The important part here is to let the autofocus system do its thing.
STEP 3) ADJUSTMENTS
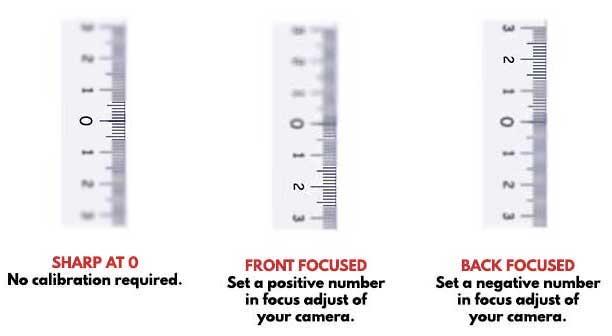
Last step. Review the test shots and do the adjustments accordingly.
- If the photos are sharp at the 0 mark, congratulations, there is no need for further calibration.
- If the pictures are focused after 0, the lens has a back focusing issue (focused behind the intended target).
- Vice versa, if the focus is before 0, it has a front focusing issue (focused in front of the intended target).
Fixing this is as simple as accessing the “AF adjustment” menu on the various cameras:
- Nikon: Setup Menu > AF Fine Tune > Set AF Fine-Tune On > Saved Value.
- Canon: Autofocus Menu > AF Microadjustment > 0:Enable > Adjust by Lens.
- Sony: Menu > Setup Menu 2 > AF Micro Adj > Amount.
- The rest of the camera brands: I believe Fuji, Pentax, and Olympus also has a similar AF Adjustment function.
All that’s left is to dial in how much to focus adjust.
- For front focused lenses, put in a positive value.
- For back focused lenses, put in a negative value.
RINSE AND REPEAT IF NEEDED
That is actually all to the calibration. Just take another photo to verify the calibration, repeat the adjustments until it is zeroed.
EXTRA
USEFUL BITS
That’s all for this guide, and here is a small section on some extras and links that may be useful to you.
WHAT IF THE AUTOFOCUS IS STILL OFF?
Then the problem probably lies somewhere outside of the calibration. Do some simple “troubleshooting by elimination” –
- Change to another good lens. If the autofocus is accurate, then you may have a bad lens with compatibility issues or hardware damage.
- Put the bad lens onto another camera. If the bad lens still does not work, then it might be hardware damage instead.
- But if it works, then it is most likely to be a compatibility issue.
Whichever way, an incompatible or damaged lens is not going to be easy to fix… It will require a circuit board replacement or an “autofocus hack”. Seek the help of a professional if you really like the lens, or stick with shooting in manual.
YOUTUBE TUTORIAL
Too much to read? Here is a good YouTube tutorial.
LINKS & REFERENCES
- How to use the AF Fine-Tune function – Nikon
- Camera Lens & Focus Calibration – Canon UK
- How to use the Auto Focus (AF) Micro Adjustment – Sony USA
CLOSING
WHAT’S NEXT?
Thank you for reading, and we have come to the end of this guide. I hope this has helped to solve your autofocus woes. As for one last bit of information, most modern lenses these days have an embedded electronic circuit and a unique serial number.
Cameras should be able to detect and apply any previously done calibrations – We do not need to change the calibration settings every time when switching lenses. If you have anything to share with this guide, please feel free to comment below. Good luck, and happy shooting!