INTRODUCTION
SILHOUETTE, THE ANCIENT ART
Welcome photo ninja, to a guide on how to do silhouette photography. Silhouettes have actually been around way before photography even existed, and arguably, first found on cave paintings. But it is not called “silhouette” until 1759, when the French people decided to name this style of “cheap cutout portrait” after their disgraced finance minister Étienne de Silhouette.
Sorry France, history is history. However, ironically, the “cheap” silhouette became a well-known form of art today – Paper cutouts, paintings, shadow plays, and photography. Silhouette may have a bad start, but it is definitely interesting as a subject. Just how do we do silhouette photography? Read on to find out!

NAVIGATION
TABLE OF CONTENTS

Section A |

Section B |

Section C |

Extra |

Closing |
SECTION A
BASICS & EQUIPMENT
All right, before we start with the actual steps of silhouette photography, let us walk through some of the basics, and the gadgets that we need.
WHAT IS SILHOUETTE PHOTOGRAPHY?
A silhouette is defined as a view of an object or a scene consisting of the outline and a featureless interior, with the silhouetted object usually being black.
For the lost souls who somehow stumbled on this guide and have absolutely no idea what a silhouette is – It is nothing more than just an outline of a solid figure. So in silhouette photography, we particularly aim to capture only the outline of the subjects.
While the idea of “common photography” is to capture well-exposed photographs to tell a story, a silhouette somewhat does the opposite. It leaves subjects that are featureless, leaving space for the viewer’s imaginations.
RECOMMENDED EQUIPMENT
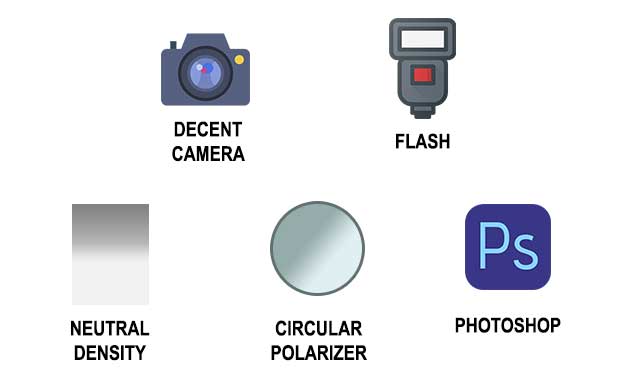
Some people may think that silhouette photography is an advanced technique and requires “special” equipment… but it is not. Really. To get started, all we need is a simple decent camera. Don’t worry if you don’t have an expensive professional camera, we can even take silhouettes using smartphones.
So long as the smartphone allows you a certain degree of manual controls (change shutter speed, ISO, or a silhouette mode), that should do the magic. But to do better silhouette photography, I will still recommend having some decent gadgets.
- Flash (or any bright light source)
You might need this when trying to create silhouettes indoor. - Circular Polarizers Filter (CPL)
These may come in handy when shooting outdoors against the sky, as they do somewhat boost the color contrast. - Neutral Density Filters (ND)
May come in handy when trying to control the exposure levels, where parts of the scene are overly bright.
EDITING SOFTWARE
Don't have a copy of Photoshop yet? Click on the banner below to check out an offer.Don’t want to spend any money? Check out the alternative free GIMP.
SECTION B
HOW TO SHOOT
So far so good? Let us now move into the steps on how to actually take silhouette photos.
STEP 1) COMPOSITION & IDEAS
WHEN SHOOTING OUTDOORS
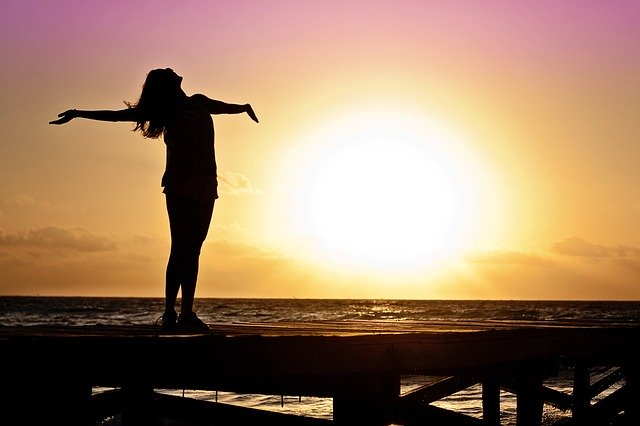
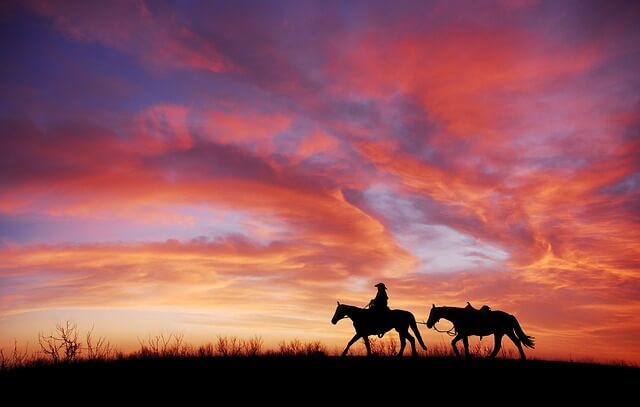
The number one requirement of silhouette photography is to shoot against a bright background, and as little light on the subject as possible. This imbalance in the levels of lighting will create the silhouette that we want – Sunrise and sunset are probably the easiest times to catch silhouettes. If not, we can also place the subject against bright sources such as car headlights.
As simple as this “basic requirement” may sound, the challenge here is to actually create interesting shots with silhouettes. For example, a photo of random black sticks against a sunset is probably not going to be very appealing… But when we form, let’s say, heart shape with the sticks, then it will start to attract some attention.
There are no hard rules for the composition, and your creativity is the limit. But since textures, details, and colors are mostly of the equation, silhouette photography is rather dependant on using shapes to create compelling photos.
WHEN SHOOTING INDOORS
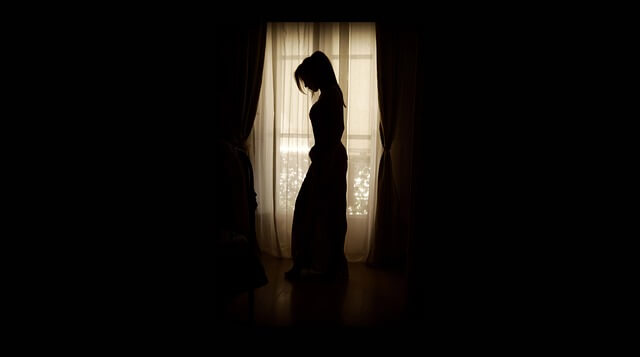
Yes, we can shoot silhouettes indoor as well – Bright windows, doors, balconies are the “usual best bets”. If not, we just have to create our own bright background by “blasting” a flash onto a backdrop or wall.
TIP – BACKGROUND INTEREST
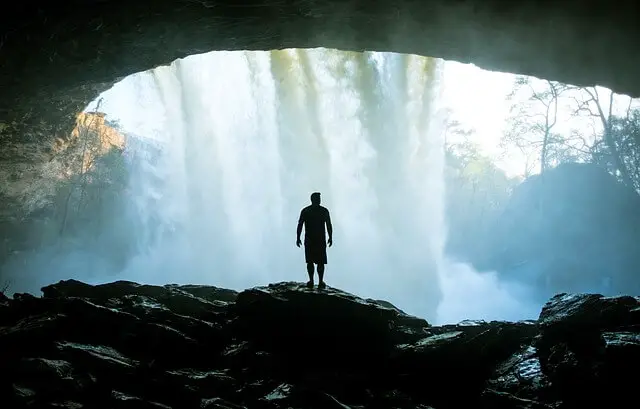
Yes, the silhouetted subject is the hero within the frame. But do consider that sometimes, it may be good to also include background interests such as trees, waterfalls, windmills, buildings, etc…
TIP – SILHOUETTE ACTION
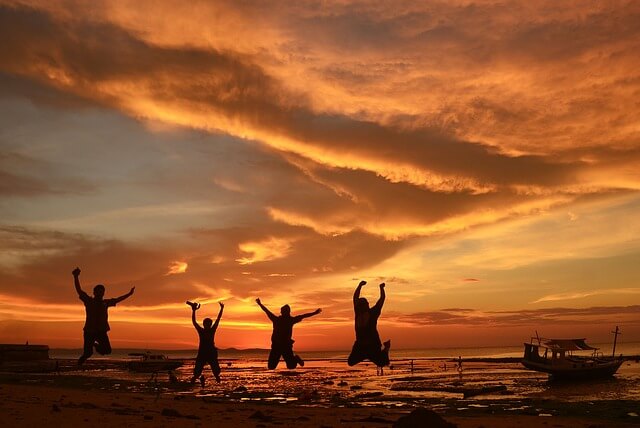
Who says that silhouette photography has to be boring and static? A few trees and rocks? Yawn… Not in this age. Here are a few simple action-packed ideas that you can add to your photo:
- Jumping – mid-air action!
- Sports action – running, cycling, skateboarding, basketball, etc…
- Throwing things, add drama by flipping a cape or long scarf.
STEP 2) THE CAMERA SETTINGS
Which settings should we use for silhouette photography? There is sadly not a “one size fits all magic setting”, but the whole idea is to adjust the exposure to the bright background, keep the subject intentionally dark; So long as the subject is underexposed, it should somewhat work.
SHOOTING IN MANUAL
These are my usual manual settings, which could be wrong. Use it as a set of general reference, not something to strictly follow along.
- The aperture is probably going to be f/4 and above. Because we want more depth of field to capture the distinct outlines, and we want to intentionally keep the subject underexposed.
- Shutter speed is sort of an open factor. But in general, keep it “fast enough to prevent a blurred image”, likely to be at least 1/250 sec. But if you are still getting details on the subject, rebalance it with even faster shutter speed, use a smaller aperture, or lower ISO.
- We probably won’t even need to deal with the ISO… Just keep it as low as possible (as usual) to lower the noise level.
- Finally, remember to shoot in the RAW format if supported – RAW photos simply contain so much more data, and retains plenty of image quality even after editing.
SHOOTING IN AUTO
Yes, shooting in the auto mode can work for silhouette photography. But with today’s “intelligent” cameras, auto-mode will always go for an overall well-balanced exposure when not set to the “silhouette mode”.
That is not what we want, and it is a problem when cameras don’t have an “auto silhouette mode”. In such cases, we can play with the lock exposure feature to “trick” the camera into using a different setting.
- Set the metering mode of the camera to “spot” or “centered”.
- Point the camera at a bright spot, and let it meter the exposure.
- Press and hold the exposure lock button.
- Re-frame the composition, focus, then take the actual shot.
If the photo is still too bright to too dark, simply retry by pointing to another bright spot. We can also further tweak the exposure level by using exposure compensation.
LAZY NEGATIVE BRACKETING METHOD
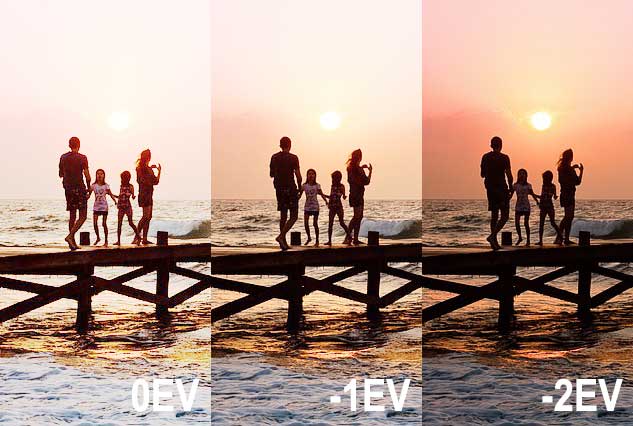
The above manual and auto settings too much of a hassle to deal with? Then here’s a “lazy way” to do it – bracketing. For the beginner photo ninjas who have not heard of it, bracketing simply allows us to take multiple shots at different exposure values. For example, when we set a bracket of 3 shots at 1 stop difference:
- The first shot will be at 0 EV, as per “normal” exposure.
- The second shot at -1 EV, an underexposed shot.
- Finally, the last shot at +1 EV, an overexposed shot.
What’s the use of this in silhouette photography? We can set all the brackets to a negative EV. That will give us 3 shots at 0 EV, -1 EV, and -2 EV. Yep, we can just shoot in bracketed auto shots, then “cherry-pick” which is the nicest one.
STEP 3) REVIEW THE SHOT
Well, this is not so much of a third step… But remember to review the shot on the spot, the days of film are over. Shoot, review, change the settings, correct the pose, do what you must. Get the shot correct on the spot, not to regret later at home.
SECTION C
EDITING
Editing is optional, but hey, no harm in making the shots look better. Here is how I generally edit silhouette photos in Photoshop – Again, feel free to take this as a point of reference, not a “must do it this way” iron rule.
GENERAL ADJUSTMENTS
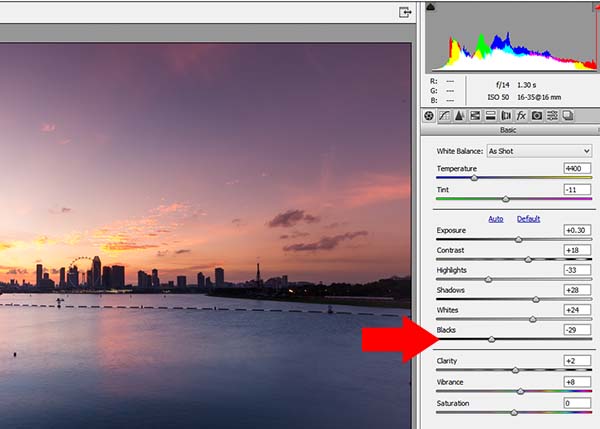
If you shoot in RAW – Camera Raw should fire up when the photo is opened in Photoshop. Lightroom users, Camera Raw should also fire up when a raw photo is selected. Don’t worry, it is also possible to use camera raw with JPG files. Open the JPG file > Filter > Camera Raw Filter. There are a whole bunch of adjustment sliders here, but in general:
- I personally love to reduce the blacks and boost a bit of the shadow. This will help to darken and define the silhouette shapes even more.
- Boost the whites, lower the highlights. This will brighten the background a little more, help to separate the dark silhouette shapes from the background.
- Finally, give it a dash of contrast – Make things pop a little more.
But well, this is my personal preference after all – Feel free to play around, and see what works best for yourself.
CLEAN UP THE PHOTO
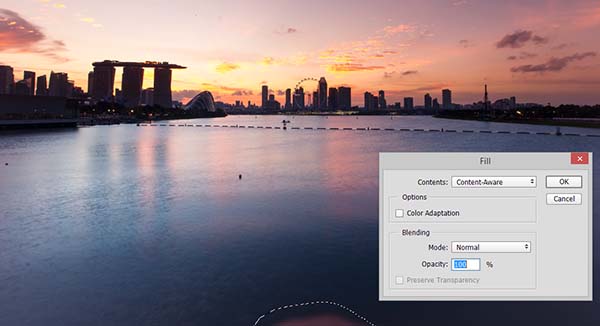
After the adjustments, there is nothing too fanciful left to do – Just clean up a few dust spots and pieces of rubbish. Select the area with the marquee tool > Edit > Fill > Content-Aware. Alternatively, we can also the healing brush tool.
EXTRA
USEFUL LINKS
That’s it for all the basics, here are a couple of inks that may be useful to you.
LINKS & REFERENCES
- How to Photograph Silhouettes in 8 Easy Steps – Digital Photography School
- Silhouette Photography – Picture Correct
- 10 Tips for Taking Stunning Silhouette Photos with Your Smartphone – EyeEm
YOUTUBE TUTORIAL
Too much text to read, here’s a YouTube tutorial.
CLOSING
WHAT’S NEXT?
Thank you for reading, and we have come to the end of the guide. I hope it has helped you to better understand, and as my usual advice goes – Reading will only give you this much knowledge. Getting out to practice, and actual experiences are the way to go. If you have anything to add to this guide, please feel free to comment below. Now go shoot, and have fun!