INTRODUCTION
ADVANCED LIGHTING
Welcome to a beginner’s guide on the photography studio lighting basics, and congratulations on coming this far! When it comes to studio lighting, some beginners will probably shy away, suddenly collapse, foam in their mouth, and mumble something about “too expensive” or “too difficult”.
Well, studio lighting really isn’t that big and scary. If one already knows how to use a flash, then the next step is to put it onto a light stand, pop a softbox on. This then, arguably, becomes a one-light studio setup – It’s really that simple.
But of course, studio lighting is so much more than just a single flash. There is a lot of different equipment, techniques, and lighting setup. Let us slowly walk through some of those in this guide, read on for more!
NAVIGATION
TABLE OF CONTENTS

Section A |

Section B |

Section C |
|

Extra |

Closing |
SECTION A
STUDIO EQUIPMENT
Welcome to the confusing world of studio equipment, there are a ton of gadgets, and new ones just keep popping up over the years – Let’s start with an introduction of some of the common gadgets.
LIGHTS
CONTINUOUS VS STROBE
When it comes to the world of lighting, there are 2 general “types” of equipment:
- Continuous lighting: Once turned on, the light will remain on.
- Strobe lighting: Fires one bright burst of light.
Strobes are generally a lot more powerful than continuous, but they are not “better” per se… Each type of lighting still serves its own purpose.
FLASH
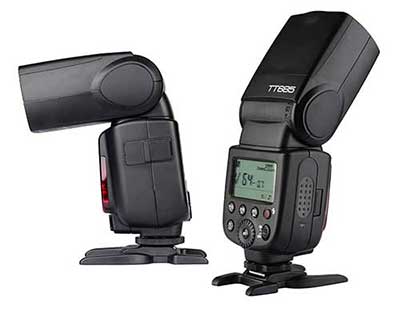
You should already know this one… Flash units are pretty much what most beginners start with, and please don’t be mistaken – these are still good for studio photography.
STUDIO FLASH STROBE
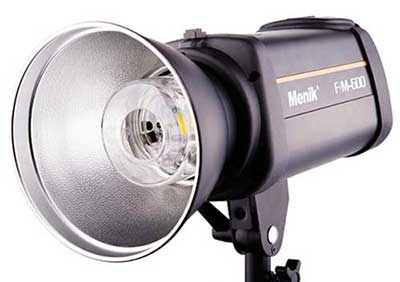
The “big guns” of studio lighting and the name can be rather confusing. These can be called:
- Strobe light.
- Studio strobe.
- Studio flash strobe.
- Monoblock Flash.
While they all seem to refer to the same thing, please take note that “monoblock” is an “all-in-one” gadget – The wireless receiver, battery, flash, and possibly a continuous LED light is all built into a single block; Yes, some strobes require a separate battery pack to work.
LED VIDEO LIGHT
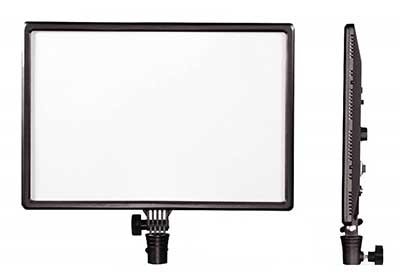
LED video lights catapulted to popularity with their slim profile, low power consumption, lightweight, portability – All while still being able to produce some very decent lighting.
WIRELESS CONTROLLERS
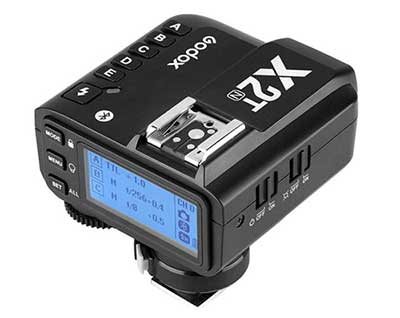
So, when we put the lights into a softbox, ever wonder how we trigger them? This is where the wireless controllers come into play. They work in a pair –
- Transmitter – Mounted on the camera, this one sends out the “fire flash” signal as we take photos.
- Receiver – Mounted on the flash, the one receives the “fire flash” signal.
Then comes the slightly confusing parts:
- Transmitter-receivers are not universal – They only work within the same brand or family. For example, a Godox transmitter will only work with a Godox receiver.
- Some flash units have a built-in wireless receiver, we don’t need to mount another receiver.
- There are gadgets called “transceiver”, a combination of both transmitter and receiver. These can be mounted on either the camera or flash.
STANDS
LIGHT STANDS
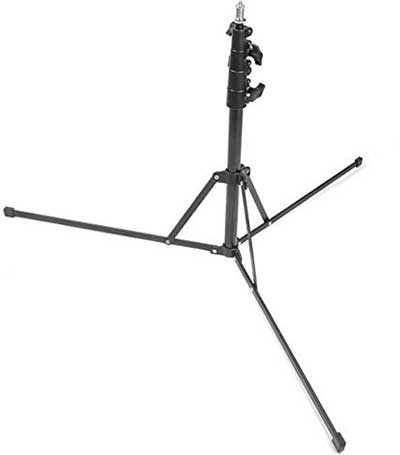
Captain Obvious. This one is where we put the lights on, but one small thing to watch is the weight limit. Not a good idea to put a heavy strobe light on a flimsy stand, have it collapse, and spend hundreds on repairs.
LIGHT STAND MOUNT
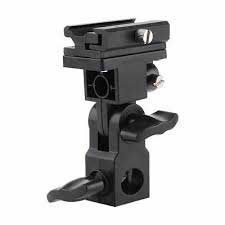
Now, you may have noticed that light stands only come with a single standard screw head… So, how do we mount a flash and softbox on? This is where we need these light stand mounts, but please take note that there are a lot of variations.
- Hot shoe mounts for flash units, with a slot for umbrellas.
- Bowens mount.
- S-Type mount.
- Adjustable ball heads (just like tripods).
- Swivel sockets.
The list can go on forever, so please do some of your own research to get the correct one that will fit your equipment.
BOOM ARMS
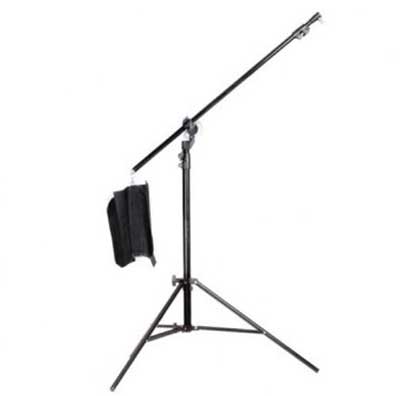
This is used for top-down lighting. We will usually put a counterweight at the other end to prevent disaster… This is usually just a bag to put heavy stuff such as cans of beer.
BACKDROP

Essentially 2 heavyweight light stands with a pole across. Not really necessary, but these come in very handy to create whatever colored backgrounds.
SOFTBOXES & MODIFIERS
UMBRELLAS
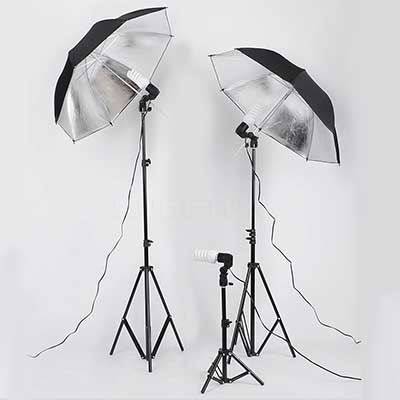
Not the usual umbrella… The ones we use in photography are usually white or silver to reflect light, occasionally gold.
REFLECTORS
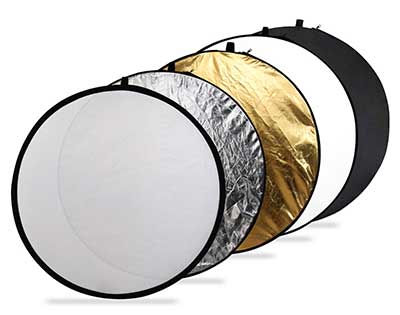
You should know this as well… Used to bounce light off, comes in all sorts of funky colors.
SOFTBOXES
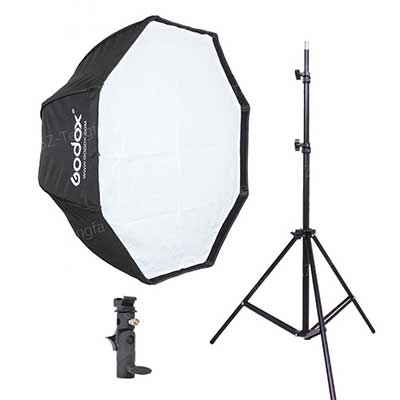
A staple of studio equipment. Softboxes usually come in octagon, rectangular, or square shapes. But kind of a common sense thing though, the difference is with the size of the softbox, and the area of light you need. For example, tall rectangles are probably better for full portraits and octagon for headshots.
LIGHT MODIFIERS
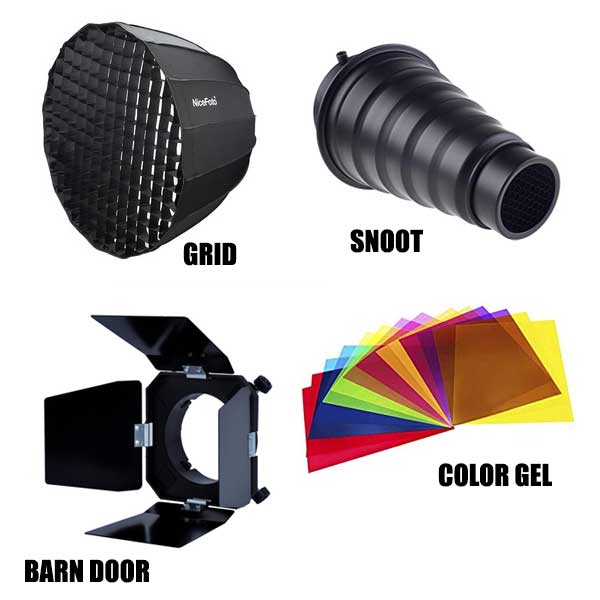
- Grid: Attached to softboxes. Restricts the angle of the light, so that we don’t get light spills.
- Snoot: Focuses the light on one small spot.
- Barn Door: Adjustable leaves to direct the light where we want.
- Color Gels: Adds funky colors.
MORE EQUIPMENT
Of course, there are a lot more gadgets in a studio, let me just put some here – Smoke machines, bubble, snow, fans, disco balls, etc…
WHAT TO START WITH!?
Yes, that is a lot of equipment, and it is easy to get lost just trying to start. The problem is, everyone has a different starting line, and probably have different ideas in mind on their own studio setup. But in general, I will recommend the following raw basics:
- Just a single flash unit with built-in wireless (not studio strobe).
- Wireless trigger.
- Light stand.
- Light stand mount.
- Octagon softbox.
Don’t need to break the piggy bank, if you go for good affordable brands such as Godox, Selens, Andoer, and YongNuo – All of these can probably be done for about $150.
SECTION B
BASIC STUDIO LIGHTING SETUP
So far so good? Let us now move into how to actually do a basic studio lighting set up.
FOR THE BEGINNERS – START WITH ONE!
When it comes to studio lighting, how many lights do we need to be considered “a studio”? Interestingly, I cannot find a textbook answer to that. I guess that we can even call a one-light-setup a “mini-studio” if we want.
That is exactly what I will recommend for the beginners, don’t overwhelm yourself with too many things. Just start with one, get yourself comfortable with off-camera lights – How to set the light stand, put on a softbox, where to place it, angle it, what settings to use, what kind of effects will it produce.
3-POINT LIGHTING
When you are comfortable with the one-light setup, I will recommend exploring the 3-point lighting, a very classic setup in portrait and studio photography:
- Key Light: Sometimes also called the main light – Used to illuminate the subject.
- Fill Light: Usually positioned beside the key light, used to balance the overall lighting.
- Back Light: Sometimes also called the rim light – Coming from the effect that as it lights up the back of the subject, it also highlights the outline of the subject.
TIP – ONE AT A TIME
Following up with the above, a “sudden jump” from one to three lights may also be quite a challenge. This is where divide-and-conquer comes in handy.
- Start with only the main light – Just get the overall frame and settings correct.
- Then add in the fill light, do some minor adjustments where required.
- Finally, include the back light, also any color gels you wish to use.
Yep, it’s really not that bad once you get comfortable with one light – All the rest are pretty much “add-on” and adjustments; Deal the lights one at a time, and you will do just fine.
SECTION C
COMMON STUDIO LIGHTING SETUP
There are endless ways to set up the lights in a studio, and here are a few of the common examples and styles for your reference.
HIGH KEY

High key is a “well-lit and bright” style. It is commonly found in those glamour shots, on the cover of magazines.
LOW KEY

Low key is the opposite of high key, and it is a dark dramatic style.
CLAMSHELL LIGHTING

Also commonly known as the “butterfly lighting”, this is a class that all portrait photographers should know. The term clamshell comes exactly from how the lights are positioned like a clam:
- The main light is mounted on top, pointing downward.
- A reflector is down at the bottom, pointing upward.
SPLIT LIGHTING

Split lighting is a stark contrast where one side of the subject’s face is lit, and the other is dark. Very easy to pull off with one light, and adds a lot to the dramatic factor.
REMBRANDT LIGHTING

Rembrandt lighting is named after the Dutch painter Rembrandt, who always used this style of lighting in his paintings. It is usually done with a minimal 1 light plus reflector – Signified by a “triangle of light under the eye” on the subject. A personal favorite of mine that adds dramatic factors to the photo, without making it look too “fake”.
LOOP LIGHTING

Loop lighting is named after how it creates a “shadow loop” beside the nose of the subject. Probably the easiest to pull off with a single light placed at the correct position.
EXTRA
USEFUL BITS
That’s all for this tutorial, and here is a small section on some extras and links that may be useful to you.
LINKS & REFERENCES
- Continuous Lighting vs. Strobes: The Pros and Cons of Each – PetaPixel
- A Beginner’s Guide to the Basic Studio Lighting Setup for Portraits – PetaPixel
- 8 Options To Consider When Building a Studio Lighting Kit – B&H
- 8 Portrait Lighting Setups Every Photographer Should Know – Borrowlens
CLOSING
WHAT’S NEXT?
Thank you for reading, and we have come to the end of the tutorial. Dealing with studio lighting may be a little daunting at first, but start simple with just one light. That should be a good introduction to studio setups, and easier on the wallet as well; Whenever you are ready to “upgrade”, just add more lights to the setup.
Don’t need to rush, always remember the basic 3-point lighting. What kind of shots do you want to produce? Where to place the lights? Deal with the lights in a step-by-step manner, and things will be just fine. If you have anything to add to this guide, please feel free to comment below. Good luck and happy shooting!