INTRODUCTION
WHITE BALANCE DOES NOT MAKE SENSE?
Welcome to a beginner’s guide on white balance. When I first started photography and heard about white balance, it was one of those things that totally did not make any sense. How do you balance white? How do you balance color? What is there to balance? As things turn out, everything about it does make sense, and white balance is important if you want to achieve more color accurate photos. So read on to unveil the mysteries of white balance.
NAVIGATION
TABLE OF CONTENTS

Part 1 |

Part 2 |

Part 3 |

Closing |
PART 1
WHAT IS WHITE BALANCE?
Just what is white balance and what does it do? Why is it so important in photography? This section will the age-old questions.
THE WILD COLOR CASTS
Before we go into white balance, this is a quick recap for those who might have missed it. Remember there is something called color temperature? Of how colors can be “hot and cold”?
- Color temperature is measured in Kelvins.
- The lower the color temperature, the more red/orange it is.
- These shades of red and orange are called warm colors.
- The higher the color temperature, the bluer it is.
- These shades of blue are called cold colors.

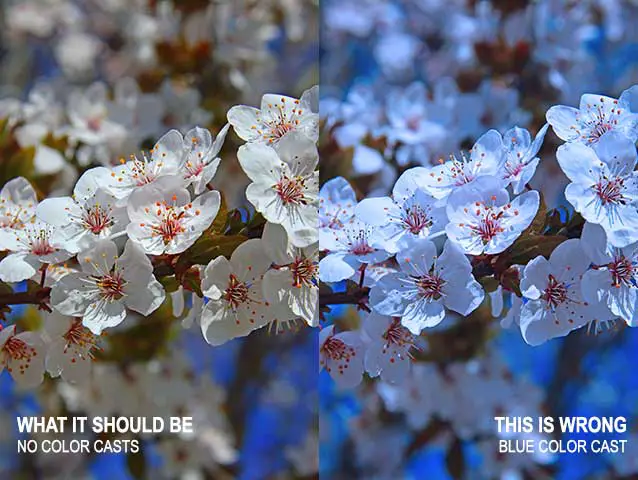
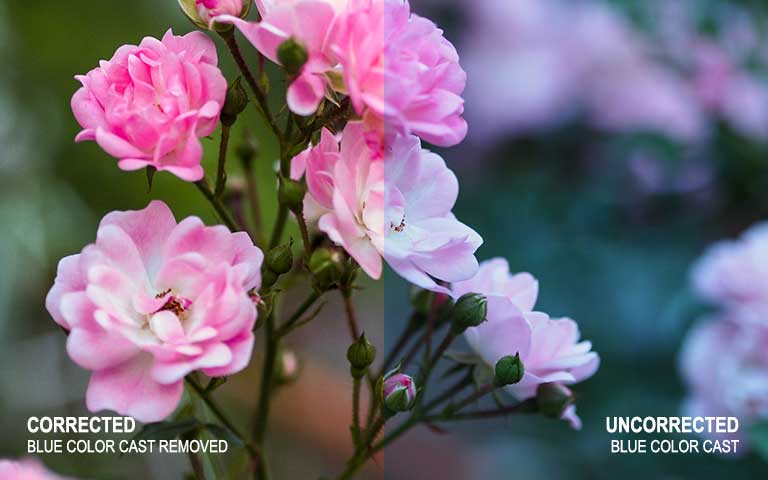
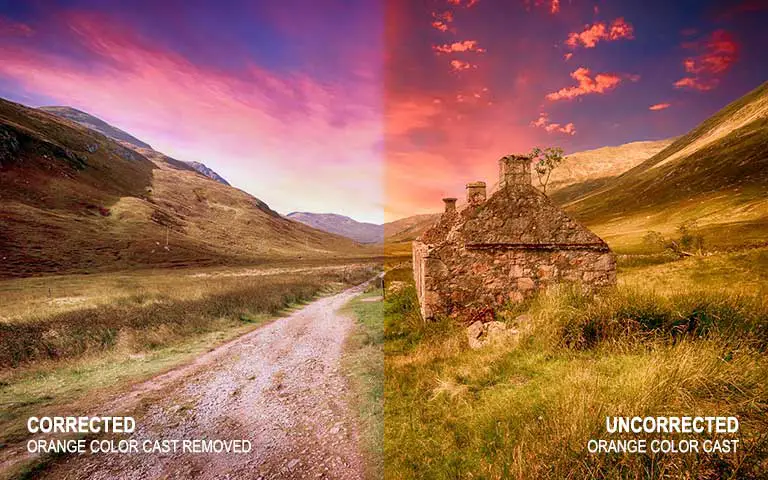
This is an important step to understanding white balance because this is kind of the root of the problem. Most people probably don’t notice it, but the sun will cause an orange color cast during sunrise/sunset, and the blue color cast during the day. Even when you are indoor, artificial light sources will still have some sort of color cast.
Now, here comes the problem. Our human eyes and brains are smart enough to “autocorrect” the color cast and tell that a white flower is white under the blue sky. But to a camera, it is very much adapting information from the scene and doing some guesswork on what the actual colors everything should be.
WHITE BALANCE TO THE RESCUE
This is where white balance steps in to rescue the day – It corrects the unrealistic color casts, and gives you a more accurate color profile; Just like the way our eyes and brains work. No, it will not turn an orange sunset into blue daylight, but it does enough so that you don’t get an overwhelming orange photo.
Just how do we do white balance then? Most modern day cameras should already have “built-in white balance by default”, and you only have to set it to the auto white balance mode. You really don’t have to worry too much, as auto white balance does a pretty good job most of the time.
PART 2
HOW TO WHITE BALANCE
Now that you know what white balance does? How do we actually adjust white balance in cameras? This section will walk you through a couple ways to do so.
MANUAL WHITE BALANCE
As much as auto white balance is accurate most of the time, it can still go wrong in rare situations… Or maybe you just want to deliberately skew the white balance for creative effects. These are the times when you have to exercise some control over the camera. In general, there are three ways to do manual white balance:
- Use a preset mode.
- Manually set the color temperature.
- Do custom white balancing on your camera.
THE PRESET MODES
This is the easiest semi-auto way to set the white balance. Most cameras should already have some of these white balance preset values, for example:
| Mode | Color Temperature |
| Daylight | 5200 K |
| Cloudy | 6000 K |
| Shade | 7000 K |
| Fluorescent | 4000 K |
| Tungsten | 3200 K |
All you need to do is to set the camera to use one of these preset modes accordingly. But please take note that every camera has a different set of preset values. Also, I will not go into the tiny details of “how to change the settings” as it is different on every camera.
MANUALLY SET THE COLOR TEMPERATURE
Alternatively, if you want absolute control over the white balance on your camera, set it into the manual white balance mode and dial in the exact color temperature. Not recommended for the complete beginners… But then, maybe it will be a fun learning experience to see how it works.
GREY CARD CUSTOM WHITE BALANCING
What if you want super accurate white balance? There should be a “custom white balance” mode on most DSLR and mirrorless cameras. Not going into tiny details again, but in general :
- Switch to the custom white balance mode.
- Place a white balance grey card in the frame where you want to shoot, or put on a more convenient white balance lens cap.
- Take a photo.
- The camera should automatically evaluate and adjust accordingly.
That’s it, but please remember to not fire the flash, and place the gray card where you want to frame your shot.
PART 3
WHITE BALANCE TIPS
Before we officially close this guide, this final section will explain a few things that you need to consider about white balance.
AVOID WHITE BALANCING ON THE SPOT
Now that we have walked through all the basics of white balance, I shall share one personal tip – Do not be too fixed on doing white balance and getting “color accurate” on the spot, when you are shooting. Just let auto white balance do its job and enjoy shooting… Don’t waste your time messing with the settings and miss out on a lot of photographic opportunities.
In this digital age, white balance and color balance can always be done later in the editing stage, in the comfort of your own home. Which brings me right to the next tip.
SHOOT IN RAW!
A final word of advice for those of you who are still shooting in JPG – Switch to RAW if your camera supports this file format, and life will be a lot easier (and better). The reason for adopting RAW is simple – RAW files are lossless and they contain a lot of data. Meaning, you can easily remove a color cast and adjust the image with a minimal quality loss. As for JPG files, they do work, but they don’t have as much data. Editing JPG files to remove a color cast can also result in losing some image quality.
CLOSING
IS WHITE BALANCE REALLY THAT IMPORTANT?
Here comes the end of the tutorial, and yes, white balance is important in getting color accurate photos… It is only common sense that we do not want photos with funky colors. But generally, there really isn’t much to fuss about with white balance. The automatic correction already does a pretty good job, and you can always correct the color cast in photo editing.
However, are there still merits in doing manual adjustments? Personally, I really don’t see a need to hassle about with white balance while shooting… Not until you are shooting with JPG, or you are an absolute purist who rejects photo editing.
Still, it is good for a beginner to play about with the manual white balance to figure out how it works. So now, go shoot and have fun! If you have questions, feel free to drop them in the comments below.