INTRODUCTION
RECOGNIZING COSPLAY PHOTOGRAPHY
Welcome to a guide on the cosplay photography tips. Cosplay is actually nothing new, and it has probably been around since the 1970s. But somehow, the world of photography doesn’t seem to recognize cosplay photography as a legit “school” on its own yet.
To you who chose this less recognized path – Well done! Cosplay photography is actually pretty fun to do, even as a casual hobby. Ignore all the toxic trolls who say that cosplay photography is for kids, they do not know the dark side of the force.
Cosplay photography may be relatively new in the world of photography, some might not even acknowledge it, but let us put some darkness light into it. In this guide, let us walk through some tips on how to bring cosplay to life – Read on to find out!
NAVIGATION
TABLE OF CONTENTS

Section A |

Section B |

Section C |

Section D |

Section E |

Closing |
SECTION A
THE PHOTOSHOOT PROCESS
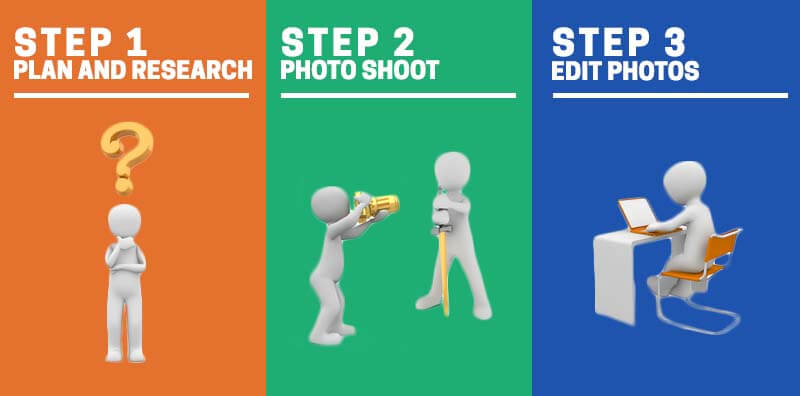
Let us first start with an introduction of this “thing” called “photoshoot process”. What it means is that photoshoots are divided into a 3 stage process:
- Pre-shoot (before the shoot)
- During the shoot
- Post-shoot (after the shoot).
Some of you guys should be lost now. Why is there a need for all this hassle? Is it not better to just shoot and post on the Internet? Well yes, but you may already be adopting the shooting process without yourself knowing. Buying the tickets to a con (pre-shoot), shooting during the con, and posting pictures on the Internet after the con (post-shoot).
TIP 1) ADOPT THE PHOTOSHOOT PROCESS & DO MORE
Now that you are aware of the photoshoot process, here is how we turn snapshots into epic shots – We have to do more than just “point-and-shoot” and do more during each stage of the shooting process.
- Prepare and do research homework before the shoot.
- Apply some ninja techniques during the shoot.
- Editing the photos after the shoot.
That said, I am not forcing anyone to join the dark side adopt a complicated shoot process. You decide your own level of photography and what is fun for you. If you think that it is a hassle to edit photos and you want to keep your photos “pure” – Go ahead and skip editing. This guide ultimately shares a “generic complete” approach to shoots, and you can choose to adopt whatever you think is good.
SECTION B
PLANNING & PREPARATION
Before walking into a shoot, it will be wise to do some of your due diligence homework. Don’t walk into a shoot like a boss, but end up like a noob. Don’t be lazy with the preparation work, they can be a pain, but it ensures that things don’t go wrong.
TIP 2) PLAN A FITTING THEME FOR YOUR SHOOT
Which series do the characters belong to? Is it a dark, evil character? A goodie character? Medieval, modern, fantasy or futuristic setting? You need to come up with a fitting theme or concept for your photoshoot – Remember that it is almost a taboo to go totally out-of-character. For example, a cool character acting all cutesy.
Just don’t try to stick broken pieces together during the shoot, which will usually end up badly and reflect on your photos.
TIP 3) PLAN THE SHOOT LOCATION
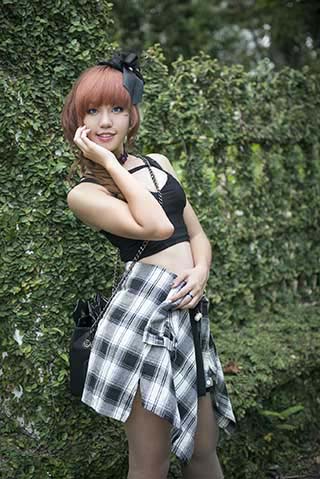
Do some simple research and find the perfect backdrop for your shoot. Even if it is at a convention, look for walls, gardens, or a background that is less crowded and more suitable. For private shoots, here are a few considerations for choosing a location:
- Indoor or outdoor?
- Are shoots allowed on that location?
- Do you need a permit?
- Can that place fit your photoshoot group?
- What facilities does that place have?
- Does it have a place for the cosplayers to change?
TIP 4) SCOUT THE SHOOT LOCATION
No harm scouting your chosen shoot location beforehand. Take a few location reference photos for yourself, keep for future use or forward it to help some friends. It is also good to scout ahead so you don’t get lost on shoot day and to confirm if the area is open for shoots.
TIP 5) CHOOSE A TIME AND DATE, CHECK THE WEATHER FORECAST
Now choose a good date and time for the shoot. If you are shooting outdoors, it is always good to check the weather forecast first. Remember to come up with a backup plan too, just-in-case things go wrong.
TIP 6) PREPARE POSES AND SHOOT IDEAS

Don’t wait for cosplayers to pose for you. As a photographer, you make your own photos. Convey your ideas to the cosplayers even before the shoot, and make sure they agree to it. Need some random poses? Visit Senshi Stock.
TIP 7) DOWNLOAD REFERENCE PHOTOS
Don’t go in unprepared. Just download a bunch of reference photos and pictures that you find interesting on your phone. They always come in handy during shots regardless.
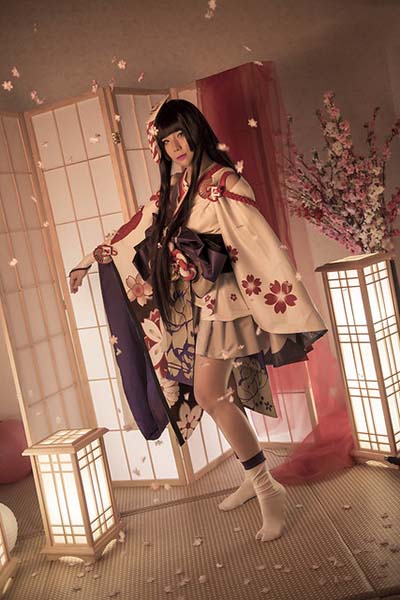
TIP 8) PREPARE YOUR PROPS
What props? Do photographers even need props? Yes, and there are all sorts of props that you can use to spice up your image – flower petals, confetti, feathers, bubble gun, etc… You can buy all of these online for just a few bucks, and they don’t take up much space. I have dedicated a whole section below on props that you can use.
TIP 9) THE EMERGENCY KIT
What now?! Does the photographer have to be a medic as well? Well yes, a cosplay medic. My “emergency kit” consists of a few simple items :
- Band-aid
- Anti-Mozzie spray
- Scissors
- Tape
- Rubber bands
- Safety pins
- Fishing line
Yep, these are not much as an “emergency kit”, but they did good for the past few years and they are permanently stuck inside the bag.
TIP 10) MAKE SURE YOU HAVE ALL THE GEAR
Pack your bags, make sure that you have all the gear you need. Going into a shoot with a flat battery or missing lens is going to put your head on the chopping board.
SECTION C
SHOOTING TIPS
Cosplay photoshoots are so much more than just pointing your camera and snapping away. If you want great shots, then know that lights, action, camera, and fun – They all go together.
TIP 11) TALK, DON’T BE A CREEP.
Never go into a shoot without a word, then disappear like a shadow into the darkness. That is just scary. If you want to shoot cosplay photography, then don’t hide behind the wall… don’t stand in a corner, or start mumbling in some unknown language.
You have stood behind the camera, but have you ever tried standing in front of it? If you are aware, there is always this scary person with a big camera. Getting to know the cosplayer during the shoot will lighten up the mood, and shooting with friends are always much easier than with strangers.
P.S. I am a quiet person too, but I still talk and socialize. I love people in the cosplay circle who are also gamers, anime fans, and photographers.
TIP 12) SET THE MOOD
Happy series? Just have some fun and keep the mood light. Dark series? Play some dark songs… but keep the mood light. Just by talking and setting the right mood will do a lot of magic to your photos, and most newbies don’t “make full use” of this.
Well, I admit. I tend not to talk a lot in group shoots or when the time is limited. But whenever time permits, you should always take some time to chat with the cosplayer and share some reference photos. Talk about a particular scene in the anime/movie and set the mood on the right track.
TIP 13) BE THE ROLE MODEL
Show your ideas, demonstrate by posing them yourself. Go into the “shall we try this” mode. Lead, not slave drive.
TIP 14) OVEREXPOSE YOUR PHOTOS (A LITTLE)
I know, many people preach about “perfect exposure” and how an over-exposed photo is bad. But over the years, I find that overexposing portraits a little does its own good in hiding some flaws. Plus, this is a pretty common technique used everywhere to produce that clean and simple look.
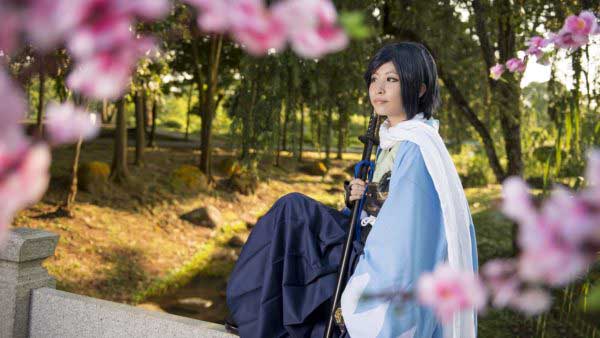
TIP 15) MIND THE SUN (WHILE YOU ARE OUTDOORS)
When shooting outdoors, always mind the direction of the sun. We don’t want cosplayers to directly face the sun on a clear day and have them start squinting. It will be a smart move to use the sun as a backlight instead… or bring a super large softbox and use the sun as an over-sized flash.
TIP 16) CHIMP YOUR PHOTOS
The days of film are over. If you have a digital camera, then you can view the photo after each shot. Then chimp on it. Make sure to get every shot right, and zoom in to check if your photo is sharp. Get the shot correct on the spot, and not regret later at home.
TIP 17) SHOW YOUR PHOTO TO THE COSPLAYER
Show the photo to your cosplayer when you are done chimping with it. Showing your shots to the cosplayer puts him/her at ease that you are not some perverted uncle/auntie trying to take lewd shots. If it is a bad shot, just show it and think of ways to improve on the shot. If it is a good shot, compliment!
TIP 18) DON’T GET TOO INTIMATE
Some people like to shoot portraits with a wide-angle lens. No problem. Some people like to shoot really up close and personal with the wide-angle. Uncomfortable, but no problem. Have an entire shoot with your camera in the cosplayer’s face? That’s just freaky.
TIP 19) USE THE CORRECT METERING MODE
If you have just started photography and not too sure on which settings to use, let auto and the metering help you.
- If you are shooting close up and don’t mind the background, use the spot metering mode.
- Otherwise, the partial metering mode should work just fine.
- If you are into environmental portraits, use the evaluative mode.
TIP 20) DON’T ALWAYS SHOOT STRAIGHT

Straight works, but it is just plain boring. Tilt the camera a little at times, it will add some illusion of motion and appear less “static”. Shooting from the top-down and bottom-up angles work too. But don’t be a pervert to shoot up-skirts.
TIP 21) USE THE RIGHT APERTURE
Bokeh whoring is good, but not always correct. When you are shooting a full body or a group, make sure you have sufficient depth of field to capture those details.
TIP 22) FRAME PROPERLY
If you want to frame someone, learn to do it correctly. It is just unbearable to watch whenever the framing goes wrong.
- Full body, 3/4 body, 1/2 body or close up?
- If it is a 3/4 body shot, frame from head to about the knees… and not “full-body minus the feet”.
- If it is a 1/2 body shot, frame from head to about the hips, and not “1/2 body, inclusive of some legs”.
- Make sure that the head is not “chopped off”.
- Make sure that hands and legs are not “chopped off” in an awkward way.
- It is always good to leave a little headspace.
- If the framing looks strange to you, move and recompose.
That said, these are only guidelines for composition. Nothing is set in stone for creativity. The only rule is that, if you have to break the rules for a good shot, break it.
TIP 23) COMPOSE AND FOCUS, NOT THE OTHER WAY
Some beginners may be confused over this one. Just know that there is an advanced technique – compose, focus, lock, recompose then shoot. Not going to teach that here. But if you have just started with cosplay photography, keep things simple and remember these 3 simple steps – compose your frame, focus on the subject, take the shot.
TIP 24) FLASH BETTER
Camera flash, not that kind of “flash”… Some newbies think they can take amazing pictures with that tiny built-in pop-up flash. No, that is horrible. Use it as your last resort. Even a cheap $10 (shipping included) CY-20 Universal Flash and a foldable flash diffuser are way better than that. Just stay away from that tiny popup.
SECTION D
EDITING
So what do we do after the shoot, just pack up, leave and the end? Nope. One does not simply post raw photos online. You have to learn how to edit your photos, make it better, even if it is just a simple touch up.
TIP 25) TOUCH UP YOUR PHOTOS, PURISTS INCLUDED
To edit or not to edit, that has been the question some people asked. After all, there are people who believe that edited photos should really be called “pictures” and not “photos” – We call them purists. Well, there is nothing wrong if you insist on not editing your photos.
But in this digital age, at least learn how to adjust the white balance, colors, contrast and remove a few dust spots in your camera. That will not hurt your “purist pride” now, aye?
EXTRA) HOW TO EDIT COSPLAY PHOTOS
For the Photoshop lovers, you guys might be interested in another of my editing guide (click on the link below). For you purists who hate Photoshop so much, you can burn it into ash, drink it and flush it down the toilet. No. Please don’t.
EXTRA) PHOTOSHOP & THE ALTERNATIVES
Don't have a copy of Photoshop yet? Click on the banner below to check out an offer.If not, there is a free alternative called GIMP, and a whole load of mobile apps:
SECTION E
CHEAP PROPS, ABSOLUTE MAGIC
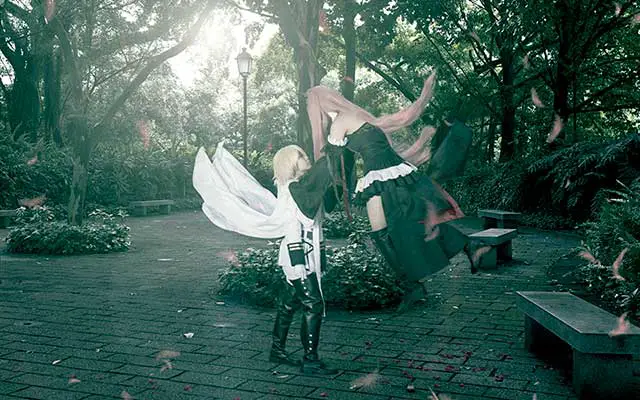
Hey, remember in an above tip that I mentioned props? Have a few bucks to spare? Here are some very affordable props that you can buy, and add magic to your photos. Yep, cosplayers are not the only ones who need props.
Fake flower petals
Grab a whole pack of petals, and throw them into the air. Instant magic.
Feathers
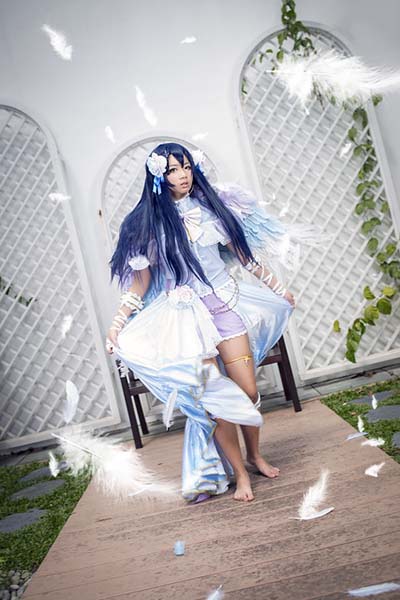
Want more epic? Throw in some feathers.
Confetti
As above… just throw and add to the magic.
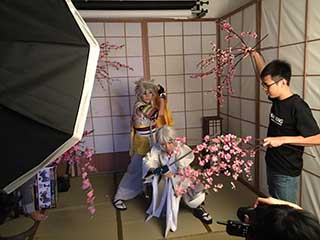
Artificial flowers, vines, and branches
When you can’t get the real thing, get a fake one. It looks just about as nice, and it does not expire.
Bubble Gun
I don’t think I need to explain how to use this one… Run free and relive your childhood dreams.
Nerf Super Soaker
No rain? Create one yourself with a Super Soaker. Just note that you will need some strong lights behind.
CLOSING
MOVING FORWARD
We have come to the end of this guide, and I hope this has been some help to you. No one becomes an expert overnight. It does take some patience, so just review what is good and what went wrong after every shoot – You will definitely become better over time.
Keep on practicing, have fun, and you will become better at it naturally. Good luck and happy shooting!