INTRODUCTION
LOST IN LIGHTING?
Welcome to a beginner’s tutorial on the flash photography basics. So you have just started with using a flash and has gotten overwhelmed by the many technical lingoes? Tried shooting with the auto mode and did not get what you expected?
Well, flash photography may be easy to get started with, but mastering it is another story. Let us walk through some of the flash basics in this guide, and get you started in the right direction. Read on!
NAVIGATION
TABLE OF CONTENTS

Section A |

Section B |

Section C |

Section D |

Section E |

Closing |
SECTION A
THE ABC OF FLASH EQUIPMENT
First, let us start with an explanation of the various technical terms – These are the raw essentials required to understanding flash equipment.
SPEEDLIGHT, SPEEDLITE, OR FLASH?
You might have already heard some people calling it Speedlight, Speedlite, or Flash – Which is the correct term to use? This is probably going to be an early confusion among beginners, so hang on. Nikon calls their flash “Speedlight”, while Canon calls theirs “Speedlite”. Nothing too confusing… Just some branding here and “flash” is the universally correct term to use.
HOT SHOE & INTERCHANGEABILITY

Captain Obvious, you should probably know by now that we mount a flash onto the camera’s hot shoe. But here’s something else that you should be aware of – Nikon, Canon, Olympus, and Pentax adopts the standard ISO hot shoe, while Sony is the odd one using their own proprietary hot shoe mount.
Meaning, the ISO standard hot shoe mount should be able to accept flash units interchangeably – Technically, we should be able to use a Canon flash on a Nikon, or Nikon flashes on an Olympus… But sadly, that is not 100% the case.
While we might be able to mount an off-brand camera flash, some of the features might not work properly. Yes, the camera manufacturers may have followed the ISO standard, but they have also put in their own technologies that are not cross-compatible – Always try to stick to your own brand when buying flash units.
GUIDE NUMBER
The power of a flash unit is commonly measured by a guide number (GN), with the formula GN = distance X f-number. Don’t need to memorize that by heart, as it is also commonly understood that the higher the GN number, the brighter the flash is… But please do be very careful with this GN though, quoting from Wikipedia:
Guide numbers are not an absolute measure of flash power (a property called luminous energy) because they are influenced by other variables, notably the camera’s ISO setting (film speed) and flash coverage angle
Yep, as you might have noticed, a higher GN can be easily “faked” by changing the f-number and ISO setting. For example:
- GN 60 @ f/1.4 ISO 100
- GN 60 @ f/2.8 ISO 400
While both GN are the same, the one at f/1.4 and ISO 100 is definitely a more powerful flash unit.
MANUAL FLASH POWER SETTING
If you have been messing around with manual flash power, you will notice that we need to set some numbers – 1, 1/2, 1/4, 1/32, 1/128, etc… We will not go into the rocket science Math, but in the human terms:
- 1 means “full blast”.
- 1/128 means “as little as possible”.
- 0… is off.
The smaller the fraction, the less powerful the flash power setting. That easy.
RECYCLE TIME
Flash units cannot go on firing like machine guns, and they need to charge up in between each shot. This is called the recycle time, and yes, usually the shorter the recycle time the better… But the “machine gun” flash units are also usually more expensive.
ON AND OFF CAMERA FLASH
This one should be pretty much straightforward.
- On-camera flash: Where we use the flash, mounted on the camera’s hot shoe.
- Off-camera flash: A little more tricky, where we use the flash remotely, controlled with a wireless trigger.
TTL FLASH PHOTOGRAPHY
TTL is a term that you will probably hear very often – But just what the heck does TTL mean? To understand this, we need to go through a 1-minute history lesson.
- In the days long past, the power of the flash has to be calculated manually.
- The photographer will use a light meter, estimate the distance between the subject and flash.
- Then do some death-defying mathematics to estimate the required power on the flash.
Today, things are a lot easier thanks to technology. All the distance and brightness data is automatically collected through the lens (TTL), all the crazy flash power calculations are now done automatically by the camera. But that said, TTL is not perfect. It will still get the wrong settings sometimes, and you may have to manually re-adjust the power.
FLASH SPEC CONSIDERATIONS
If you have not gotten a flash yet, here is a small section on the things to look out when buying one – Feel free to keep this as for future reference.
| Consideration | Description |
| Power | As above, GN is actually not a really good gauge for the flash power – Power is also not everything… For example, we do not need to use crazy floodlights when there are sufficient natural lights. Just get whichever flash is powerful enough for your general usage. |
| Recycle Time | This is a must if you are looking to shoot fast-moving action, and need the flash to go machine gun. |
| Battery Life | It will be bad if the flash runs out of juice quickly. |
| Built-in wireless | It saves you the trouble of bringing another wireless receiver around. |
| Size & Weight | Do you travel a lot? Then you probably want to get a flash that is smaller and portable. |
| Compatibility | The most important factor. Will this flash work with your camera? I.E. If you are using a Nikon camera, buy a flash made for Nikon cameras. |
FLASH RECOMMENDATIONS
No idea which flash to get? Here are a few of my recommendations:
I AM BROKE.
If you are really tight on a budget and just want some extra lights – I will recommend getting the CY20 universal flash. Don’t expect too much out of these though, they are only GN20 and does not support TTL (this is a fully manual flash). But at a measly $10, these are the cheapest flash units you can find in the world.
DECENTLY GOOD ONES.
There are plenty of good flash unit manufacturers out there, apart from the “original” Nikon, Canon, or Sony. The few reputable ones are Godox, YongNuo, Pixel, Phottix, and Neewer. Personally, I started with a YongNuo, and I must say that it is decently good – So good that I am still using it today.
If you have a budget to keep to – I shall recommend the YongNuo YN-560 IV, which has a built-in wireless receiver – Nikon, Canon, Sony. They do cost a tad bit more, but they are quite powerful and will save you some money from buying extra wireless triggers.
BETTER ONES THAT ARE STILL AFFORDABLE.
If you are serious about flash photography, this is what you should be putting your money into. Personally, I will recommend the Godox AD200 – An interesting pocket-sized “flash” that almost has the power of a studio strobe, and also a built-in wireless receiver.
They do come at around US$300+, but for that power and portability? It is well worth the money spent. If you want, you can consider getting the slightly bigger brother Godox AD360 II as well.
SECTION B
ON-CAMERA FLASH
Using the flash on-camera is probably the wiser way to kickstart. Just mount the flash onto the camera, set it to auto, and it just works.
STARTING WITH TTL

How does one start using the flash?
- Mount the flash onto the camera.
- Set the flash to TTL mode (auto).
- Set the camera to shoot in auto or aperture priority mode.
That’s it. As in the introduction above, TTL isn’t going to give you award-winning shots straight out of the box… But it is a good place to start, without having to think too much about all the settings. Just practice and play around with the flash a little bit, when you are comfortable, I will recommend taking a few more steps to further control the TTL:
- Take a shot with TTL.
- If it is too bright, dial in a negative exposure compensation on your camera.
- If it is too dark, dial in a positive exposure compensation on your camera.
- Take a step or 2 back, and see how the light spreads.
Yep. This may not give you that perfect shot again, but just get familiar with how you can still control the power level in TTL – I will leave some links and tips on using a single flash in the extras section below.
P.S. As every flash and camera is different, you are going to have to do your own research on how to do all of these settings on your own – There are simply too many to list out step-by-step here.
WORKING WITH MANUAL

So what if the flash unit does not have TTL? Or you just want more controls? Well, working in the manual mode is not as bad as some people think, and it is pretty much the same game of “guess the flash power”. However, I do not recommend beginners to start with manual flash until they are comfortable with manual exposure.
In manual flash photography, you will not want to put the camera in the full auto mode. If the exposure settings shift around too much, you are going to have a hard time trying to guess the required flash power. This is what I will normally do:
- Shoot in manual or at least aperture priority mode.
- Estimate and set the flash power.
- Take a test shot.
- Re-adjust the exposure and flash power until things look good.
Yep. Manual flash is a little more of a hassle, but it does give you a lot more control over shaping the exposure and lights.
MANUAL OR TTL?
So manual or TTL, which is better? Personally, I have no preference. TTL makes things easier, while the manual mode gives you more control. Just try out both, and use whichever that works for you. But you need to understand that having TTL does not make a flash unit better. Nor is a manual flash inferior by any means. Producing good photos is the biggest winner.
SECTION C
FLASH MODIFIERS
Before moving into off-camera flash, let us talk about the extra toys for flash photography. These are modifiers that we attach to a flash unit to change the way light works – To soften the light, to add colors, or even to focus it on a single spot.
DIFFUSER CAP

The most commonly used basic modifier and it probably came “by default” when you bought your flash. Simply put this on your flash head, and it will slightly soften the light. Not by much, but it’s better than a bare flash. If you do not have one of these, click here to get one (take note of the size of the cap though, get one that fits your flash). Or alternatively, you can wrap the flash head in a piece of tissue to soften the light.
DOME DIFFUSER
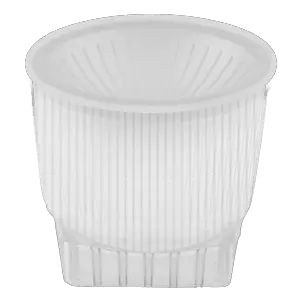
This is what I lovingly call “Tupperware”. The main difference between the dome and other modifiers is that the dome lights everything up to 360°. It essentially turns the flash into a “light bulb”, giving you better all-round-better-distributed lighting. There are 2 versions of this – the dome and the sphere.
MINI SOFTBOX
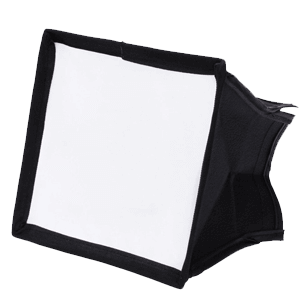
This is what I prefer to use even though it looks somewhat stupid. A 9-inch mini softbox increases the surface area and gives you a much nicer plus softer light… Much better than the tiny diffuser cap.
REFLECTOR CARD

These foldable reflector cards are also what I call “ping-pong bat”, because it looks like one. It works by bouncing the flash off the reflective card – Remember the equation of bigger area equals softer light? I will rank this as “better than a cap, worse than a softbox”.
SNOOT
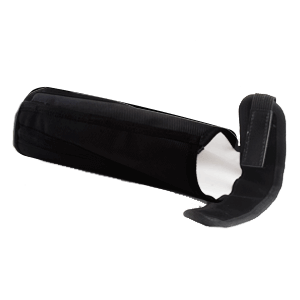
This is just the same ping-pong bat above but rolled up to become a baseball bat. The snoot is used to direct the flash onto one specific spot. Very useful for those product shots with an entirely dark background.
RING DIFFUSER BOX
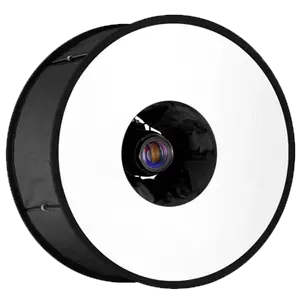
These ring diffuser boxes are not really portable, but they are one of the best for portrait photography. Same old “bigger area softer light” equation – This has an even bigger area than the mini softbox, so you can expect some nice lights from this. Beware though – I will not recommend using a wide-angle lens with the ring box. Use a 50mm or more.
COLOR GEL
This pack of transparent paper is cheap, and it adds colors to your shots.
WHICH MODIFIERS TO GET?
My personal recommendation is :
- The diffuser cap is a must. It may not do much, but it is lightweight and cheap. It is just a total convenience and lifesaver to have one in your bag.
- Secondly, the Tuppleware may take up a little more space, but it’s a pretty good all-rounder.
- If you are into portraits and portability is not a concern, forget the Tupperware and go for softboxes instead. The mini or ring will do nicely.
- Color gels are another must – They are inexpensive and very useful.
SECTION D
OFF-CAMERA FLASH
Flash does not always have to be mounted on top of the camera, you can use them off camera and use many of them at the same time. We shall explore that in this section, and for the starters, there are 2 ways to trigger an off-camera flash – Via slave mode or wireless triggers.
WHY OFF-CAMERA?
On-camera flash is kind of limited, that’s why. With off-camera flash, you can position the lights wherever you want. Plus, with the power to control many lights, off-camera flash just gives you a lot more creative options.
MASTER & SLAVE

The simplest way to get started with off-camera flash is to set it into the “slave mode”, which most decent flash units have by default. How it works is simple – In slave mode, the flash will go off once it detects another bright burst of light.
So yes, you will need at least 2 flashes for this setup. If you have a built-in pop-up flash in your camera, you can use that as the “master” to trigger the “slave”. But a major pain with this master/slave setup is that any light source that is bright enough will trigger the slave. Not a good idea when you are working in a busy place.
WIRELESS FLASH TRIGGER

The second way to do off-camera flash, is to use gadgets called “wireless flash trigger”, and there are 2 parts to that story :
- Transmitter: This goes onto the camera, and acts as the “master”.
- Receiver: This goes onto the flash, and acts as the “slave”.
So yes, you will need a transmitter on your camera, and receiver on the flash for this setup to work. But wireless flash triggers are much more reliable since they use radio frequency instead.
MORE ON FLASH TRIGGERS
There are more things to note about wireless triggers :
- There is something called a transceiver, which is a mix of both transmitter and receiver. They can be mounted on the camera or flash.
- Some flash units have a built-in receiver. In such cases, you do not need to attach a receiver to the flash.
- But a gentle reminder, wireless triggers are generally not cross-brand compatible (Godox transmitter will not trigger YongNuo receiver).
- While wireless triggers are generally reliable, it does not mean they are totally “safe”. Some of the cheaper triggers may suffer from “misfires” – not triggering when you take a shot.
- There are chances that triggers may clash with each other. For example, 2 photographers are shooting in the same area, using the same brand of wireless triggers. There is a chance that they can trigger each other’s flash by accident.
- This is why decent triggers have a “channel” setting – So there are no clashes when photographer A uses channel A, and photographer B uses channel B.
- “Regular” wireless triggers will generally play well up to a shutter speed 1/200 sec. Beyond that, you will get wireless sync issues (limitations of technology).
- If you want “fast and furious”, go for triggers that support high-speed sync (HSS), which generally works even if you shoot at 1/8000 sec.
- Conclusion, choose and stick with one good brand if you are into off-camera flash.
THE RECOMMENDATIONS
Which wireless triggers should you go for then? There are over a dozen of brands available, and this is what I recommend :
Simple: If you just need something that works decently well, get yourself a pair of cheap-and-good YongNuo YN603 – Nikon | Canon | Sony. But note, these do not support HSS. They will only sync up to a shutter speed of 1/200 sec.
Decent: If you are looking for something better that supports HSS, I will recommend getting the Godox X1 series – Nikon | Canon | Sony.
Expensive: If you have too much money to spare… Go for the Pocket Wizard.
INTO THE STUDIO WORLD
We are not done with off-camera flash nor all the studio equipment yet. Whoever says photography is easy? There are still plenty of other things like reflectors, light stands, and softboxes. But I guess I will keep these for another tutorial – Because this is a little more on the advanced side.
SECTION E
EXTRAS & QUICK TIPS
All right, after all the information on equipment, how do we actually flash? Going around with random bursts like a serial flasher is definitely not the way to go. So here is a quick section on how you should proceed.
FLASHING AT THE WORLD?
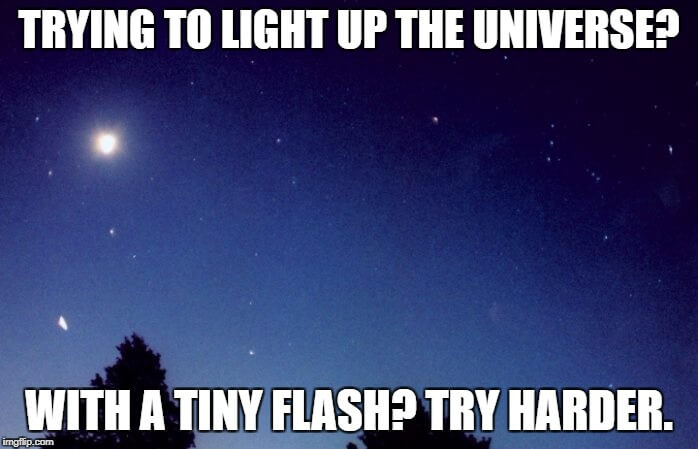
If you are still popping flash while taking landscape photos, you need to stop. Think about it. A tiny little flash will not light up the entire city. Not only is this useless, but it’s also a complete waste of battery and it makes you look stupid…
SAY NO TO “NUCLEAR FLASH”
![]()
Stop flashing people directly in-the-face with a bare flash. I call this the “nuclear flash” and it makes people squint. It makes them look ugly sheet white too. At least have the decency to put on a diffuser or use a piece of tissue to soften the light. That will improve your light quality, instantly. Also, remember that must flash heads can be turned for a good reason… Do it and see the difference for yourself.
WALLS AND CEILINGS ACT AS DIFFUSERS
If you are shooting indoors, you are in luck. You can use walls and ceiling to bounce the flash – they act like huge diffusers. Just imagine as having a well-lit room. Beware of colored walls and ceilings though. They can “poison” your flash, and give a funky color cast.
ONE LIGHT? NO PROBLEM.
LINKS & REFERENCES
Here are a couple of links that might be useful to you:
- 7 Single Flash Portraits Techniques That You Can Apply Right Now – DIY Photography
- 10 Ways to Shoot Stunning Portraits With Only One Light – Envato
- How to Balance Flash with Ambient Light
- Basic Rules & Concepts of Lighting in Photography
CLOSING
WHAT’S NEXT?
Thank you for reading, and we have come to the end of this flash basics tutorial. This should pretty much cover all the essentials that you need to know about flash photography. I know this is quite a handful to digest, but now, just take a break and let the knowledge sink in.
Congratulations on coming this far, and you are already many steps ahead of being a clueless newbie. If you have anything to share with this guide, please feel free to comment below. Good luck and happy shooting!