INTRODUCTION
THE EPIC DIY PORTABLE LIGHTING
Welcome to a guide on how to make DIY continuous lighting for photography/videography. This project came to mind when I searched the Internet for ideas on home-made lighting, and all I found were “plug lamps into the wall socket”. As you can guess, I am not very impressed with the “level of DIY”, and those did not solve my problem – I needed a portable light for outdoor shoots, and pretty sure there aren’t any wall plugs available out in the woods…
Thus I channeled my inner geek, strapped a variable color LED light to a battery, and got a “good enough portable light” without breaking the piggy bank. For you guys who are interested in building a similar portable light, this guide will show you how I built my project, step-by-step. Read on!
NAVIGATION
TABLE OF CONTENTS

Section A |

Section B |

Closing |
SECTION A
THE BASICS
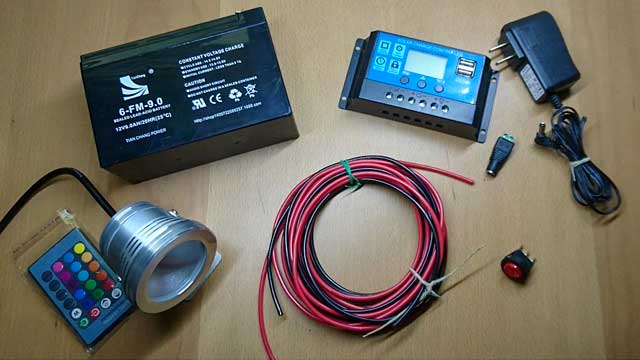
All right, let us now get started with the basics – The parts, materials, and tools required to make the DIY continuous light.
PARTS LIST
| Component | Price (USD) | eBay | Notes |
| 12v 9AH Sealed Lead Acid Battery | $24.00 | Click Here | I went with a small battery for portability, but if you need more juice, feel free to get a bigger battery (or get a lithium battery). Shipping for lead-acid batteries can be expensive, buying one from your local auto store may be cheaper. |
| 12V 10A Charge Controller | $7.25 | Click Here | Get one with USB charging ports, and these are actually used in solar systems to protect the battery. Figured this will be a good addition – You don’t need a solar panel, plugging a power adapter into the charge controller works too. |
| DC Male/Female Connector | $0.80 | Click Here | Just to make the charging port look nicer and easier to plug in. |
| 12V 2A Power Adapter | $3.50 | Click Here | AKA Power brick. Yep, just something simple to charge the battery. If you have an unused 12v power brick lying around, feel free to recycle. |
| Rocker Switch | $0.80 | Click Here | The on/off switch. |
| 18AWG Wires (5 meters) | $2.89 | Click Here | Depending on how far you want to stretch the lights. 5 meters is enough for me, a single light setup. If you need more, get more. |
| 12v LED Spotlight (Variable RGB color) | $9.00 | Click Here | Feel free to get more lights if you want more… Just make sure that you have enough battery power to run them long enough for a shoot. |
| Container | $1.50 | Click Here | You might want to recycle old containers or check out your local discount stores… I got mine for just $1.50. |
The total cost – $49.74. Yes, a completely portable versatile lighting system for just under $50!
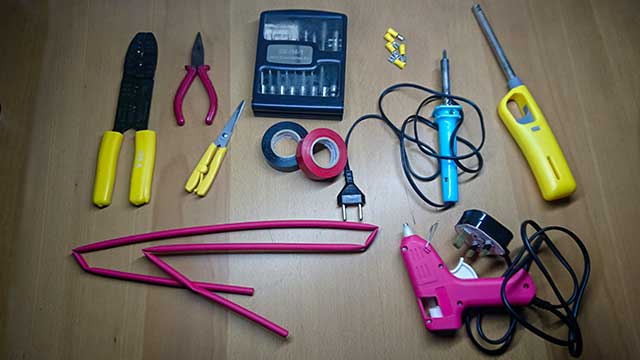
RECOMMENDED TOOLS
| Tool | Price (USD) | eBay | Notes |
| Wire Stripper/Crimper | $8.45 | Click Here | You can do with a pair of scissors and pliers, but this tool just saves you time. |
| Screwdriver Set | $5.00 | Click Here | A set of screwdrivers that come in handy. |
| Insulation Tape | $1.63 | Click Here | Good to have, keep those wires nice and neat. |
| Female Spade Connectors | $0.80 | Click Here | Lazy to solder and do all the wiring stuff? Use these. |
| Soldering Iron Kit | $10.00 | Click Here | The recommended way to securely connect wires and components. |
| Wire Heat Shrink | $1.00 | Click Here | Lazy to solder? Just heat shrink them together. |
| Lighter | $2.50 | Click Here | For the heat shrink, just be careful with the fire. |
| Hot Glue Gun | $4.00 | Click Here | Glue on steroids |
OPTIONAL PARTS
For you guys who are looking for ways to better “package” this project, here are a few extras.
| Photo Flash Bracket B | $0.99 | Click Here | I mounted the light onto one of these, so it fits onto any light stand. |
| Light Stand | $20.00 | Click Here | If you don’t already have one. |
A FAIR REMINDER & DISCLAIMER
Well, we are dealing with electronics here. If you are not confident with soldering and dealing with the technical stuff – Consult a professional electrician instead. Do this project at your own risk, Red Dot Geek is not liable for your screw-ups. 😛
THE YOUTUBE VIDEO
SECTION B
DIY STEPS
With the basics out of the way, let us now get into the steps for building the light tent.
Step 1) The charge controller is the heart of the system
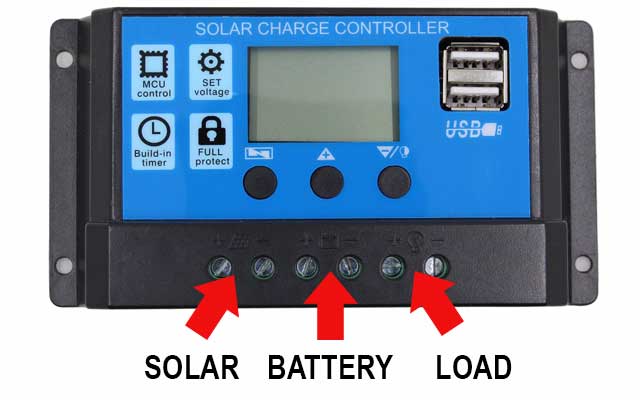
The build will center around the charge controller, and people who dabble in solar systems should be well familiar with this one. But let us start with a little explanation, so people who are new will not get lost. Just why are we putting a solar charge controller into a photography LED light system? Because it protects the battery.
In particular, the charge controller will prevent the battery from being over-charged or over-discharged; Nobody likes an exploding battery. It’s cheap, it adds safety, and it has extra USB charging ports. So why not? It may look confusing at first, but you only have to connect 3 things to the controller to make it work –
- Solar panels: Which you may not have in this case… but plugging a 12v power brick in works too.
- Battery: Self-explanatory.
- Load: Which is the LED light.
Step 2) The charging port
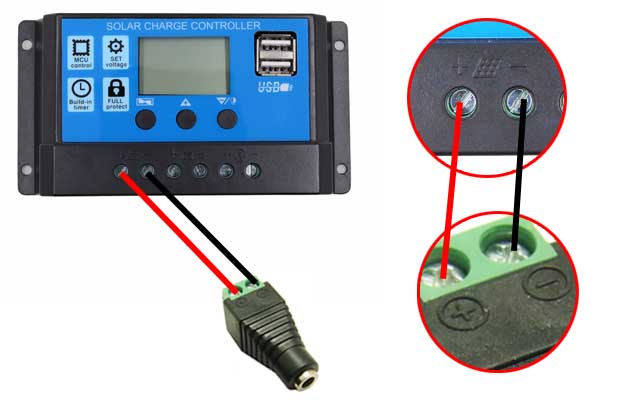
Begin with the easiest connection, which is attaching a female DC connector to the solar terminals on the controller. There is no rocket science involved here. Simply wire the + solar terminal on the controller to the + terminal on the DC connector, and do the same for the – terminal.
Step 3) The light
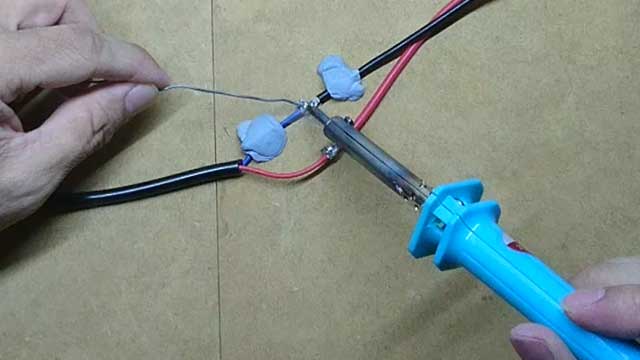
Now, this step requires a tad bit of extra work. As the “default” wires that came with the LED light is too short, I extended it by another 2 meters. I used soldering because it is much more secure, but you can get past this without soldering – Just twist the cables together securely and tape it shut.
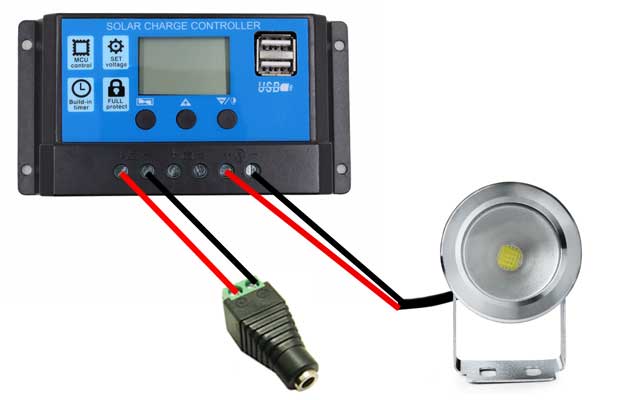
Once you have extended the wires of the LED light, simply attach it to the load terminals of the charge controller. You know the drill – plus to plus (red wire), minus to minus (black or blue wire).
Step 4) Wiring up the on/off switch
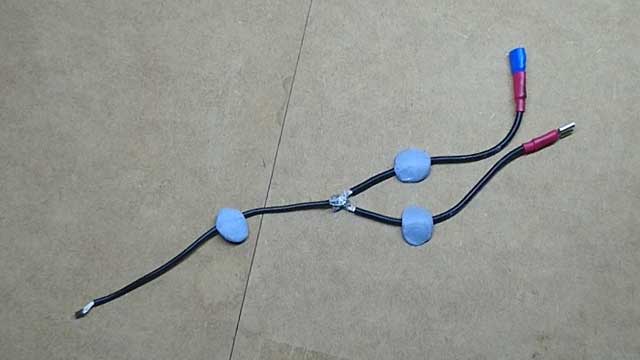
This part of the build is probably the most confusing, but just follow along and you will do fine. Firstly, you will need to create a piece of “split Y-cable”. Again, you can just twist the cables securely and tape them together, but I will recommend soldering them for extra robustness.
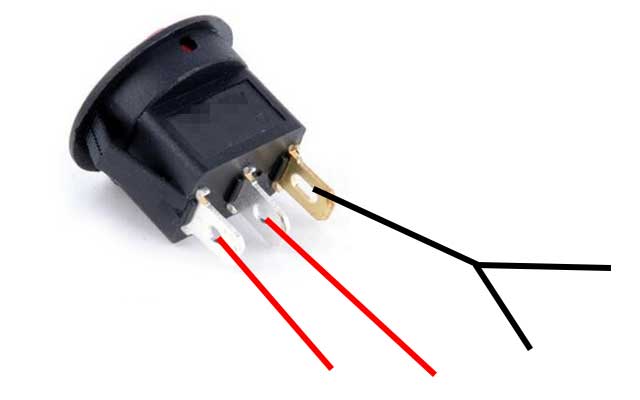
Next, you will notice that the first pin of the rocker switch is brass. Attach the split cable to it, and 2 pieces of straight cables to the other 2 pins.
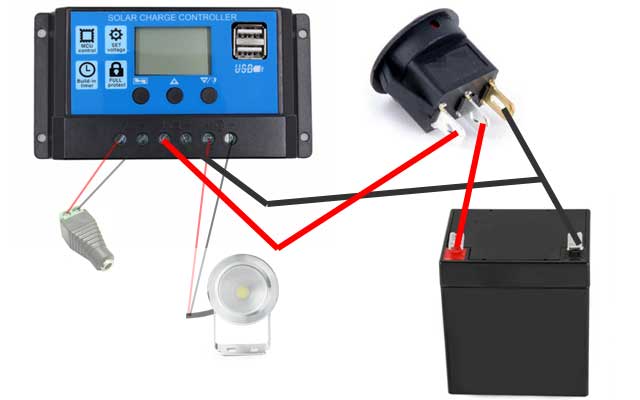
- Connect one end of the split wire to the – battery terminal on the charge controller.
- Connect the last pin to the + battery terminal on the charge controller.
- Finally, connect the center pin to the + terminal of the battery and the other end of the split wire to the – terminal of the battery.
Done! You now have a fully functioning variable LED spotlight.
Step 5) Packaging
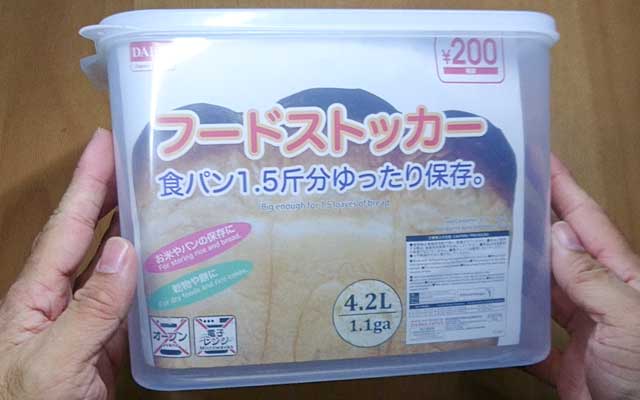
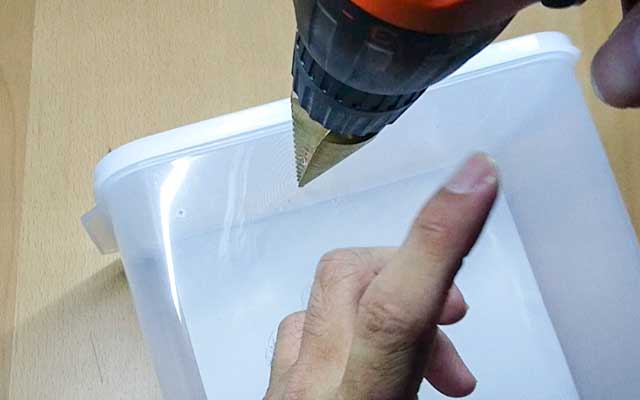
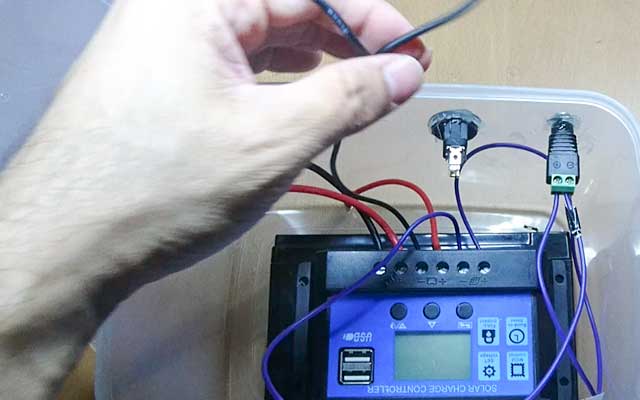
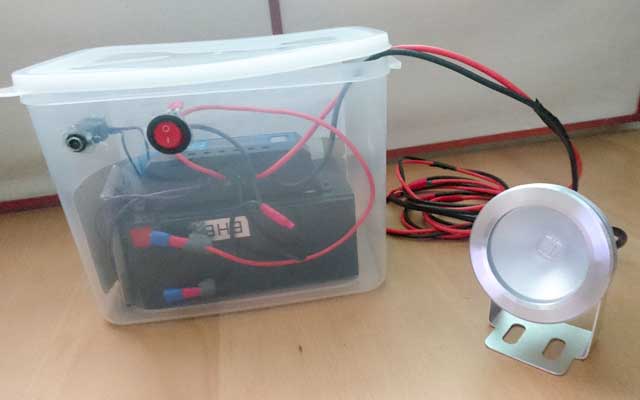
You guys should have figured out that it is stupid to bring around a few pieces of random electronics. So to wrap up the entire project, I simply bought a cheap bread container from a discount store. Put a few holes into it, and secured everything inside – Viola. A lightweight portable variable LED light setup that costs under $50.
CLOSING
WHAT’S NEXT?
Thank you for reading, and we have come to the end of this guide. I hope this continuous RGB light has helped you to save some money, and if you have anything to share with this guide, please feel free to comment below. Good luck and may the photography force be with you.