INTRODUCTION
WELCOME TO INFRARED PHOTOGRAPHY
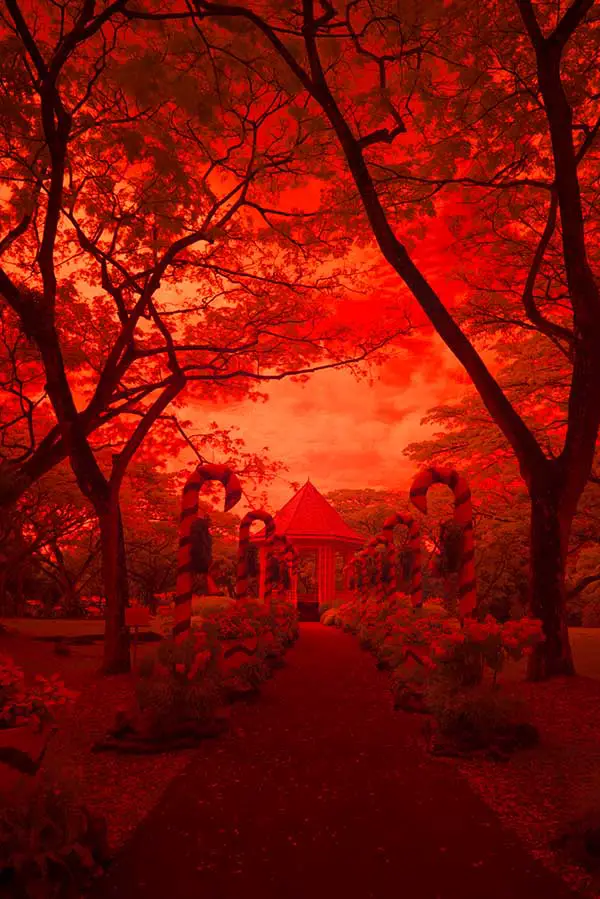
Bored of the “regular photography”? Looking to do some interesting alternate photography instead? Then you should totally learn how to do IR photography (infrared photography). White trees, white grass, and a surreal landscape, those are the characteristics of IR Photograph. These are the secrets of the unseen world, and they look like they totally came out of the matrix world.
But you will need some understanding and have quite a bit of work to capture this surreal beauty. Which is why I have written this not-so-secret guide to walk you through on how to photograph the unseen world.
NAVIGATION
TABLE OF CONTENTS

Section A |

Section B |

Section C |

Section D |

Section E |

Closing |
SECTION A
WHAT THE HECK IS INFRARED?
Boring science alert! But this short section is important if you do not want to be a confused photo ninja. I am not a rocket scientist either, so I will just touch on things that are important for you guys to know.
As you might already know, light is a form of energy… and super brains call that a form of electromagnetic radiation. Whatever that means, photo ninjas probably only need to know something called electromagnetic spectrum. That is a chart of all the known electromagnetic radiation.
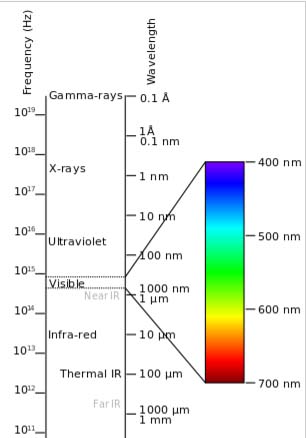
- The visible light that we can see has a wavelength between 400 nm to 700 nm.
- Ultraviolet is between about 10nm to 400nm.
- Finally, the infrared lights that we are interested in have about 700nm to 1mm.
Some of you sharp ninjas may be confused now. If IR is invisible, how are we going to photograph it? Well, not to worry. It would seem that most humans are actually capable of seeing lights into the near IR and UV range. A few freaky humans are capable of seeing even more… things.
So no worries. Even though we are technically shooting in the IR lights range, that should still be somewhat visible to our human eyes. Geeky ninjas, feel free to check out more science on Wikipedia if you are interested.
SECTION B
GEAR REQUIREMENTS
To get started with IR photography, you will need some rather specialized gear. Basically, you are either going to:
- Attach an IR filter to your camera OR
- Get a modified IR camera.
No worries though, there are rather affordable options for either case.
THE RECOMMENDED GEAR LIST
- Attach an IR filter, if you are not using a modified IR camera
This is the cheaper and easier way. I use a [Hoya R72]. Alternatively, you can get a decent and affordable [Zomei]. - If you want a modified IR camera, you can either buy one or modify it yourself.
I don’t recommend this. It is basically putting a piece of [internal IR filter] permanently over the sensor. The easier way is to just buy an already [modified infrared camera] from eBay. - Using a sturdy tripod is recommended
[Selens] offer pretty decent and affordable tripods, or go for the good old reliable [Manfrotto]. - Remote shutter release
Take your hands off the camera to reduce the shake, does not matter if it is wired or wireless. [Nikon] [Canon] [Sony]
Also, you will need an editing software to “fix” the IR photos. If you do not already have a copy of Photoshop or Lightroom, click on the banner below to check out an offer.
Don't have a copy of Photoshop yet? Click on the banner below to check out an offer.
NON-MODIFIED CAMERA – HOW TO TEST FOR IR SENSITIVITY
Sadly, not all cameras are built for IR photography. As technology advances, cameras become very capable of filtering out UV and IR lights… which is not what we want. So before we jump into IR photography, we need to test if your camera that is capable of capturing light in the IR range.
To test how sensitive your camera is to IR light, we use a very simple, very “traditional” method. All you need is a remote controller (TV, audio, or whichever you can find). Next, point the remote control at your camera and switch on the live view mode on your camera.
Press a few buttons on the remote, and if you see the bulb light up on the camera screen, your camera is good to go for IR Photography. If it doesn’t, your camera is probably filtering out all the IR lights.

MODIFY YOUR CAMERA
I will highly discourage this method as it is permanent, and can potentially destroy your perfectly good camera. In a nutshell, it involves stripping out the internal “hot mirror” of your camera, then installing a custom IR filter over the sensor.
This requires some very technical skills and will void the warranty for sure. Do it at your own risk, and only if you have an old camera to spare.
If you have some spare cash, just buy an already modified camera floating on eBay and Amazon.
SECTION C
THE SETUP
IR Photography is one of the most frustrating photography that I have done. Seriously… there are just a lot of things that you need to take note of, and a lot of factors to consider. It’s like serving a difficult grandma who is hard to please. But the results, are just beautiful.
BEST TIME TO SHOOT
Daytime is the best with lots of sunlight and loads of IR light. Unfortunately, that will also mean very warm in the outdoors. You will get all sweaty, but you also get to laugh at the silly people who say harsh sunlight is bad for photography.
BEST PLACE TO SHOOT
Anywhere outdoor where sunlight can reach. But since IR interestingly turn greens into whites, go find somewhere with lots of greens and sky. Parks will be a good idea.
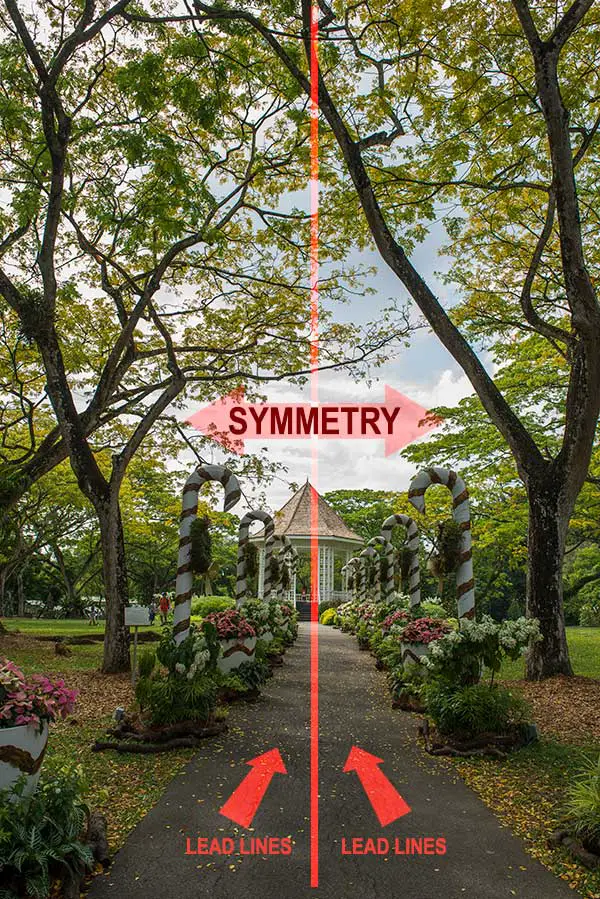
COMPOSITION
As per “usual”, the first thing you need to do in IR photography is to keep a keen eye open for interesting perspectives. All your basic composition rules still apply – Lines, shapes, the rule of thirds and symmetry if you wish.
Just a small note on colors in IR photography – it is really hard to estimate how it will turn out. Greens in bright sunlight will probably turn out white. Most IR reflective surfaces will turn out white as well, while skies and waters probably remain as blue. Alternatively, you can turn everything black-and-white in post process.
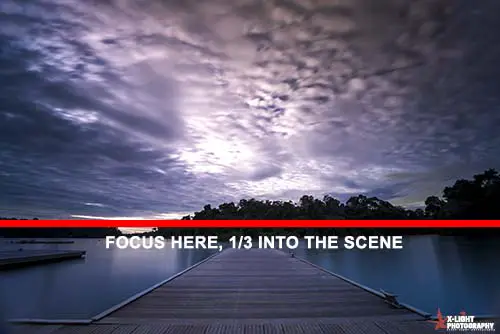
TRIPOD ACTION
When you have a good composition, it’s time to put the camera on the tripod and remote shutter release. If you are using an IR filter, don’t put it on just yet… because once you put it on, all you will see is nothing but a sea of red. So focus 1/3 into the scene and get everything in focus first. Then turn your camera into the manual focus mode, and put on the IR filter.
Try not to stack too many filters, remove the UV or clear filter if you have them attached. This will reduce the chances of vignetting, and the UV filter is probably useless anyway – The IR filter will simply block out all visible AND UV lights.
SECTION D
HOW TO SHOOT
You can’t see it. So how do you even shoot it!? My take on it? A lot of estimation. A lot of trial-and-error. It’s a good thing that we have digital cameras, and no longer have to worry about running out of film.
SHOOT IN RAW!
I will stress this in every one of my guides – shoot in RAW. Especially when it comes to IR photography, you are going to need all the data that RAW files can capture. Editing an IR photo in JPG is just going to be very difficult.
THE SETTINGS
I usually shoot in manual. As for the settings, I don’t have any magic numbers that can “one size fits all”. But here are my usual settings :
Aperture: I am usually stuck between f/5.6 and f/14. I am a landscape photographer, and I need a decent depth-of-field.
Shutter Speed: This is pretty much trial-and-error. As I am on a very dark red screw-on IR filter, I will say at least 1 second to as long as 1 minute. If you do not want to do long exposures, you will have to sacrifice a little bit on ISO and aperture.
ISO: I usually recommend the ISO to be as low as possible. But in the case of IR photography, pumping the ISO is somewhat very useful. Especially when you have a small aperture, and do not want a long shutter speed to register all the moving leaves. I usually keep the ISO anywhere from 100 to 3200.
Forget about shooting in the auto modes. The IR filter will simply cause the metering to go wack. Even if you have one of those modified IR cameras, you are probably going to need some manual adjustments too.
TAKE A SHOT
If you want tack sharp photos on a DSLR, remember to set to the mirror up mode, and use remote shutter triggers. If not, there is really nothing too special at this stage. Shoot, chimp, check the exposure, re-adjust the settings and repeat. Since you are working on an IR filter, the RAW image will be red. Nothing wrong with it, you will need some editing work to “fix” it.
When it comes to long exposure, and movement in the frame – you are going to get motion blur. If you do not want motion blur, remember to adjust your shutter speed accordingly.
SECTION E
EDITING
The final stage is where the magic happens, and I entirely use Photoshop only to edit the IR photos. Lightroom users, do not fret. This should work for you as long as you do that channel swap in the right way.
COOKING THE RAW FILE
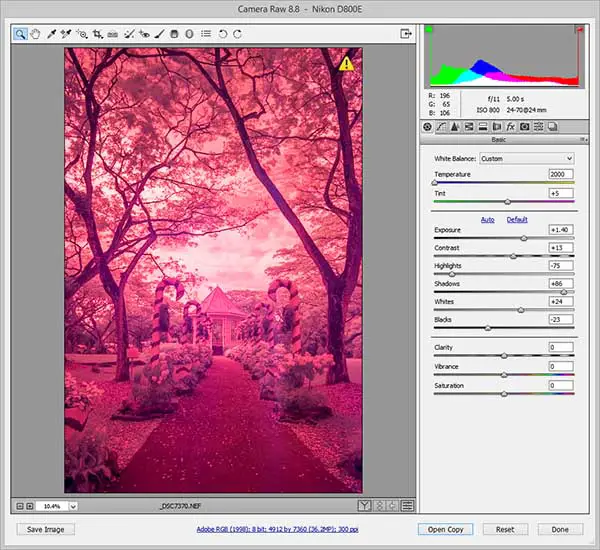
Camera Raw should fire up when you open the file up in Photoshop. I will usually set the temperature to 2000K, sharpen, and adjust the exposure to bring out more details.
CHANNEL SWAP
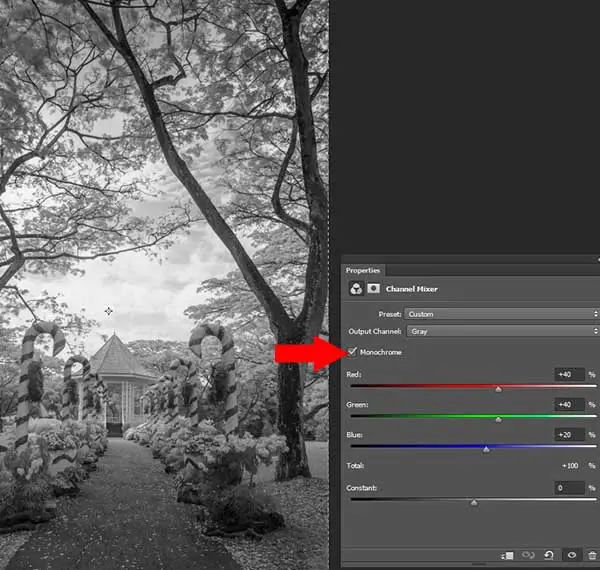
The channel swap is the most important step. Layer -> New Adjustment Layer -> Channel Swap. If you want a different flavor of IR Photography, just check the monochrome and you get your instant black-and-white IR photo. To continue with color IR, keep that monochrome unchecked.
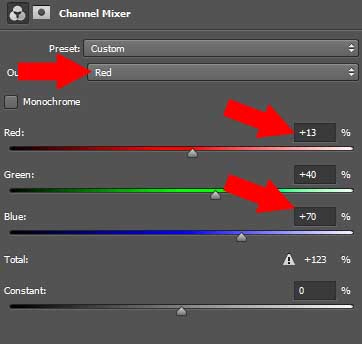
Cycle through the red/green/blue channels and play with those sliders. Generally, you will want the red and blue channels to be swapped :
- The red channel will have fewer reds and more blues.
- The blue channel will have fewer blues and more reds.
CLEAN UP, FINISH UP
If you nail that channel swap correctly, you should get that surreal photo.
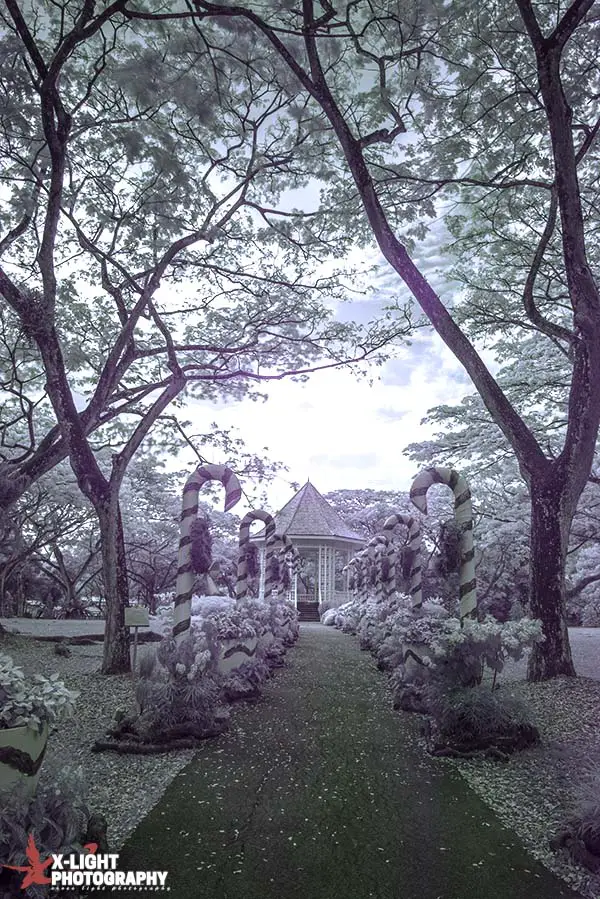
But one last final step. Use the lasso tool to pick out pieces of rubbish, and use content aware to erase them. Remember to slap your watermark on, and that’s it! Mission accomplished.
CLOSING
HIT IT!
Well done! You have finished reading this entire guide. Most people will probably be baffled by IR photography at first, especially when you are shooting something that you cannot see.
But practice makes perfect.
Keep on trying, and the satisfaction when you nail an epic IR photo simply outweighs the pain of the learning process. I hope this guide has given you a glimpse into the alternative side of photography.
If there are parts that you find confusing in this tutorial, please do comment below. I shall try to answer and improve on it. Now go try IR photography, shoot and have fun!