INTRODUCTION
PHOTOGRAPHY CAN BE PAINFUL
Welcome to a guide on the various ways to prevent injuries as a photographer. Are you experiencing back pains, neck pains, or wrist pains from lugging a ton of camera gear around? Well, you are not alone, and I have suffered my fair share of misery from photography too – Everything from mild scoliosis to frozen shoulders to headaches.
It all began with a desk-bound job, and some friends recommending “you need to go outdoors more often”… So I adopted photography as a way to enjoy the outdoors and nature more. Little did I know, carrying all the photography gear added fuel to injuries instead of relieving the long sitting hours.
So yes, this guide pretty much came at the price of learning the hard way. These are the best “photography tips” that I can give to people who are suffering the same pain as I had. Read on to find out how to lessen the pain, enjoy photography more!
NAVIGATION
TABLE OF CONTENTS

Section A |

Section B |

Closing |
SECTION A
PREVENTION MEASURES
Once upon a time, I never gave much thought to the ways of “proper camera handling”. It was not until after a couple of visits to the chiropractor that I learned the word “pain”, and the true meaning of “prevention is better than cure”. Yep, just keep these few points in mind, and photography will be a lot less painful.
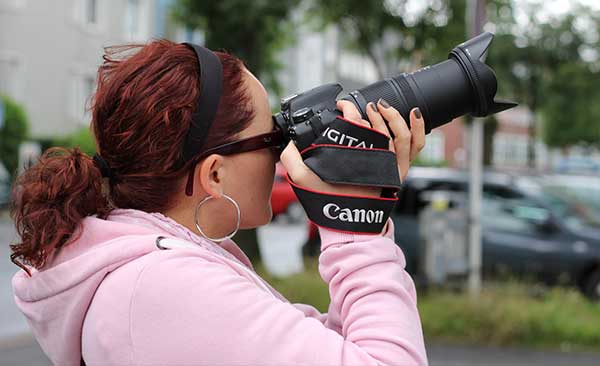
1) ADOPT A GOOD POSTURE
If you are suffering the same pains as I had, it is time to consider what went wrong and stop doing the root cause – Bad posture. If sitting on an office chair and hammering on the keyboard all day is bad enough, then don’t add more stress by carrying more weight on your shoulders and back.
While visiting a physiotherapist or chiropractor can help to relieve the pain, but the best way is still to solve the problem from the root… Which is not that difficult at all. Just adopt a good posture to prevent further injuries. If you are too busy to view the entire video above, here is a summary:
- While standing, stop hunching forward to take shots.
- Stand upright, bring the camera to the face instead.
- Tuck in the elbows, use your body to support the weight.
- Adopt a board stance.
- If you need to go lower, lunge forward instead of hunching.
Yep, and remember to sit upright on the chair as well. Stop slouching over.
2) BRING ONLY ESSENTIAL EQUIPMENT AND ACCESSORIES
Are you bringing more gear to a shoot than you should? I have seen a wedding photographer whose sling bag is like a freaking Doraemon pouch – 2 cameras, 2 zoom lenses, 2 prime lenses, 2 flash units, color gels, extra batteries, a whole pack of extra memory cards, filters, and umbrella. But for the duration of the entire wedding, he never touched the prime lenses, used one flash, and only switched batteries once.
Would it not be smarter to bring only half the gear? Leave the rest in the car or somewhere safe? I know, this can be especially hard for the wedding and event photographers. They have to bring a whole load of extra gear as spare and just-in-case when things go wrong. Better safe than sorry, right? But here’s the thing, the more gear you bring, the more it is going bog you down for the entire day.
Plus, Captain Obvious to the rescue, carrying all these heavy stuff will have bad effects on the body over time. So do consider the stuff that you have to bring carefully, and bring only the essentials that you absolutely need.
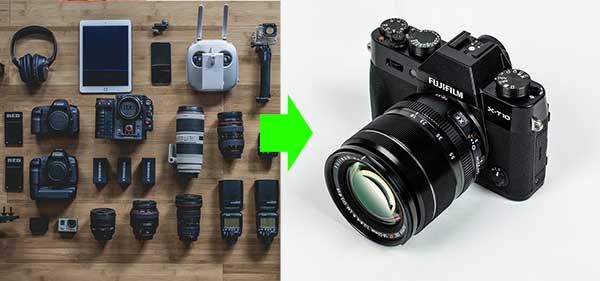
3) GO FOR LIGHTER GEAR
With advances in technology, camera gear is getting smaller and lighter, but the performance is getting better. Need some firepower while shooting outdoors? Forget that crazy strobe light with an extra heavy battery pack. There are gadgets like the Godox AD360 and AD200 – Both are lightweight, but dish out a decent amount of light.
Need a lightweight but stable tripod? Go for the carbon fiber ones. Need a lighter camera? Go for the mirrorless or large sensor compact cameras. They really are good these days, and there should be absolutely no problems using them as a “workhorse”.
4) FORGET SLINGS. GET A GOOD BACKPACK & DISTRIBUTE THE WEIGHT!
When we carry a heavy sling bag on one side of the body for extended periods of time, it will slowly grow in a painful and permanent way – Potentially causing the body to “lean” towards one side, causing various health problems.
I think you catch the drift. If you are still slinging a lot of camera gear, laptop, and tablet – It is time to lighten up the load and consider getting yourself a good backpack instead. Camera and camping backpacks may cost more, but the weight distribution design is well worth the price. If you somehow still need to bring “the big guns” along, get those luggage bags with wheels… Or use a very “innovative” shopping trolley.
5) KEEP THE BACKPACK CLOSE

Another small recommendation while carrying a backpack – Tighten the straps and make sure it hugs snugly onto the back. Never “single sling” it on one shoulder. It may not feel like much at first, but a bobbing backpack full of heavy gear can wear the body out fast. The less movement the backpack makes, the better the weight distribution, the less pain it will cause over time.
6) SHIFT THE WEIGHT TO THE WAIST
While we are still on the topic of backpacks and weight distribution – The camera bag goes onto the shoulders, the camera sling goes onto the shoulders, and the tripod sling also goes onto the shoulders. It is no wonder why photographers suffer so much pain in the neck, shoulders, and arms area. Consider moving all of those weight off the shoulders. Go get yourself a photographer vest and/or waist belt system… They are not the most fashionable, but they work.
7) WRIST SUPPORT
Handling a heavy camera for an entire day will take its toll eventually. If your job requires you to do that often, go get yourself good wrist support – They are easily available at any pharmacy or sports-related shops. Alternatively, the no-cost way is to wrap the camera strap around your hand.
8) REST AND STRETCH
As for this final tip, it should be pretty obvious – The human body can only take a certain amount of punishment. So whenever you can find the opportunity to rest, drop all the gear, rest, and do some stretches. It may look a little stupid to stretch in the public, but hey, it’s a matter of life-and-death here… Personally, I will gladly choose to look like a fool for 10 minutes and not suffer life-long permanent pains.
SECTION B
USEFUL BITS
That’s all for this guide, and here is a small section on some extras and links that may be useful to you.
PAIN RELIEF
This section is just a few good self-massage methods that I found on YouTube to lessen the pain yourself. But please take note, if you are suffering from chronic pains such as frozen shoulders, numbness, and headaches – Go see a physical therapist instead. These methods are only good for relief, not cure. If you forcibly try to relieve those pains, you might end up injuring yourself more instead.
WRIST PAIN
NECK PAIN
BACK PAIN
LINKS & REFERENCES
- Prevent Back Pain – My Health Finder
- How to Prevent Shoulder Injuries – WebMD
- 10 Tips to Help Photographers Avoid Back Problems – Digital Photography School
CLOSING
STAY HEALTHY!
Thank you for reading, and we have come to the end of this guide. I hope these few recommendations will help you guys to reduce and prevent the pains. But be it professional or hobbyist photographers – Please go see a doctor if the pain gets bad, that is a signal from the body that something is very wrong.
I believe that photography should not be a painful experience, but it is something to be enjoyed. So stay safe, stay healthy, and happy shooting!